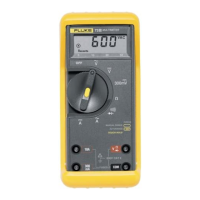
Milliamp Process Clamp Meter
Calibration Adjustment
13
Temperature Adjustment Procedure
1. Press C for >1 second until t23 appears on the percentage display.
2. Wait at least 60 seconds for the internal temperature to balance.
3. Press H to adjust the temperature.
Low Range Adjustment Procedure
1. Clamp the Meter’s current clamp around an insulated 18 gauge, copper wire, with
6-inch diameter. Current flow should be in the direction of the arrow on the current
clamp.
2. Press C < 1 second until CAL 20 appears on percentage display.
3. Output 0 µA dc from the calibrator.
4. Wait at least 15 seconds for the Meter’s internal circuits to stabilize.
5. Press A on the Meter to zero the reading.
6. Output 20 mA dc from the calibrator.
7. Wait at least 15 seconds for the Meter’s internal circuits to stabilize.
8. Press L on the Meter to adjust the positive gain.
9. Output -20 mA dc from the calibrator.
10. Wait at least 15 seconds for the Meter’s internal circuits to stabilize.
11. Press H on the Meter to adjust the negative gain.
High Range Adjustment Procedure
1. Clamp the Meter’s current clamp around an insulated 18 gauge, copper wire, with
6-inch diameter. Current flow should be in the direction of the arrow on the current
clamp.
2. Press C < 1 second until CAL 100 appears on percentage display.
3. Output 0 µA dc from the calibrator.
4. Wait at least 15 seconds for the Meter’s internal circuits to stabilize.
5. Press A on the Meter to zero the reading.
6. Output 100 mA dc from the calibrator.
7. Wait at least 15 seconds for the Meter’s internal circuits to stabilize.
8. Press L on the Meter to adjust the positive gain.
9. Output -100
mA dc from the calibrator.
10. Wait at least 15 seconds for the Meter’s internal circuits to stabilize.
11. Press H on the Meter to adjust the negative gain.
Note
The following procedure is not required unless the Meter’s current clamp
has been replaced.
1.800.868.7495info@Fluke-Direct.ca
Fluke-Direct.ca