Laser Levels
Use the Product
13
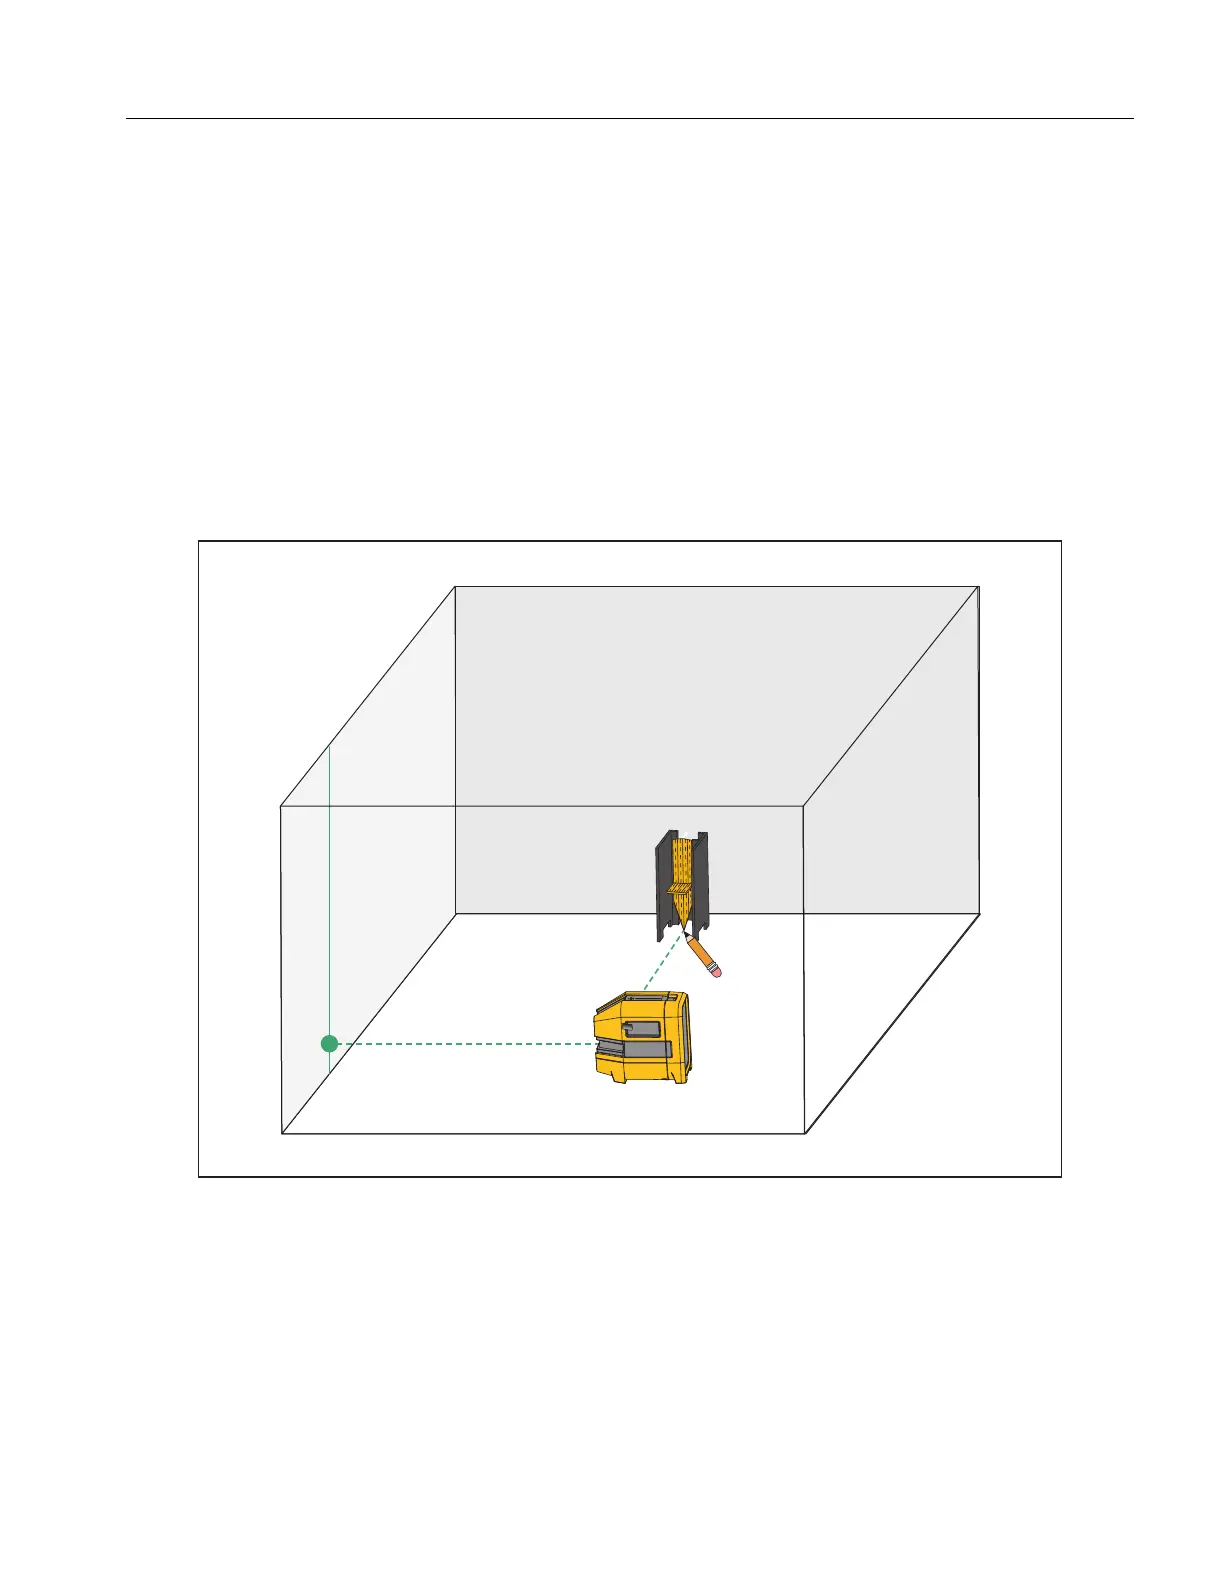
Square Marks (6R, 6G Only)
Use the vertical and horizontal point lasers to create new square marks or to determine if an existing item is
square.
To layout a new square for a wall or staircase (see Figure 7):
1. Mark a vertical line on a wall.
2. Center the vertical laser on the line on the wall.
3. Place the pendulum target on the floor and align the horizontal point laser with the center vertical line on the
pendulum target.
4. Place a mark on the floor below the point of the pendulum target.
5. Move the Product either closer to or farther away from the wall and redo the procedure to make another mark
on the floor.
6. Draw a line to connect the two marks. The new line is perpendicular to the wall.
Figure 7. New Square
 Loading...