Doc No: OMM50002312
Rev: C Page 36 of 54
Subject to contractual terms and conditions to the contrar
y, this document and all the information contained herein are the confidential and exclusive
property of FMC Technologies, and may not be reproduced
, disclosed, or made public in any manner prior to express written authorization by FMCTI.
been removed from the pump. Replace the seal retainer gasket (24) if it shows
signs of deformation or damage.
6. Wrap tape or other material over the exposed piston rod threads to protect the
new seal lips from damage. Lightly oil piston rod after applying tape to the threads
Install the seal retainer gasket then slide the seal holder over the protected
threads and into the pump frame. Care must be taken to ensure the seal lips are
not folded or cut when passing over the ends of the rod.
7. Ensure that the gasket (24) and seal holder (7) are in place, install the seal
retainer (23) and tighten until it bottoms out. Do not over tighten as it can damage
the seal retainer gasket.
8. Remove the protective material that is covering the rod threads. Rebuild the
remainder of the pump as outlined in previous sections. Torque all fasteners as
outlined in the Fastener Torque Requirements, Section 11.0 of this manual.
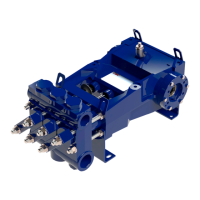
10.4.2 Rebuilding the Power End
1. Remove magnetic pipe plug (32) to allow all oil to
drain from power frame (1).
2. Remove all rear cover cap screws (30). Remove the
back cover (12) and back cover gasket (13) from the
power frame.
Removing the fluid cylinder simplifies crankshaft removal on W11 pumps
3. Remove the end cap of each connecting rod
(3) by removing the two hex nuts that hold
each end cap to the connecting rod body.
The cap can be removed from the body by
tapping on the cap screws with a rubber
mallet and then tapping on the end cap to
loosen. Be sure to not damage the threads
on the cap screws.