INSTALLATION METHOD 2
This method allows for installation of the appliance with the rear part of it's firebox recessed into the inner leaf
of the cavity wall. This will enable a standard fireplace to be flush fitted to the wall and the appliance will then
be fitted flush into the fireplace. The structural integrity of the wall must be maintained.
Check on the type of cavity insulation used, and if it is of the granular type then take suitable precautions when
opening up the wall not to allow excessive loss of insulation material from the cavity. Packing the cavity with
Rockwool should help hold back loose fill insulation material.
Unless lime and mortar has been used, it will be necessary to drill four holes with a masonry, drill, and then use
a mechanical cutter (Sharksaw) to cut out the correct size of 'slot' required for the chosen lintel.
NOTE: Obtain a lintel 750mm long x 75mm deep x thickness of the inner leaf. We would suggest either a pre-
cast concrete or steel lintel; Catnic CN52 or CN46 depending on thickness. Typical inner leaf weights when siz-
ing a lintel over a 450mm wide opening are 90kg for 100mm blockwork and 120kg for 125mm blockwork.
Plan to minimise disruption to occupants and protect any other parts of the building against dust infiltration.
Areas that are opened up will need to be protected against rain or snow during the work and if there is a risk of
frost, replacement brickwork will require protection until mortars have hardened.
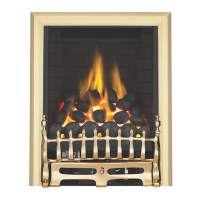
Set out where possible centrally beneath a block join as
shown. Use a drill for guide holes, and a 'shark saw' or angle
grinder to form an opening to suit the lintel.
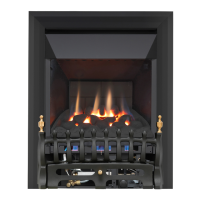
The lintel should be inserted and securely slate pinned,
leaving the wall above safe and firm.
Note: AAlwayss bbed oon mmortar, DDO NOT ddry bbed.
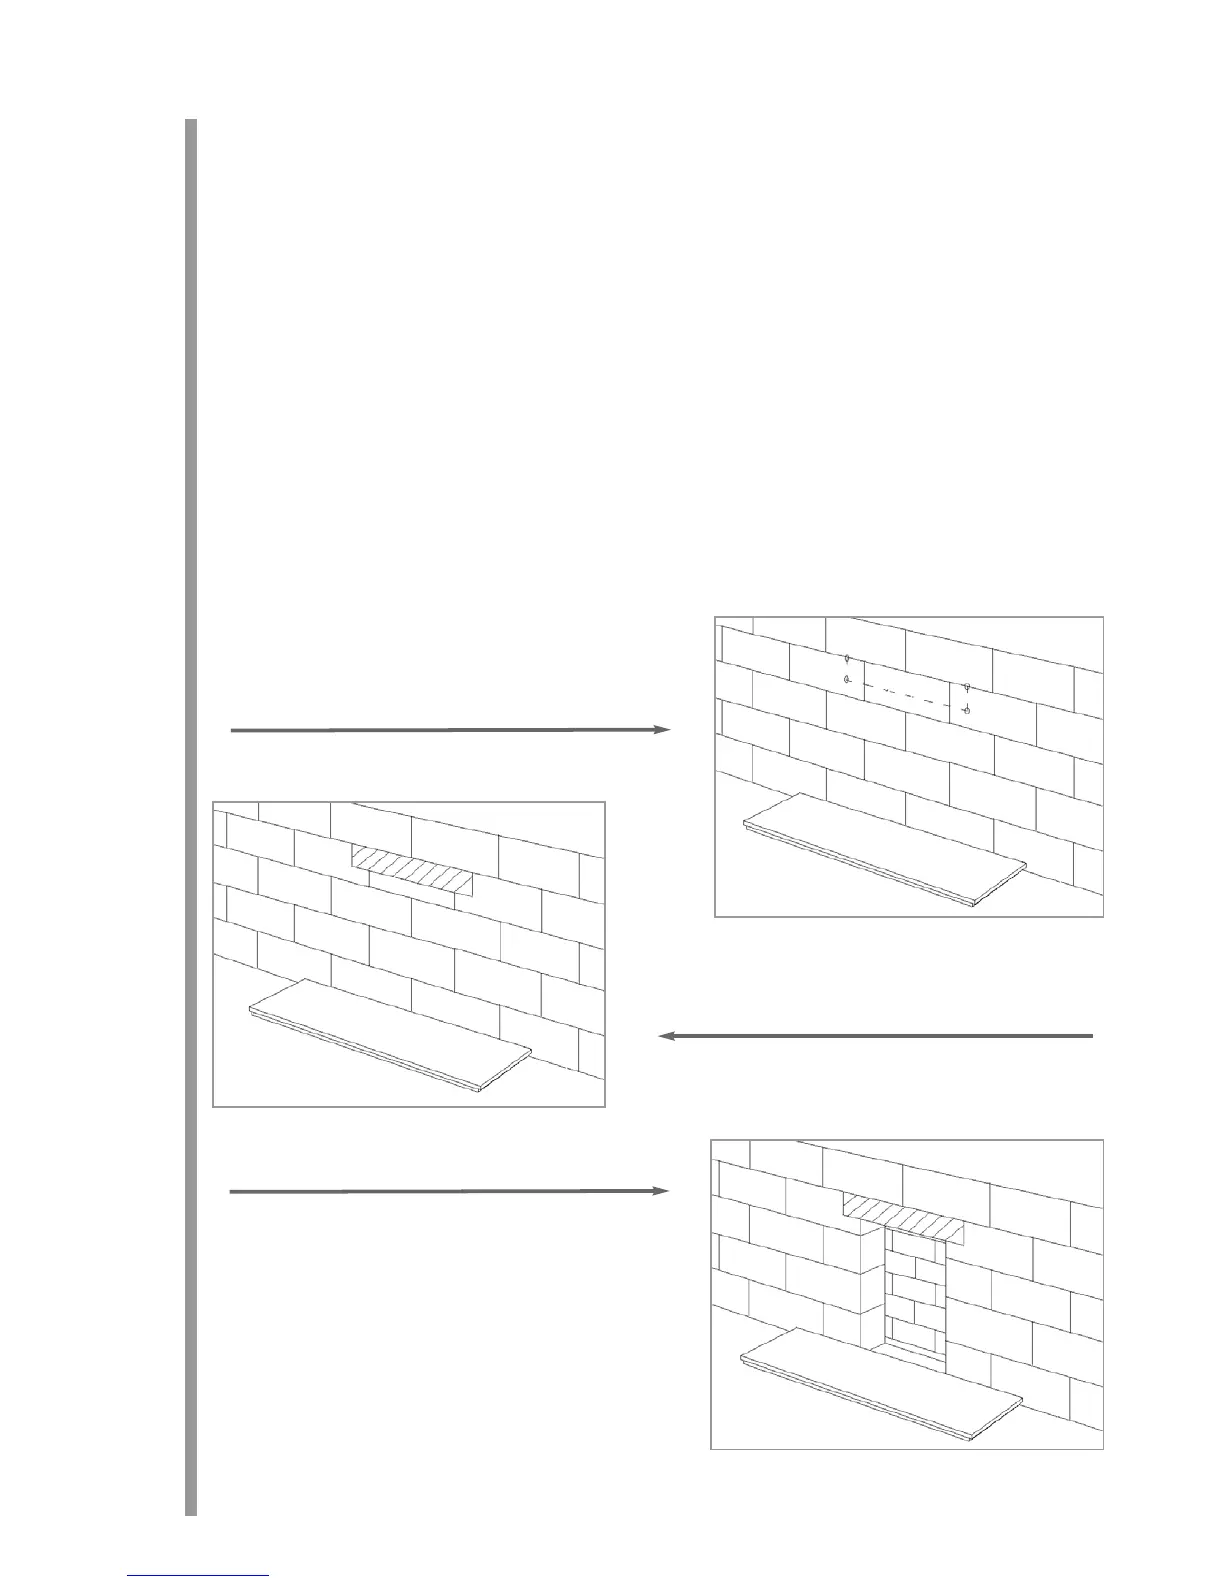
Remove all masonry from below the lintel, and clear debris
from the cavity.
The top of the exposed cavity must be sealed with Superlux
board or a similar non-combustible material. The board
should be fixed at an angle, lower at the back, so as to direct
any moisture coming down to the outside wall. This board
should be fixed with screws, Unibond, or a similar adhesive.
It is important to fit this board or a cavity tray to protect the
property and the appliance from drips of water. The sides of
the opening where the cavity is exposed should be packed
with Rockwool or similar non-combustible material to a min-
imum depth of 50mm. The Rockwool packing must extend
from the base of the opening to the Superlux board.
The non-combustible hearth should now be formed or secured in place.
8
8.4