INSTALLATION METHOD 33 ((continued)
Insstallation uussingg rrebated ffire ssurround oor ffalsse cchimney bbreasst.
When using this method of installation the
following amendments should be incorporated.
25mm clearance must be allowed from the
appliance firebox to any insulated combustibles.
75mm clearance must be allowed to any unpro-
tected combustibles. 50mm minimum thickness
of insulation should be provided around flue
pipe and gather hood. Where the flue pipe pass-
es through the inner leaf, a hole 100mm larger
than the flue should be cut to allow 50mm air
gap around the entire flue circumference.
The vapour barrier on the back of the inner leaf
should be cut and carefully fixed to prevent any
ingress of damp into the plasterboard layer. A
layer of insulation will need to be provided to
insulate the surface of the inner wall from the
heat effect of the flue. It may be advantageous to
use a sheet of Superlux board for this purpose.
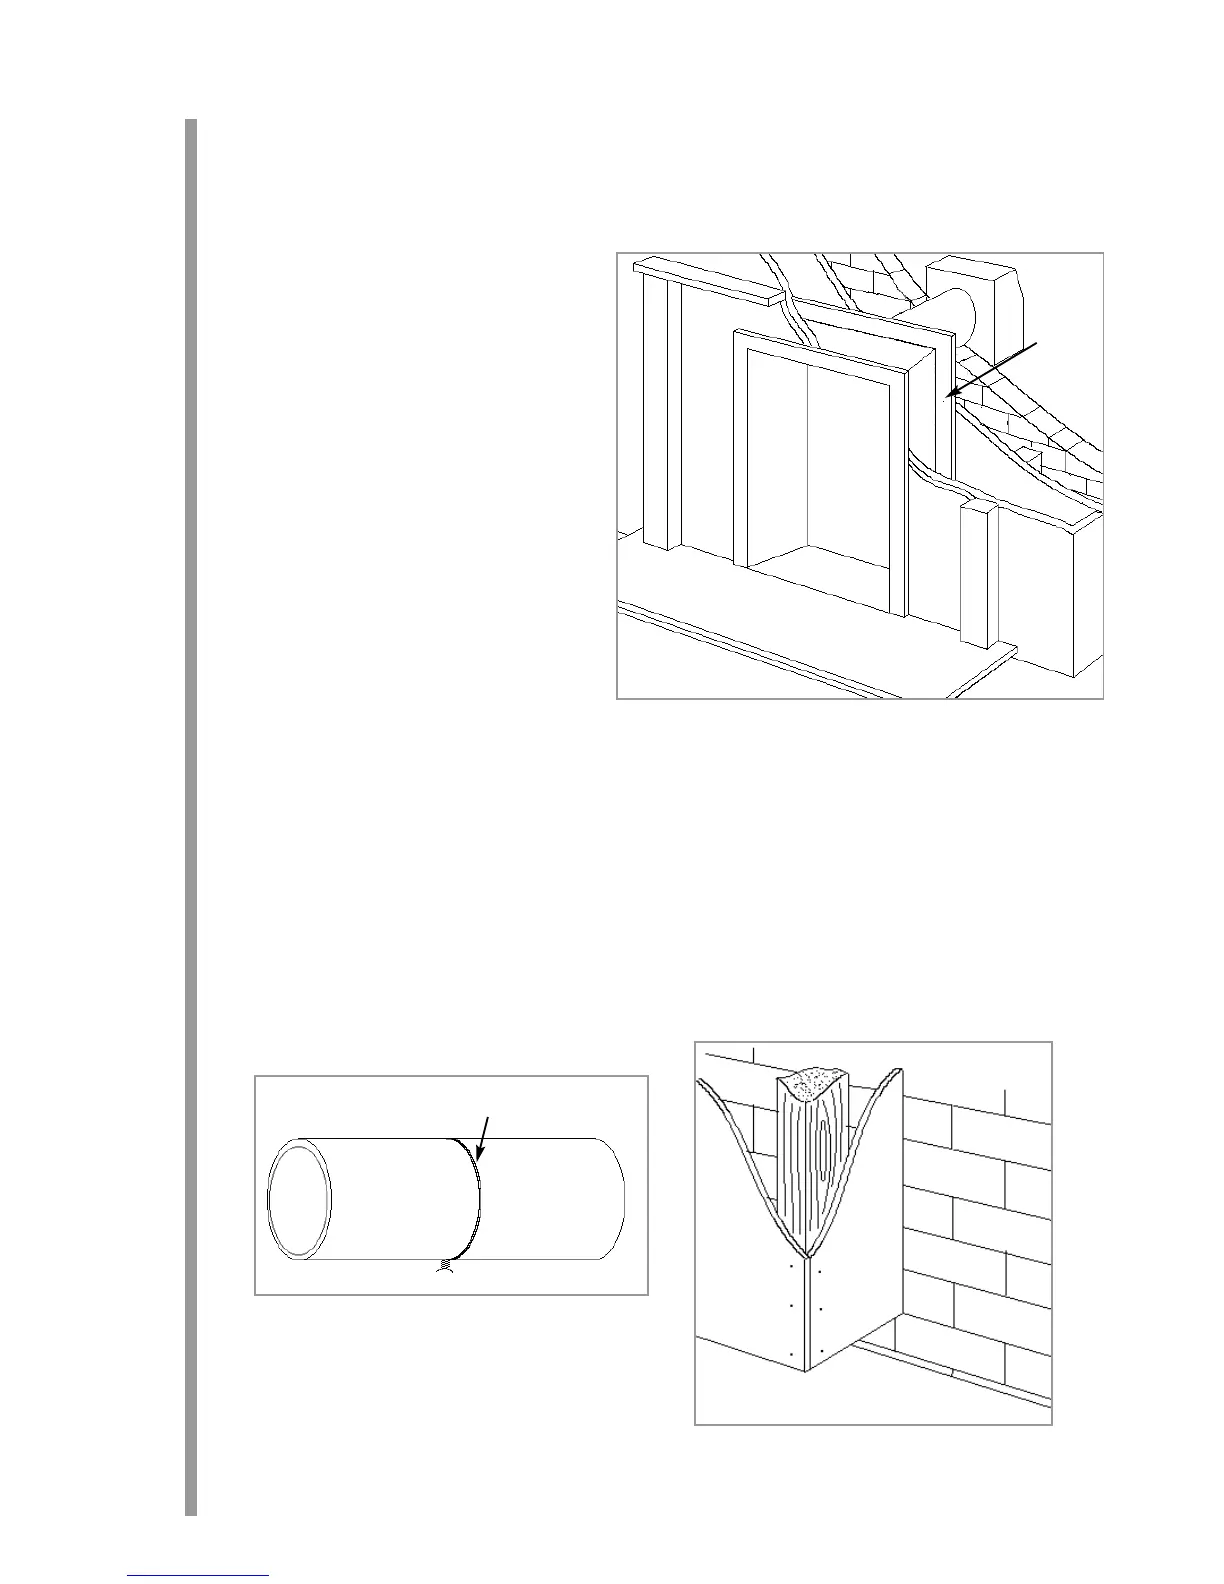
Insstallation bby ssettingg tthe aappliancce iinto tthe iinner lleaf oof wwall.
When setting the appliance into the inner wall find a suitable position between the wall panel frames and
carefully open up a hole to the dimensions given in the relevant section, paying careful attention to securing the
damp proof membrane back into position. A drip collar of galvanised or stainless steel should be formed with the
twisted joint on the underside of the flue to disperse drips.
An air gap of 75mm between all hot surfaces and the surrounding wall should be allowed, if protective insulation
is used this may be reduced to 25mm clearance. The exposed cavity should be sealed off using Superlux or a
similar non-combustible board, see below.
Note: NNeither tthe aappliancce nnor tthe RRocckwool iinssulation sshould ooverhangg tthe ccavity sspacce.
10
Superlux board
Wire drip collar formed around flue tube
8.5