14
© Copyright, Sunrise Tradex Corp., 2018
7.0 REFRIGERANT CONNECTIONS
Keep the coil connections sealed until refrigerant connections are made. See the installation
instructions for the outdoor unit for details on line sizing, tubing installation, and charging
information. The coil is shipped at no charge. Evacuate the system before charging with
refrigerant. Install the refrigerant tubing so that it does not block the service access to the front of
the unit.
Nitrogen should ow through the refrigerant lines while brazing.
Use a brazing shield to protect the cabinet’s paint and a wet rag to protect the rubber grommet
from being damaged by torch ames. After the refrigerant connections are made, seal the gap
around the connections with pressure sensitive gaskets.
7.1 CONDENSATE DRAIN TUBING
Consult local codes for specic requirements.
1. When making drain tting connections to the drain pan, use a thin layer of teon paste,
silicone or teon tape to seal.
2. When making drain tting connections to the drain pan, do not overtighten. Overtightening
ttings can split the pipe connetions on the drain pan.
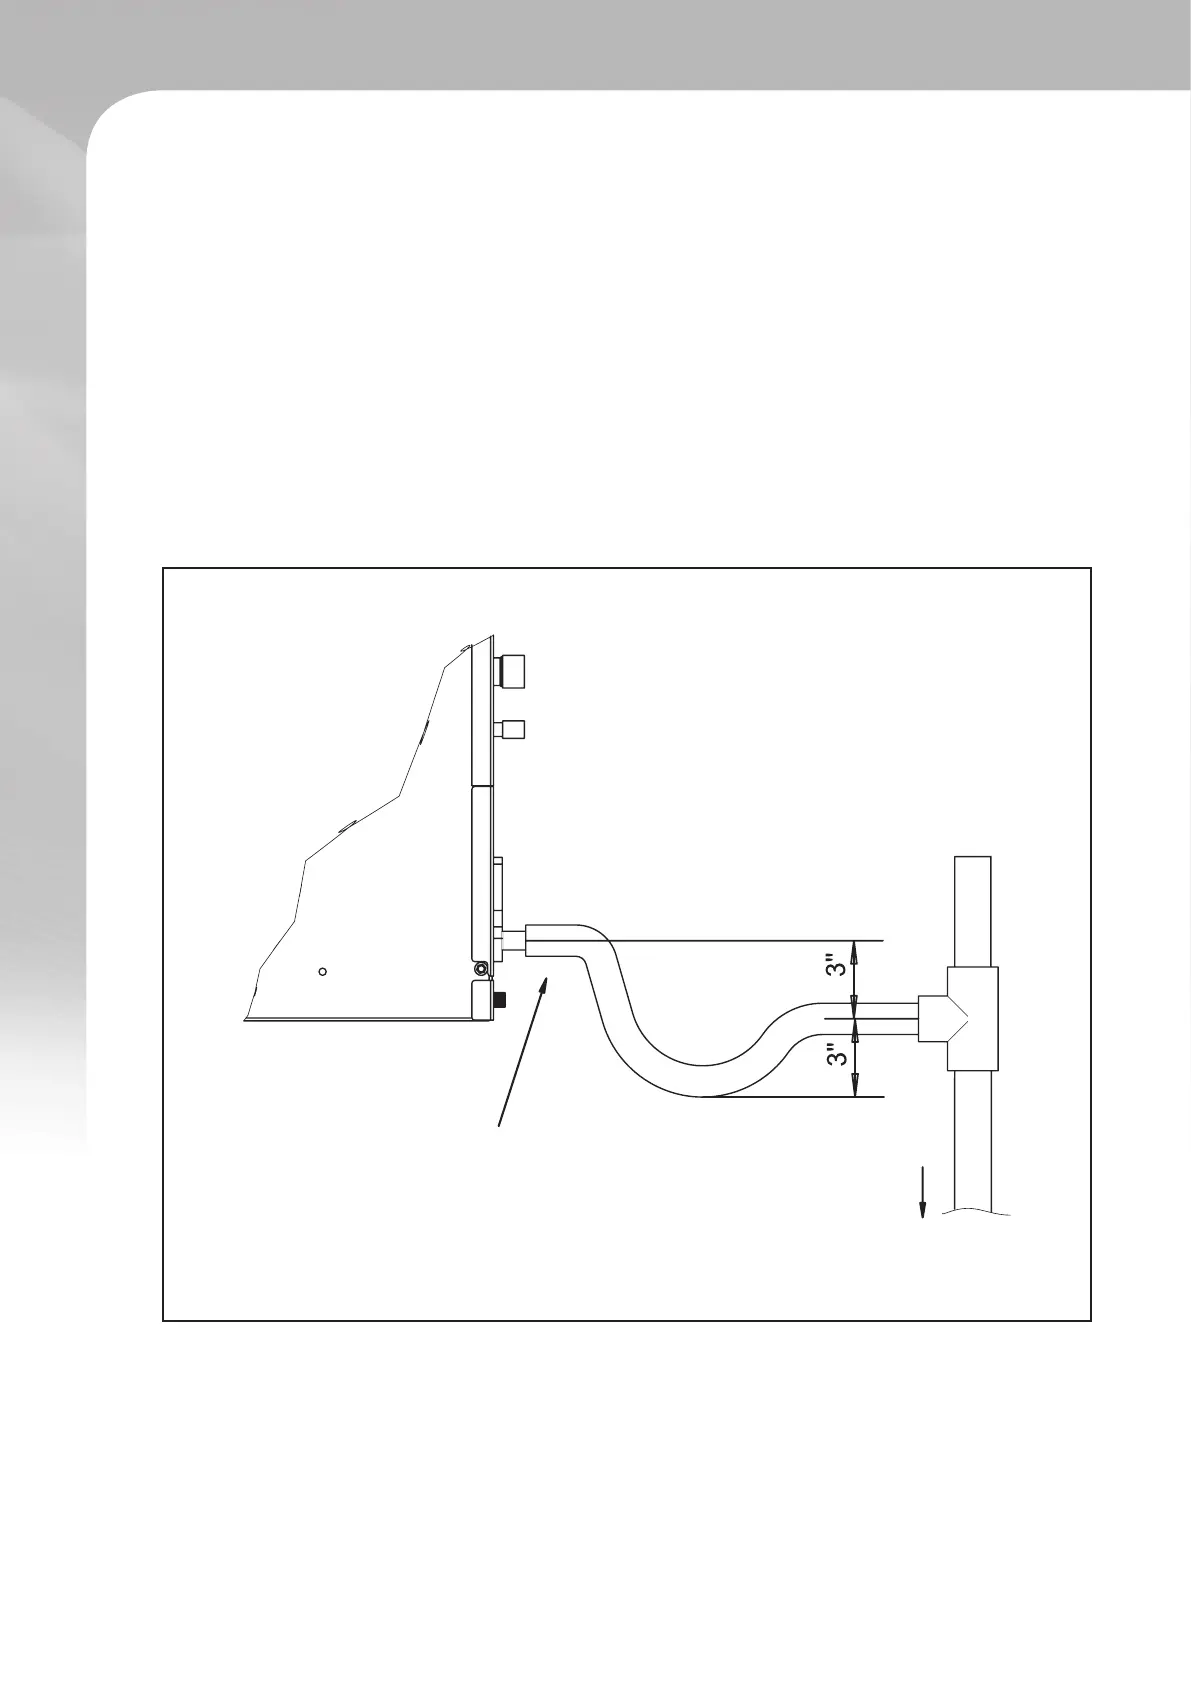
FIG. 5 CONDENSATE DRAIN TRAP
CONDENSATE DRAIN TRAP
DO NOT OPERATE UNIT WITHOUT A
CONDENSATE DRAIN TRAP.
UNIT
DO NOT OVERTIGHTEN DRAIN FITTING
UNIT MUST BE SLIGHTLY INCLINED TOWARD
DRAIN CONNECTION
TO APPROVED DRAIN
Installation Manual
76,2 mm
76,2 mm
 Loading...