STEP 3 - Front Wheel Assembly
6
STEP 2 - Rear Wheel Assembly
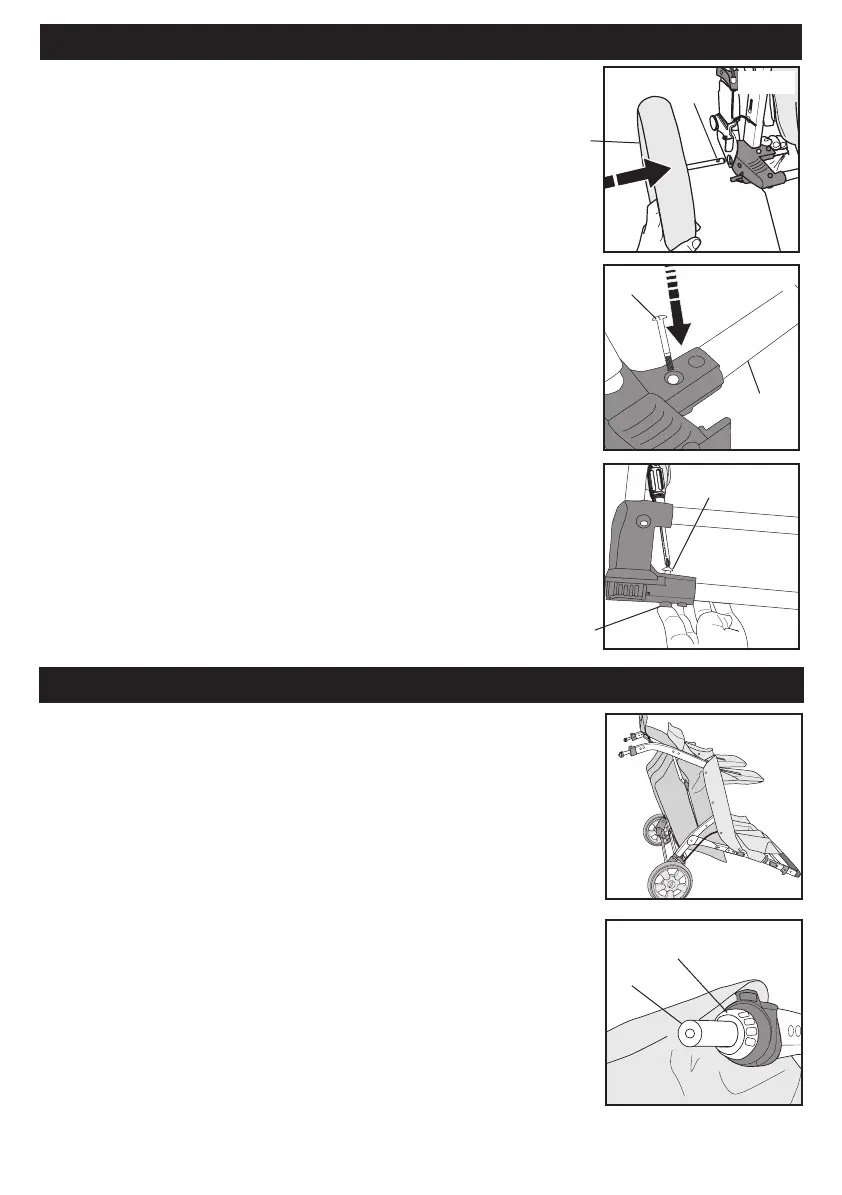
1. Align hole in rear axle rod of Rear Wheel With Axle B with
holes in Rear Axle Tube Assembly (C) . Slide rear wheel with
axle B into Rear Axle Tube Assembly (C) (Fig. 1).
2. Slide Rear Wheel With Axle (B) in until hole in rear
axle rod 1 aligns with hole in rear axle tube.
3. Insert M6 x 34 mm Screw (H) through Rear Axle Tube
Assembly (C) and rear axle rod until screw comes out bottom of
Rear Axle Tube Assembly (C) (Fig. 2).
NOTE: If end of screw does not slide into hole, check
alignment of hole in axle. If hole in axle is not
aligned, remove rear wheel and start over.
4. Insert M6 Nut (I) into 6-sided recess on bottom of
rear axle tube and using phillips screwdriver, secure
Screw (H) by turning into nut until tight (Fig. 3).
Repeat steps 2 thru 4 for opposite rear wheel.
Fig. 1
Fig. 2
Fig. 3
1
B
H
H
I
C
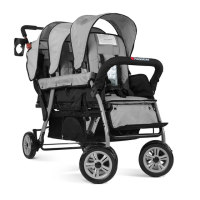
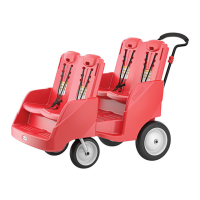
1. Unfold stroller (see “Operation and Use” section).
2. Tip stroller back on rear wheels until handle contacts
oor(Fig. 1).
3. Gather all parts required for assembly. Locate
M6 x 25 Shoulder Screw (K), Lock Washer (L),
and Flat Washer (M) in parts bag. Locate Front
Wheel Assembly (D).
4. Remove protective packaging material from Front
Wheel Post (Fig. 2).
NOTE: Hold bearing (Y) on front wheel post (X) while
removing protective packaging materials
and parts bag.
Fig. 2
Fig. 1
Y
X