070.610-IOM (JUL 21)
Page 35
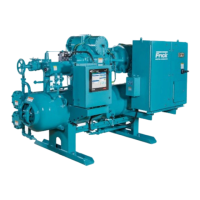
RWF II Rotary Screw Compressor Units
Maintenance
Replace the gasket and reinstall the canister cover. Torque
cover bolts rst to nger tight, then 65 ft-lb, then 130
ft-lb.
7. Evacuate (pull a vacuum on) the lter canister to elimi-
nate non-condensibles.
8. Fill the canister with new Frick refrigeration oil as
needed.
9. Open outlet service valve and leak test.
10. Filter is ready to place in service.
Strainer – demand oil pump
To clean the demand oil pump strainer, the unit must be
shut down. The procedure is as follows:
1. Push [STOP] key on microprocessor panel to shutdown
unit, then open disconnect switches for compressor and
oil pump motor starters.
2. Close strainer inlet service valve.
3. Open drain valve located in the strainer cover and
drain oil into a container.
4. Remove capscrews securing strainer cover, strainer
cover, gasket and element. Retain gasket.
5. Wash element in solvent and blow clean with air.
6. Wipe strainer body cavity clean with a lint-free clean
cloth.
7. Replace cleaned element, gasket and reattach cover
using retained capscrews.
8. Close drain valve and open strainer inlet service valve.
9. Check for leakage.
10. Close disconnect switches for compressor and oil pump
motor starters.
11. Start the unit.
Strainer – liquid injection
To clean the liquid injection strainer the unit must be shut
down. The procedure is as follows:
1. Push [STOP] key on microprocessor panel to shut
down unit, then open disconnect switches for compressor
and oil pump motor starters.
2. Close liquid supply service valve located before liquid
solenoid.
WARNING
Excessive pressure from expanding refrigerant
trapped between stop valve and solenoid may cause
gasket and O-ring failure and uncontrolled refrigerant
release.
3. Close service valve located between the compressor
and the liquid injection thermovalve.
4. Carefully loosen capscrews securing the strainer cover
to the strainer. Allow pressure to relieve slowly.
5. When all entrapped refrigerant has been relieved,
carefully remove loosened capscrews (as liquid refriger-
ant is sometimes caught in the strainer), strainer cover and
strainer basket.
6. Wash the strainer basket and cover in solvent and blow
clean with air.
7. Reassemble strainer.
8. Open service valve between compressor and liquid
injection thermovalve and check for leakage.
9. Screw out manual solenoid valve stem.
10. Carefully open liquid supply service valve.
11. Leak test.
12. Close disconnect switches for compressor and oil pump
motor starters.
13. Start unit.
Coalescer lter element
When changing the coalescer lter element(s) it is recom-
mended that the oil be changed, cartridge(s) in oil lters
OF-1 and OF-2 if applicable be changed and the following
applicable strainer elements be removed and cleaned.
NOTICE
Use of lter elements other than Frick may cause
warranty claim to be denied.
1. See Changing oil, Steps 1 through 8.
2. Loosen manway cover retainer bolts, remove retainers,
manway cover and cover gasket. Discard cover gasket.
3. Remove and retain nut securing coalescer lter re-
tainer.
4. Remove retainer, coalescer lter element and 2
O-rings. Discard lter elements.
5. Install new coalescer lter element(s).
NOTICE
Frick SuperCoalescer
™
element (with drain feature) must
be installed with the "DRAIN DOWN" tag on the bottom
at the 6 o'clock position.
CAUTION
Seat element in center of locating tabs on separator
bulkhead.
6. Replace coalescer lter retainer and nut. Tighten the
nut to 21 ft-lb torque. Do not overtighten nut. Excessive
torque can damage the element and result in oil car-
ryover. Install jam nut and tighten.
7. Install new manway gasket and replace manway cover.
8. While unit is at atmospheric pressure, tighten the two
12 in. x 16 in. elliptical head manway bolts to 180 ft-lb.
9. Ensure manway bolts remain nger tight after the
compressor unit is in operation, as the manway bolts
will loosen as a result of pressurization.
WARNING
Overtightening components could result in a re,
serious injury or property damage.
Do not apply the manway bolt torque specied for
an unpressurized unit while the unit is pressurized.
Applying this torque when the manway is pressur-
ized can overstress the manway gasket. Overstressing
the gasket can lead to gasket failure and/or a system
leak.
Trained technicians are required for servicing.
10. See Changing oil, Steps 9 through 14.

 Loading...