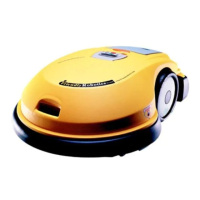
- Insert the Manual Controller back into the holder and pivot down flush.
- Confirm the Charging Station is turned on and the mower is pointed at any perimeter wire
section (not an island or excluded obstacle).
- Press the upper scroll arrow once for the ‘Go to dock’ message option to display and then
press GO.
- The Robomow will find the perimeter wire and will follow the wire to the Charging Station –
‘Searching dock’ message is displayed during this sequence.
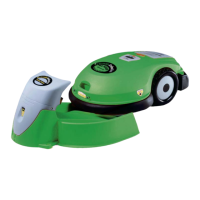
Manual Charging of the Robomow with the Manual Controller
- Drive the Robomow manually into the Charging Station using the navigation buttons on the
Manual Controller.
- Once in the station, return the Manual Controller to the pocket and pivot down flush.
- Confirm the display changes to a battery charging icon, indicating a successful docking.
3.5 Activating The Perimeter Switch – Non-Charging Zone
The Robomow cannot operate unless the Perimeter Switch is turned on and the mower is on the
inside of the active perimeter. Locate or connect the Perimeter Switch to the zone, which you would
like to mow. Press the ‘ON’ button to turn on the switch. You will hear one short beep when the
switch is first pressed, indicating it is on. To verify switch operation, there is a green LED located next
to the ‘ON’ button that will flash when operating properly. If an intermittent beeping is heard shortly
after turning the switch on, there is a problem with the batteries or the perimeter. Look to see which
red LED is flashing to determine which is the problem. You must correct the problem before the
Robomow will operate automatically. In a case where you have forgotten to turn on the Perimeter
Switch the LCD on the Manual Controller will display ‘No wire signal’ message (Figure 3.0), reminding
you to turn the switch on.
If a cut wire indicator is flashing be sure you connected the Perimeter Switch to the perimeter wire
using the small green connector. If the low battery light is flashing, insert fresh c-cell alkaline batteries.
If this does not correct the problem, refer to
Chapter 7, Text Messages and Troubleshooting for further
help.
No Wire Si
nal
Figure 3.0
No Wire Signal Display
Figure 3.1
Positioning
Robomow
on Lawn
Starting
point
Front pointed to
perimeter wire
3 feet
(1 m)
3.6 Positioning The Robomow On The Lawn
Remove the Manual Controller from its’ holder and drive the Robomow into the lawn area to be cut.
The manual driving speed of the Robomow has two speeds, slow and fast. You may select the
opposite speed by simply pressing the ‘Speed’ button once while in the process of driving the mower.
Position Robomow at least 3 feet (1m) from the perimeter wire, with the front of the mower pointing to
the perimeter wire. Figure 3.1.
!
WARNING!
Serious injury or death can occur. This machine has sharp rotating
blades. When operating in automatic mode, keep children, pets and
bystanders away from mower. When operating automatically, do not
leave unattended if children, pets or other persons will come in
contact with the mower during operation. Never allow persons or
pets to ride on this machine or block the path of travel.
Chapter 3
Page 28
3.7 Edge Mowing – Non-Charging Zone
39