12
Set up Guide
5.1 Pre Installation Checkout
To complete assembly you will need a Philips screwdriver (size PH0) and a
wrench (size M5; included in package).
Before installing the weather station on the place of operation, we recommend
placing the weather station at a temporary location with easy access for one
week. This will let you check all functions, ensure proper operation, and get
familiar with the weather station and its calibration procedures.
Attention:
Do not mix old and new batteries
Do not use rechargeable batteries
If outdoor temperature may go below 32F or 0C for prolonged periods,
Lithium based batteries are suggested over alkaline type batteries for the
outdoor sensor array
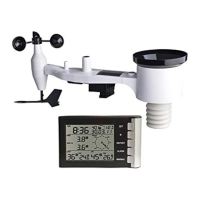
5.2 Outdoor Sensor Array
5.2.1 Install batteries in sensor package
Insert 2XAA batteries in the battery compartment. The LED indicator(on
the top of the sensor) will turn on for 3 seconds and normally flash once
every 8.8 seconds (the sensor transmission update period).
If sensor has been put outside for some time, and solar panel has charged up
the internal accumulator fully or partially, if you install the 2 AA backup
batteries, the system might not start up properly. So you can always make a
system reset by press the “Reset” button. ?