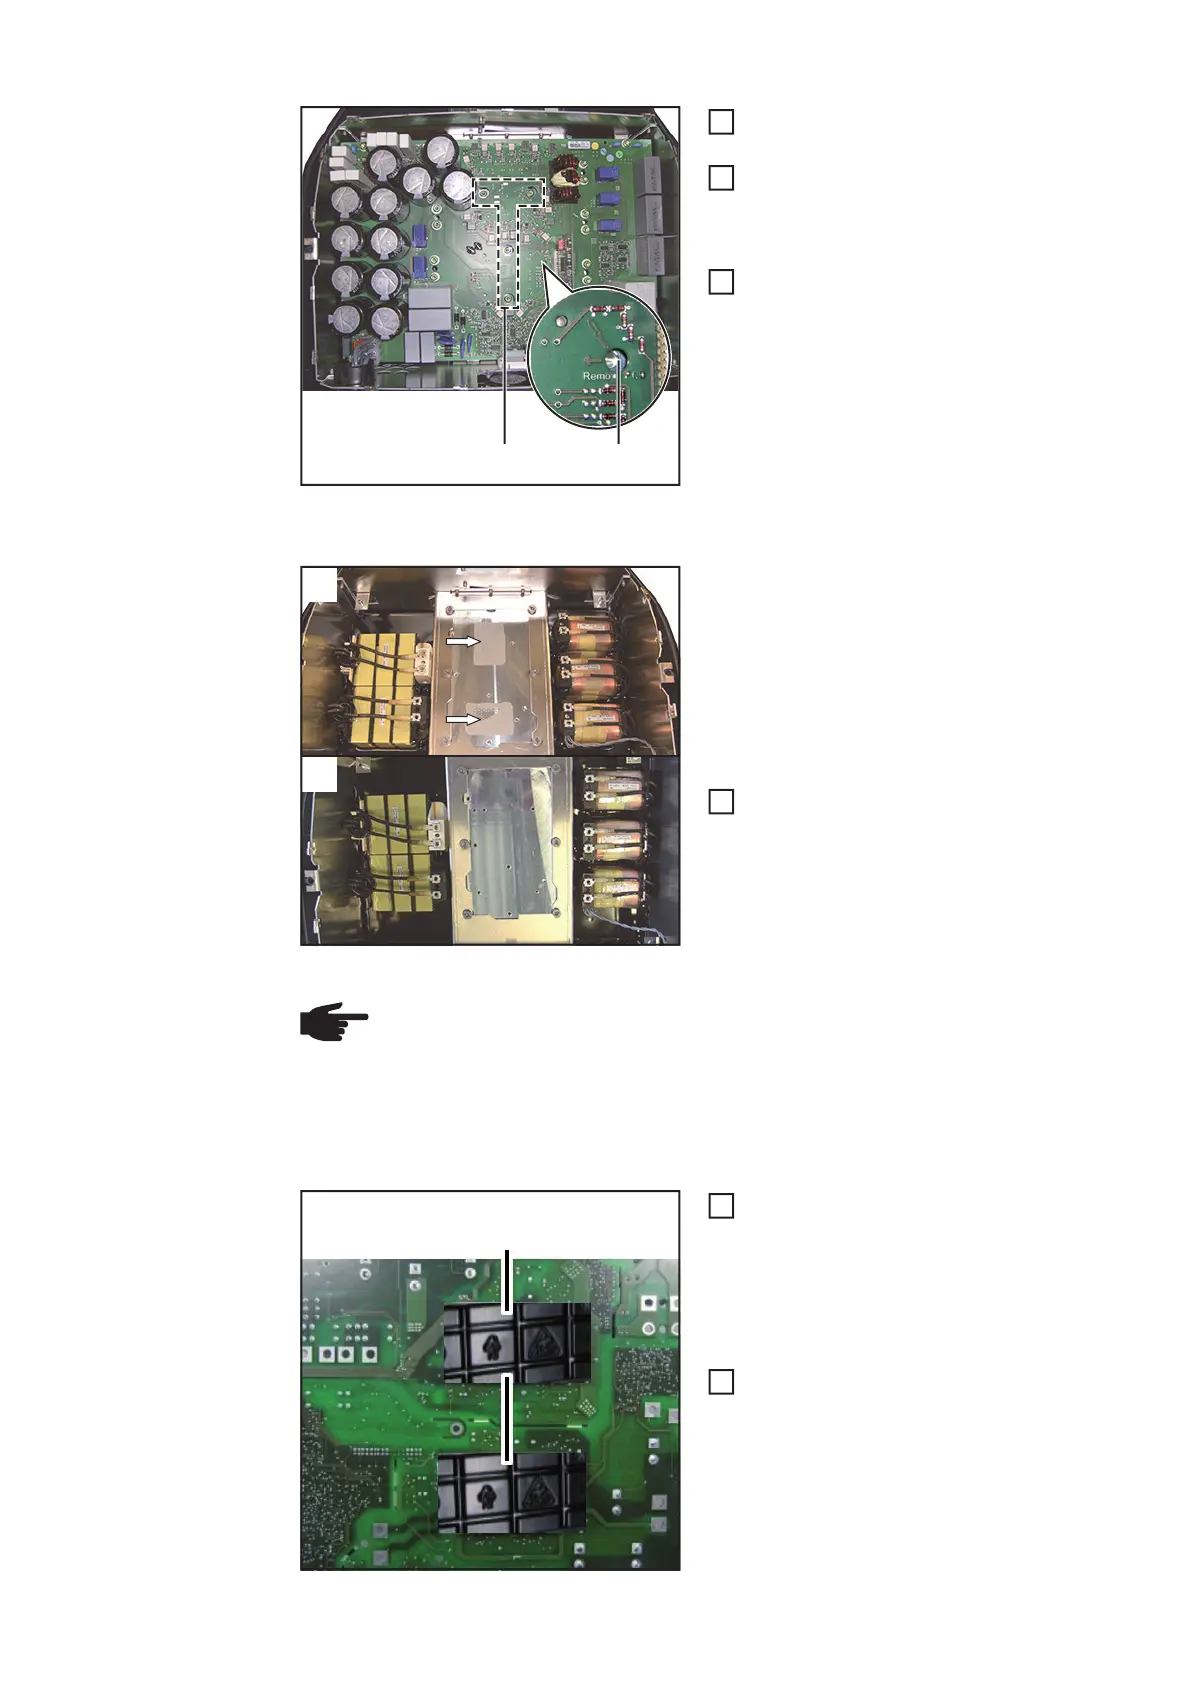
140
Remove 4 x 4x9 mm TX20 screws (6)
from the modules
Separate the PC board from the heat
sink by inserting a screwdriver into the
"Remove PCB" hole (7) and pressing
in the direction of the arrow
Remove the Power PC board from
above
Clean the heatsink
IMPORTANT!
- When cleaning the heatsink ensure all
old heat-conducting medium residues
are removed.
- Clean heatsink only with a clean cloth.
- When cleaning the heatsink do not
scratch it or damage it in any other
way.
Clean the heatsink
a) Heatsink with heat-conducting resi-
dues
b) Clean heatsink
Installing PrimoPS:
Remove the 2 x blister packs (8) from
the modules of the new PrimoPS PC
board
IMPORTANT! It is essential that the follo-
wing step is carried out.
Always put the blister pack on the faul-
ty power PC board and return it to Fro-
nius.
(6) (7)
4
5
6
a)
b)
1
NOTE! When returning the PrimoPS Power PC board:
- Also clean the modules with a clean cloth.
- Then remove the PCM film from the small parts kit
- Place the PCM film on the module and smooth it down
- Remove the protective film
(8)
1
2
 Loading...