40
Trafoverbindung (3) und Drosselver-
bindung (2) richtig einfädeln
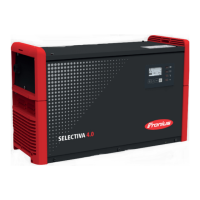
Primär-Leistungsteil komplett einset-
zen und richtig positionieren
Axiallüfter (5) in die dafür vorgesehene
Zugentlastung einsetzen und am Pri-
mär-Leistungsteil anstecken
Flachbandkabel-Verbindung (4) zum
P-Control herstellen
Primär-Leistungsteil mit 5 Stk. Linsen-
schraube 5x10 TX25 (1) montieren
[3 Nm]
Trafoverbindung mit 3 Stk. Linsen-
schraube 5x10 TX25 (3) montieren
[4.5 Nm]
Drosselverbindung mit 1 Stk. Linsen-
schraube 5x10 TX25 (2) montieren
[4.5 Nm]
Auf eine parallele Führung der Dros-
selleitungen achten und mit 2 Stk. Ka-
belbinder 200 (10) bündeln
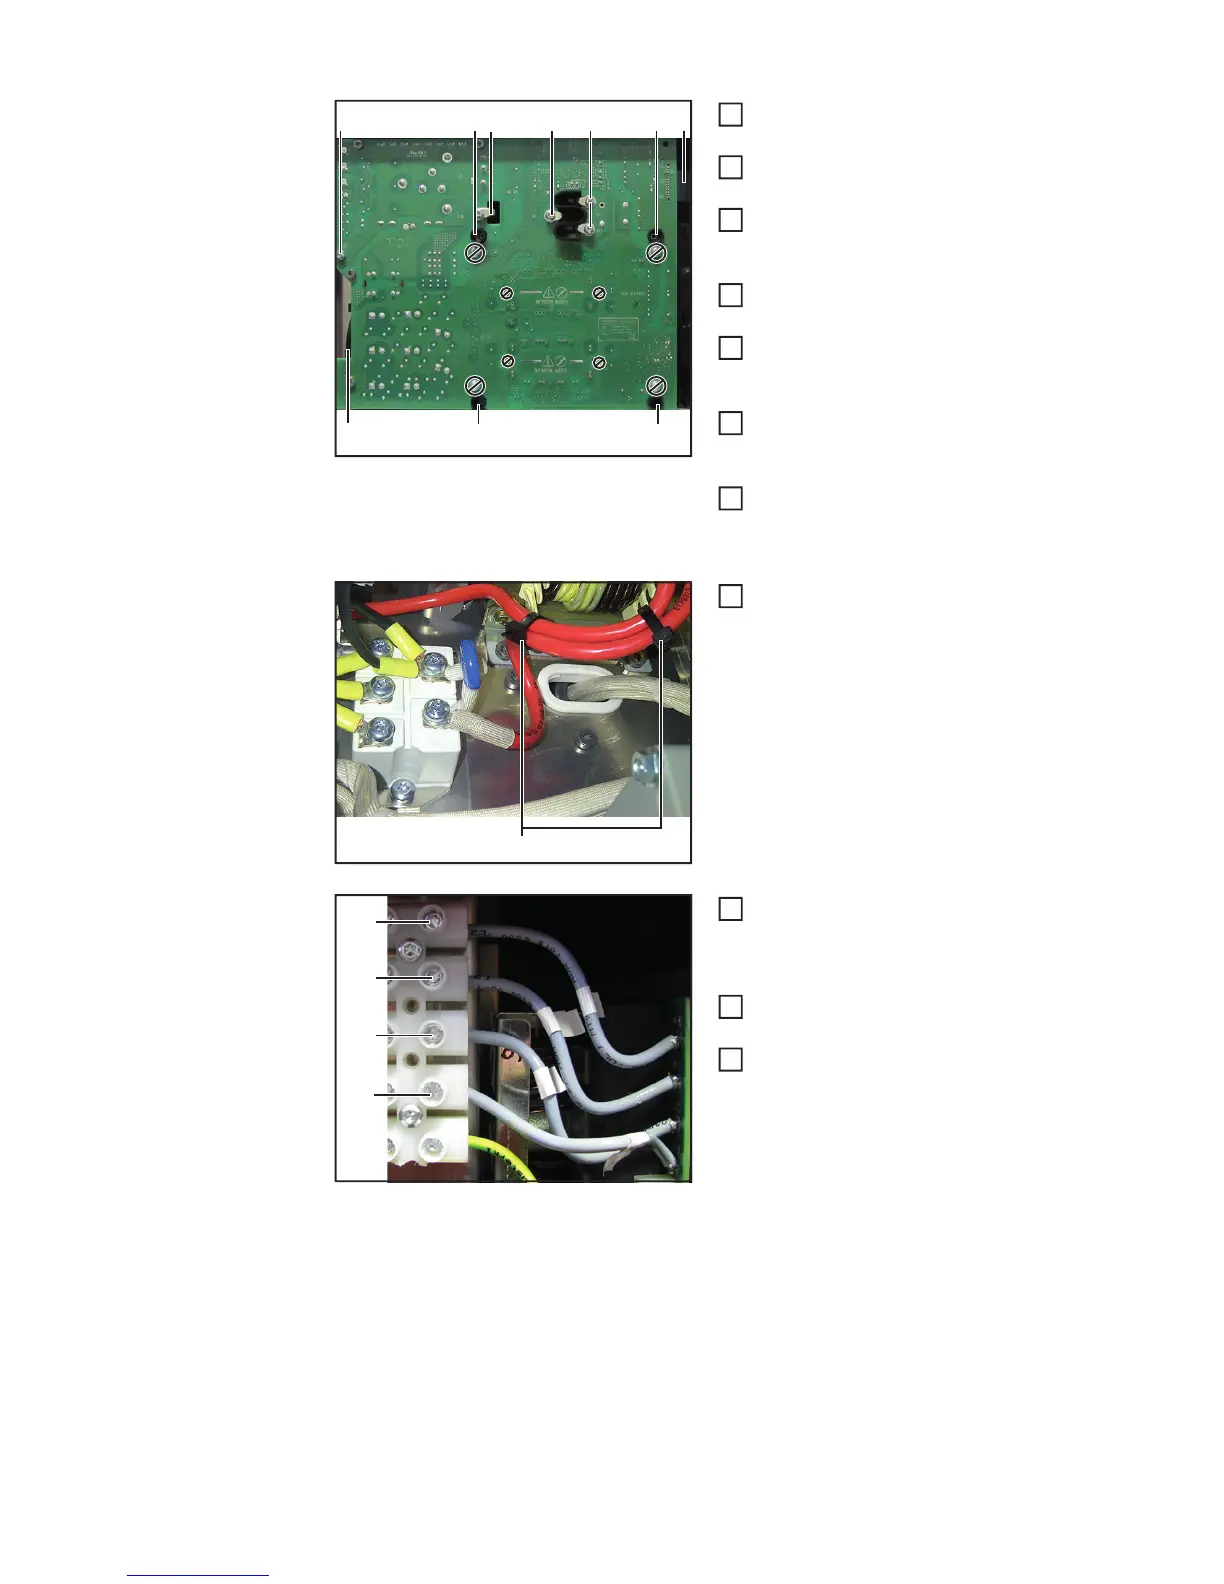
Versorgung des Primär-Leistungsteils
(L1, L2, L3, N) an der Netzklemme
montieren
[1.5 Nm]
Falls die Montagehilfe montiert wurde,
diese entfernen
Gehäusevorderfront und An-
schlussplatte-AC montieren (siehe Ka-
pitel „Gerät schließen“)
(5)
(4)(1)
(1)(1)
(1)(1) (2) (3) (3)
2
3
4
5
6
7
8
(10)
9
(L1)
(L2)
(L3)
(N)
10
11
12
 Loading...