43
DE
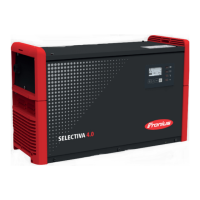
Durchführungstülle (1) vom Axiallüfter-
Kabel abnehmen
2 Stk. Schraube 5x8 TX25 (3) lösen
Axiallüfter herausnehmen
Axiallüfter einbauen:
Axiallüfter wie abgebildet mit Luftrich-
tung in das Gerät einlegen
Axiallüfter mit 2 Stk. Schraube 5x8
TX25 (3) an der Ventilatorhalterung
montieren
[2.1 Nm]
Durchführungstülle (1) am Axiallüfter-
Kabel befestigen
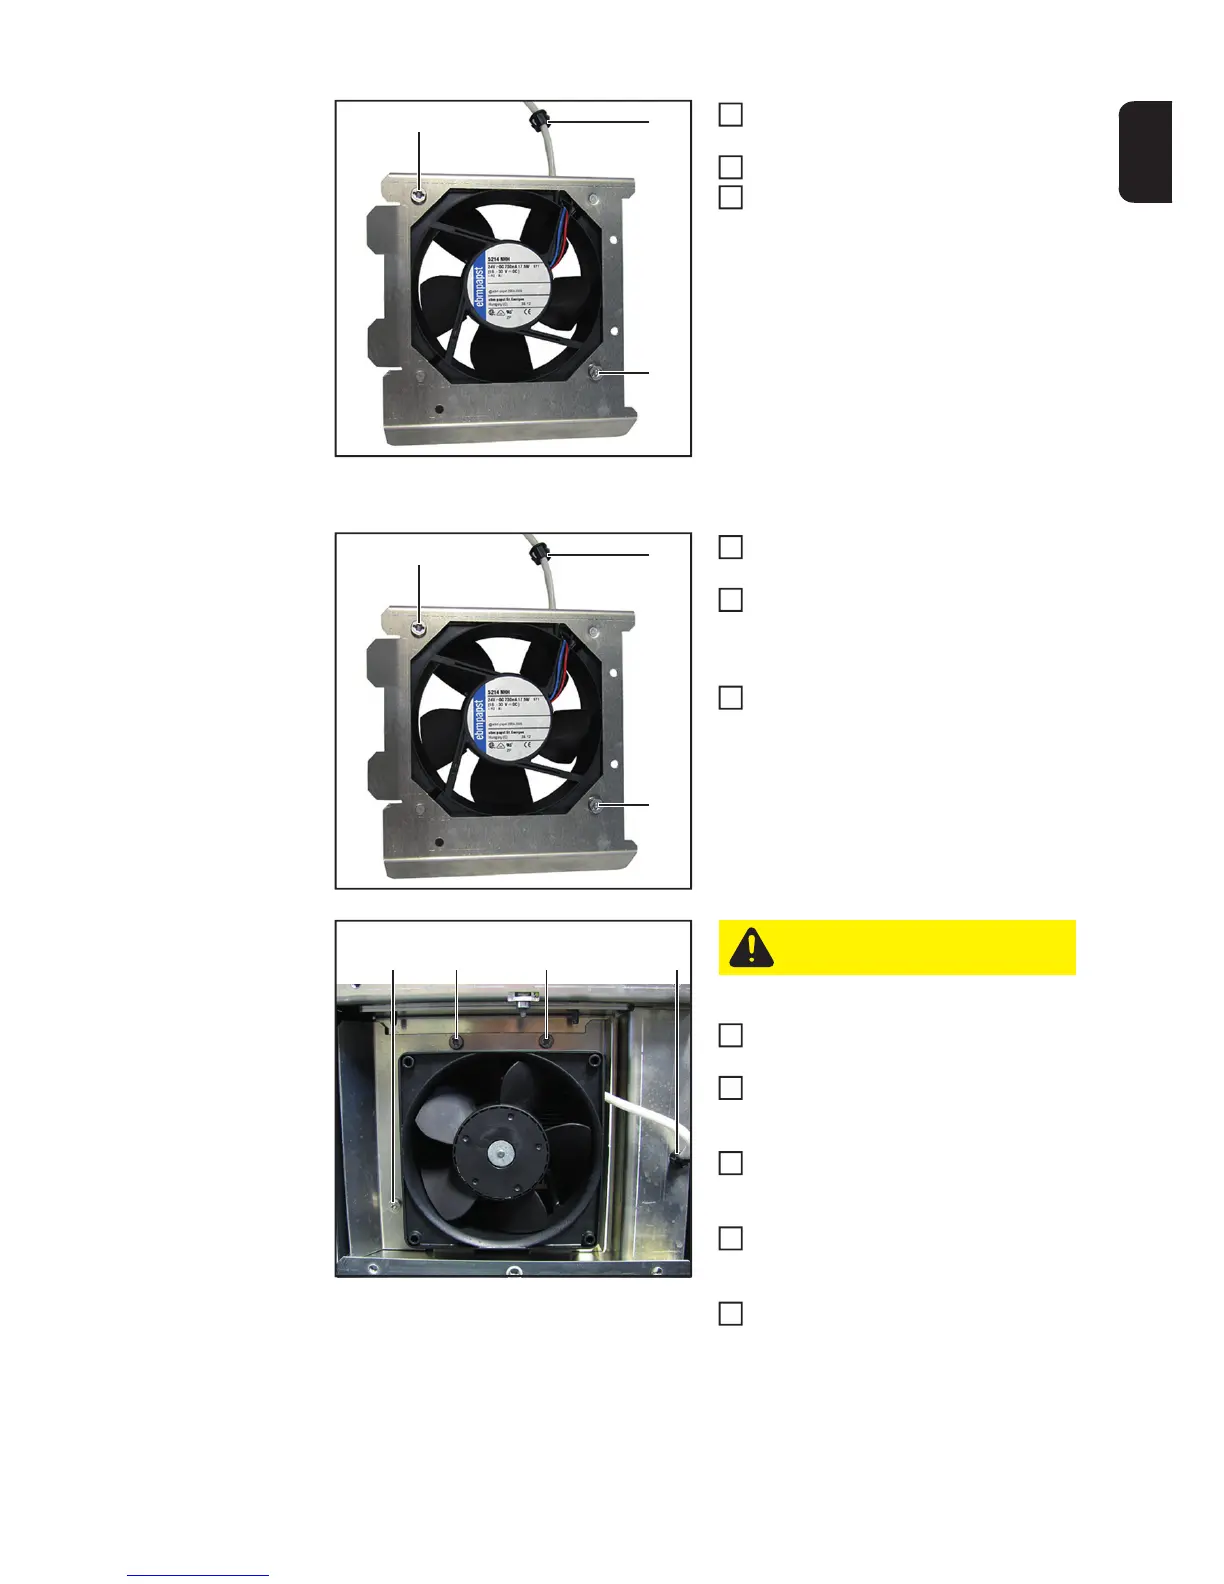
Lüfter-Baugruppe in das Gerät einset-
zen
Lüfter-Baugruppe mit 3 Stk. Schraube
5x12 TX25 (2) montieren
[3 Nm]
Montierte Durchführungstülle vom Axi-
allüfter-Kabel in die dafür vorgesehene
Ausnehmung (1) geben
Axiallüfter-Kabel am Primär-Leis-
tungsteil montieren und in die Zugent-
lastung legen
Gehäusevorderfront und Geräterah-
men AC-seitig montieren (siehe Kapi-
tel „Gerät schließen“)
(1)
(3)
(3)
6
7
8
(1)
(3)
(3)
1
2
3
(1)(2)(2)(2)
VORSICHT! Beim Einsetzen nicht
auf den Rotor drücken
4
5
6
7
8
 Loading...