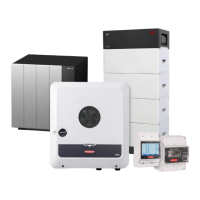
Communication
Network Server addresses for data transfer
If a firewall is used for outgoing connections, the following protocols, server ad-
dresses and ports must be allowed for successful data transfer:
-
Tcp fronius-se-iot.azure-devices.net:8883
-
Tcp fronius-se-iot-telemetry.azure-devices.net:8883
-
Tcp fronius-se-iot-telemetry.azure-devices.net:443
-
Udp sera-gen24.fronius.com:1194 (213.33.117.120:1194)
-
Tcp cure-se.fronius.com:443
-
Tcp firmware-download.fronius.com:443
-
Tcp froniusseiot.blob.core.windows.net:443
-
Tcp provisioning.solarweb.com:443
-
Upd/Tcp 0.time.fronius.com:123
When using FRITZ!Box products, the Internet access must be configured to be
unlimited and unrestricted. The DHCP Lease Time (validity) must not be set to 0
(=infinite).
LAN:
Establishing a connection:
1
Enter host name.
2
Select connection type "automatic" or "static".
3
For connection type "static": enter IP address, subnet mask, DNS and gate-
way.
4
Click on the "Connect" button.
ü
The connection is established.
After connecting, the status of the connection should be checked (see "Internet
Services" on page 124).
WLAN:
Establishing a connection via WPS:
¨
The access point of the inverter must be active. It is opened by touching the
sensor → communication LED flashes blue.
1
Establish the connection to the inverter in the network settings (the inverter
is displayed with the name "FRONIUS_" and the serial number of the device).
2
Enter the password from the rating plate and confirm.
IMPORTANT!
To enter the password on a Windows 10 operating system, the link "Connect
using a security key instead" must first be activated to establish a connection
with the password.
3
In the browser address bar, enter and confirm the IP address
192.168.250.181.
121
 Loading...