Connection area 33
Connection area divider 34
Ground electrode terminal 34
DC disconnector 35
Data communication area 35
Button functions and LED status indicator 36
Internal schematic connection diagram of the IOs 38
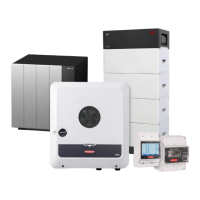
Backup power variant - PV Point (OP) 39
General 41
Explanatory note - PV Point/PV Point Comfort 41
PV Point (OP) 41
Backup power variant - Full Backup 43
General 45
Prerequisites for backup power mode 45
Transitioning from feeding energy into the grid to backup power mode 45
Transitioning from backup power mode to feeding energy into the grid 45
Backup power and energy saving mode 46
Automatic switch to backup power including backup power circuits and 3-pin separation, e.g.
Austria or Australia
47
Functions 47
Transitioning from feeding energy into the grid to backup power mode 47
Transitioning from backup power mode to feeding energy into the grid 47
Automatic switch to backup power all-pin separation, e.g. Germany, France, Spain 48
Functions 48
Transitioning from feeding energy into the grid to backup power mode 48
Transitioning from backup power mode to feeding energy into the grid 49
Automatic switch to backup power all-pin separation, Italy 50
Functions 50
Transitioning from feeding energy into the grid to backup power mode 50
Transitioning from backup power mode to feeding energy into the grid 51
Manual switch to backup power 3-pin separation, e.g. Austria / all-pin separation, e.g. Ger-
many
52
Functions 52
Transitioning from feeding energy into the grid to backup power mode 52
Transitioning from backup power mode to feeding energy into the grid 53
Installation 55
General 57
Quick-lock system 57
Warning notices on the device 57
System component compatibility 58
Installation location and position 59
Choosing the location of the inverter 59
Choosing the location of third-party batteries 60
Installation position of inverter 60
Install the mounting bracket and hang up the inverter 62
Selecting the fixing material 62
Properties of the mounting bracket 62
Do not deform the mounting bracket 62
Fitting the mounting bracket to a wall 62
Installing the mounting bracket on a mast or beam 63
Attaching the mounting bracket to mounting rails 64
Attaching the inverter to the mounting bracket 64
Prerequisites for connecting the inverter 65
Different cable types 65
Permissible cables for the electrical connection 65
Permissible cables for the data communication connection 66
Cable diameter of the AC cable 66
Cable diameter of the DC cable 67
4
 Loading...