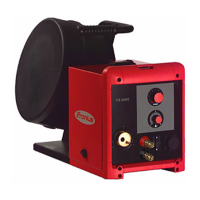
(3) "Run 4-step" mode
= Press and release the torch trigger
The set operating points run automatically
(4) Selector switch
for selecting operating points 1 - 3 and the operating modes.
If operating point 1, 2 or 3 is selected, the following settings can be
made on the power source control panel
-
Switching between 2-step and 4-step modes
-
Switching between pulse/standard process
(5) "Run 2-step" mode
= Press the torch trigger
= Release torch trigger
The set operating points run according to the 2-step principle
(6) Operating point 1 indicator
illuminates when
-
selector switch (4) is set to operating point 1
-
operating point 1 is running
(7) Slope 1 potentiometer
for adjusting the transition time from operating point 1 to operating
point 2
, setting range 0.1 - 9.9 s
(8) Operating point 2 indicator
illuminates when
-
selector switch (4) is set to operating point 2
-
operating point 2 is running
(9) Slope 2 potentiometer
for adjusting the transition time from operating point 2 to operating
point 3
, setting range 0.1 - 9.9 s
(10) Operating point 3 indicator
illuminates when
-
selector switch (4) is set to operating point 3
-
operating point 3 is running
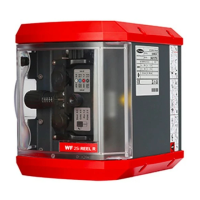
IMPORTANT!
If using the VR 4000-30 TIME wire-feed unit, the "Job mode" function is not
available.
After connecting the wirefeeder, the only welding processes that can be selected
on the power source are as follows:
-
MIG/MAG Standard
-
MIG/MAG pulse synergic
24