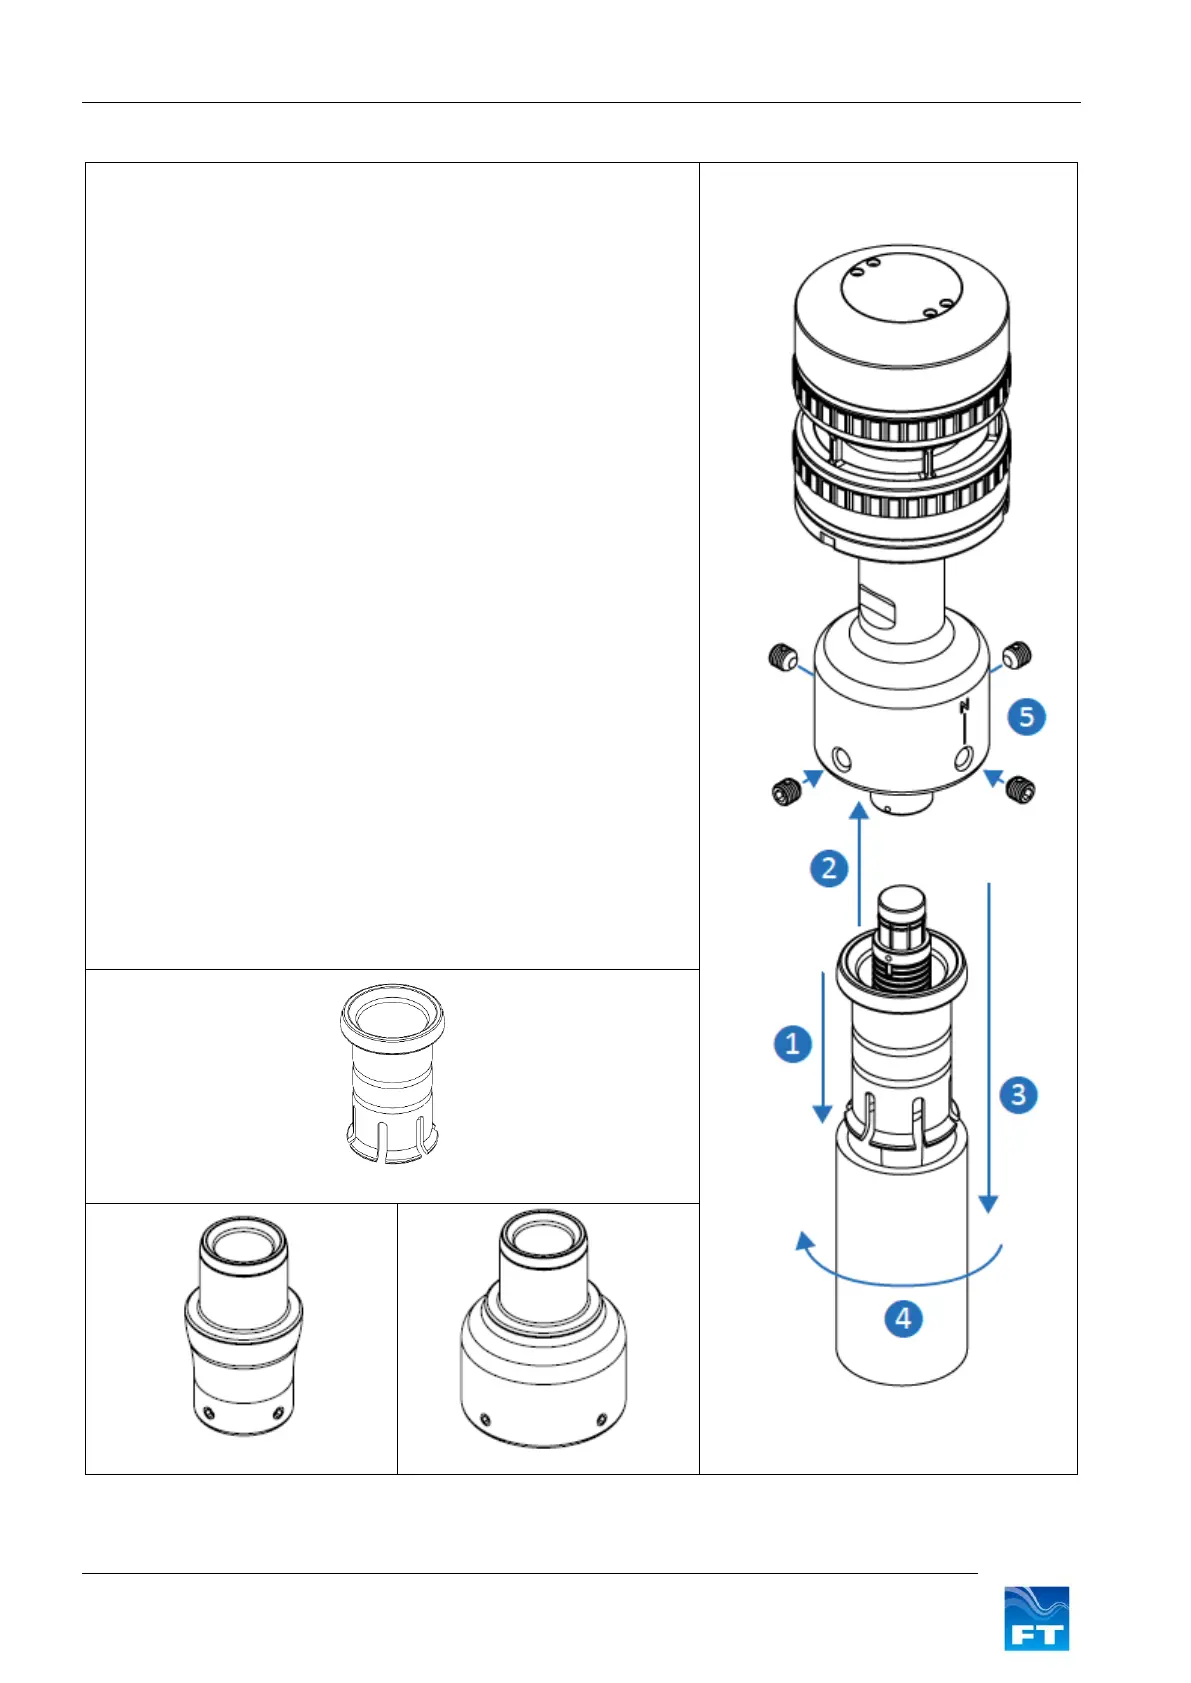
1. Push the slotted end of the pipe insert into the mounting pipe.
Apply a continuous seam of all-weather adhesive sealant
around each of the two channels, before pushing the insert fully
into the pipe, ensuring the shoulder is flat and any surplus
sealant is wiped away. This insert provides a smooth transition
for the sensor O ring to facilitate easy mounting of the DM with
no damage to the internal O ring (for alternative pipe sizes use
the available size adaptors)
2. Pass the cable through the mounting pipe and pipe insert
3. Connect the cable to the wind sensor and lower the DM base
onto the pipe
4. Rotate the sensor to align the central North (‘N’ datum, feature)
with magnetic North (or an alternative reference)
5. Tighten four self-locking fasteners (4x part FT034) ensuring an
even distribution of pressure and firm contact with the mounting
pipe. The fixings use a thread-locking insert and will provide
resistance before they are fully engaged. In highly corrosive
environments (such as coastal installations) the use of marine
grade self-adhesive tape (such as USCGFP by 3M) is
recommended to apply over the top of the mounting fasteners
to ensure ease of removal. In these environments, it is also
beneficial to apply sealant around the base of the sensor at the
pipe interface to reduce build-up of corrosion that could make
sensor removal difficult.
Confirm the installation is safe and appropriate for the
environment.
FT provides optional size adaptors to suit mounting diameters of
25mm (FT031) and 50mm (FT032). Ensure the internal diameter
allows the interface cable to pass through.