NANO PRO
12
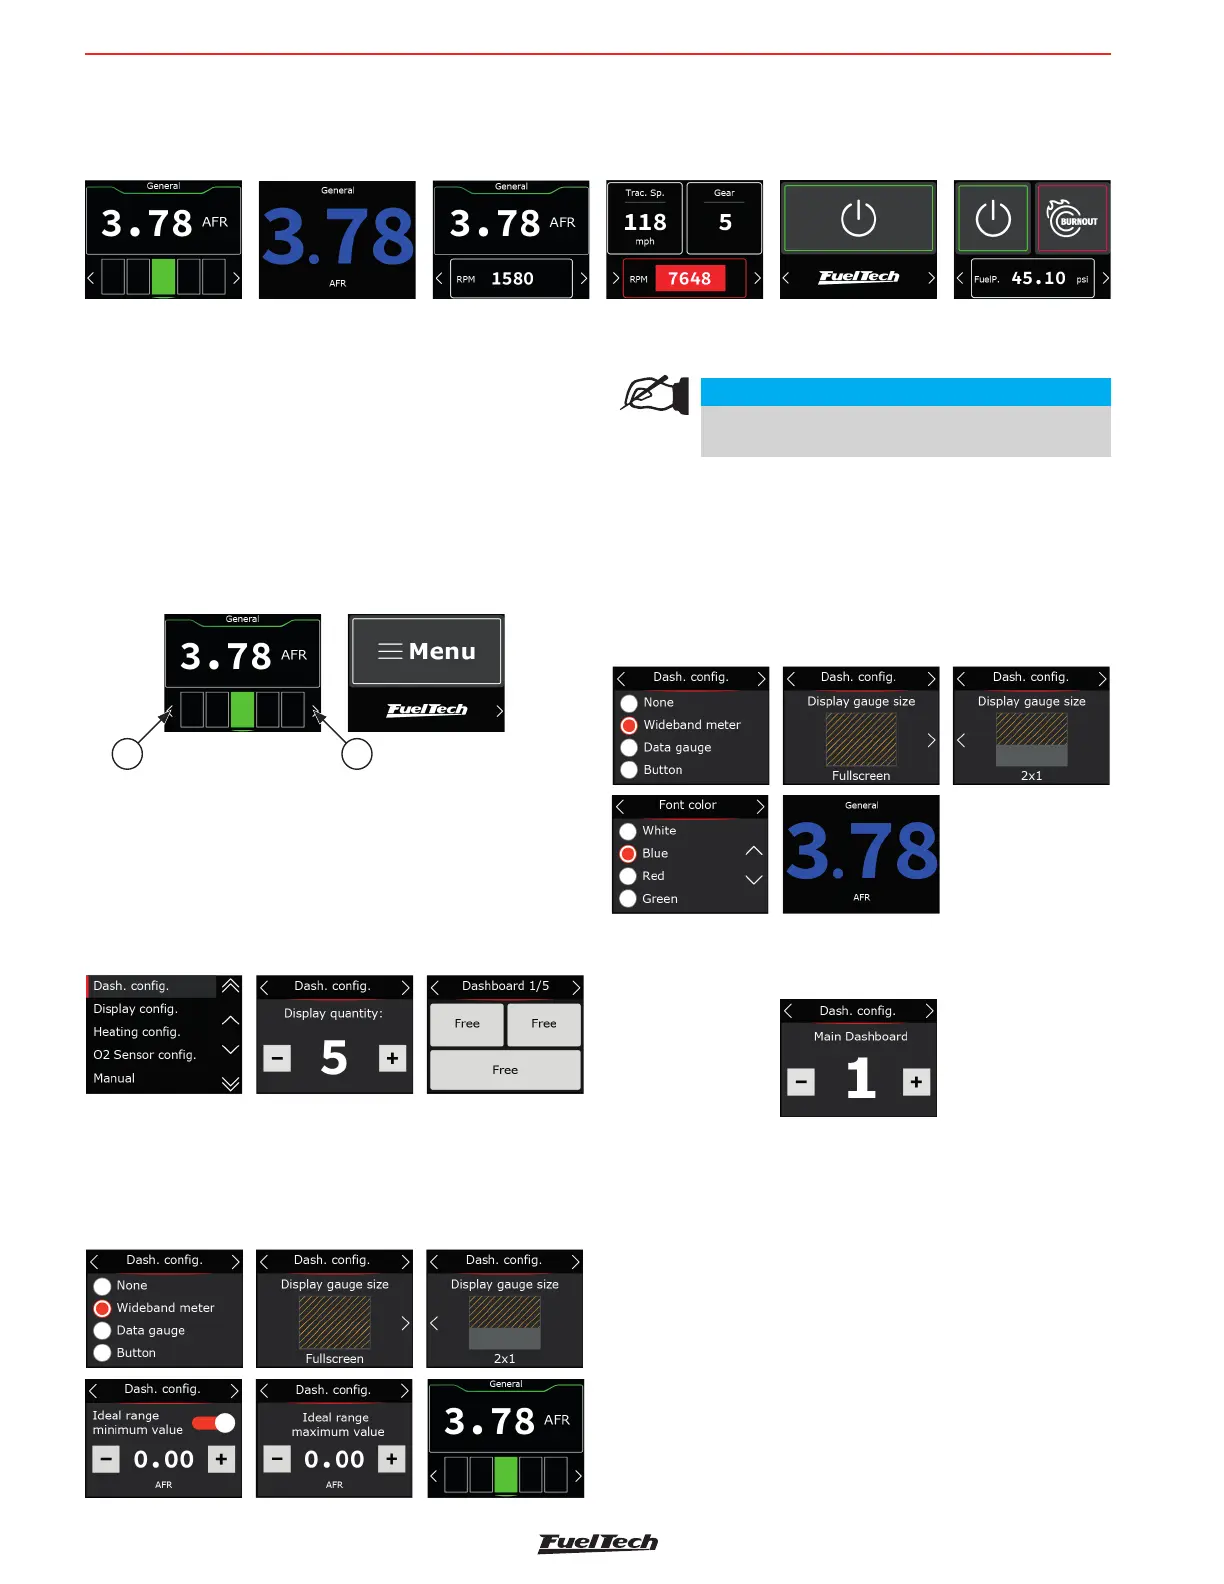
8. Confi guration through the Nano PRO Interface
It is possible to con gure the FuelTech Nano PRO entirely from the screen. Below are a few example screens.
Single O2 sensor gauge
O2 sensor with a data
fi eld
Three data fi eld One button
Two Buttons
Single O2 sensor gauge
Using the interface
To navigate between screens, press the buttons (1) in the lower
corners of the interface.
There are two ways to get into the menu:
a - Press button (1) to change screens until you reach the menu
screen.
b - Press and hold the button (1) for one second to go directly
to the menu.
1 1
8.1 Dashboard con guration
Con gures the number and information of the dashboards. It is
possible to create up to 5 different dashes.
Con gure here the screen that will be the main dash, presented
on startup of the Nano PRO. You can choose the total number of
Dashboards, for that, click on one of the 3 free spaces.
Wideband Meter
There are two possibilities for viewing the O2 sensor value.
Ideal range bar: In this option, the O2 sensor value will be
shown on the display and just below a bar with the ideal range
of air/fuel mixture.
NOTE
To display a bigger O2 value on the display, do not
confi gure the ideal range values.
Value only: in this option the O2 sensor value will be very similar
to the WB-O2 Nano. Only the O2 sensor value will be displayed.
In this case, it is possible to con gure the color of the value
shown on the display.
Available colors: White, Blue, Green, Yellow, red and Orange.
Select which will be the Nano PRO’s main dash screen. It’s
possible to con gure any of ve screens as the main screen.