5 Scan
272
Scan
5
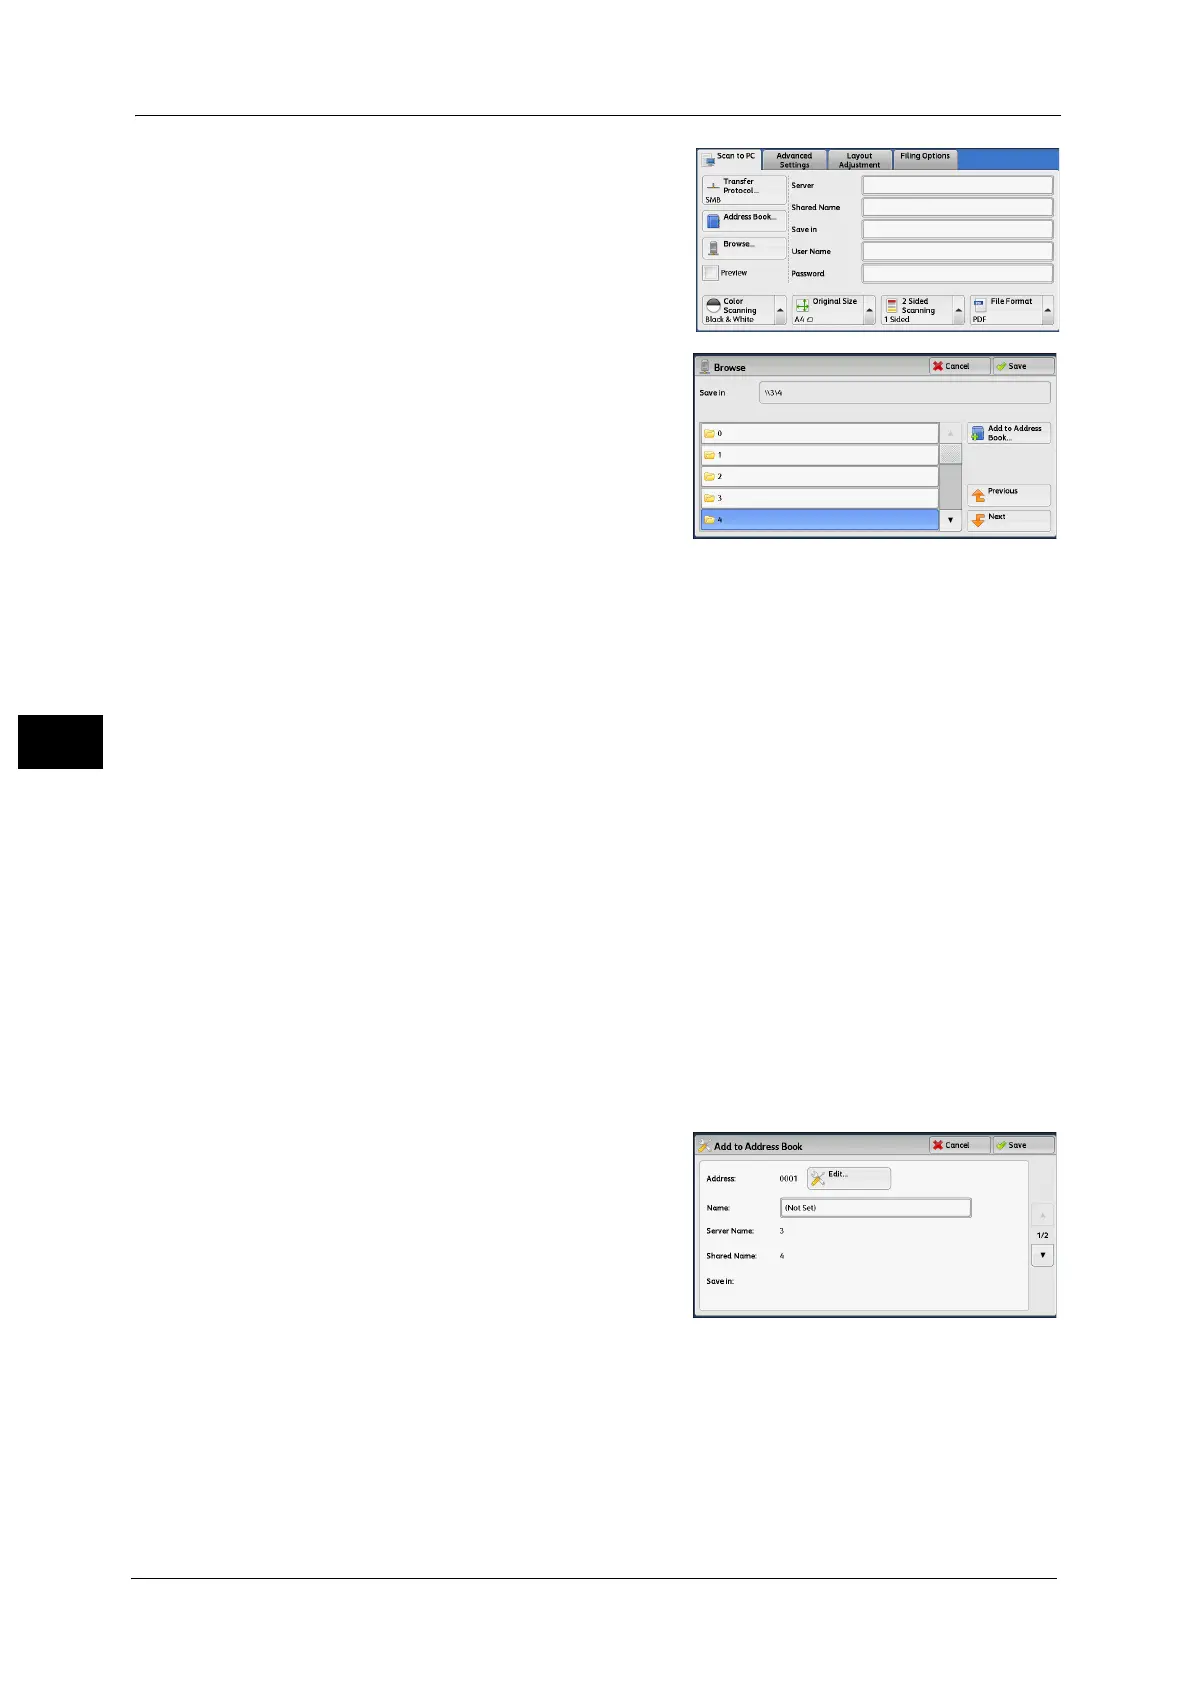
1 Select [Browse].
2 Select the destination to save the data in.
Select [Previous] or [Next] to move to another
level.
Important • You can specify recipients for SMB only.
Note •Scroll the list by drag or flick operation to
switch the screen to be displayed. For
information on how to drag or flick, refer to
"Touch Screen" (P.76).
Save in
Shows the current location in the hierarchy.
Add to Address Book
Displays the [Add to Address Book] screen.
Refer to "[Add to Address Book] Screen" (P.272).
Previous
Allows you to move to the upper directory.
Note •This button is grayed out if there is no upper directory.
Next
Allows you to move to the lower directory.
Note •This button is available when a folder is selected.
[Add to Address Book] Screen
This screen allows you to register the save destination specified in [Browse], in the Address
Book.
1 Select [Add to Address Book].
2 Select [Save].
Address
To change the address number, select [Edit] and
then the desired number.
Name
To change the recipient name, enter a new
name with the keyboard displayed by selecting
[Name].
Note •The recipient name may not be displayed depending on the settings.
 Loading...