6. Press the ENTER switch button (SW3) and fix it.
PEAK CUT
MODE 1: Low
MODE 2: Lower
(L4) (L5) (L6)
7. To return to “Operating status display (Normal operation)”, press the EXIT switch button (SW4).
In case of missing how many times you pressed the SELECT and ENTER switch buttons:
1. To return to “Operation status display (Normal operation)”, press the EXIT switch button once.
2. Restart from the beginning of setting procedure.
NOTE: In case of missing how many times you pressed the SELECT and ENTER switch buttons,
you must redo the setting procedure. Return to “Operation status display (Normal opera-
tion)” by pressing the EXIT switch button once, and restart from the beginning of the setting
procedure.
¢
Peak cut mode
SW1
SW2
SW3 SW4 SW5
(1) (2) (3) (4) (5)
LED lamps
Switch buttons
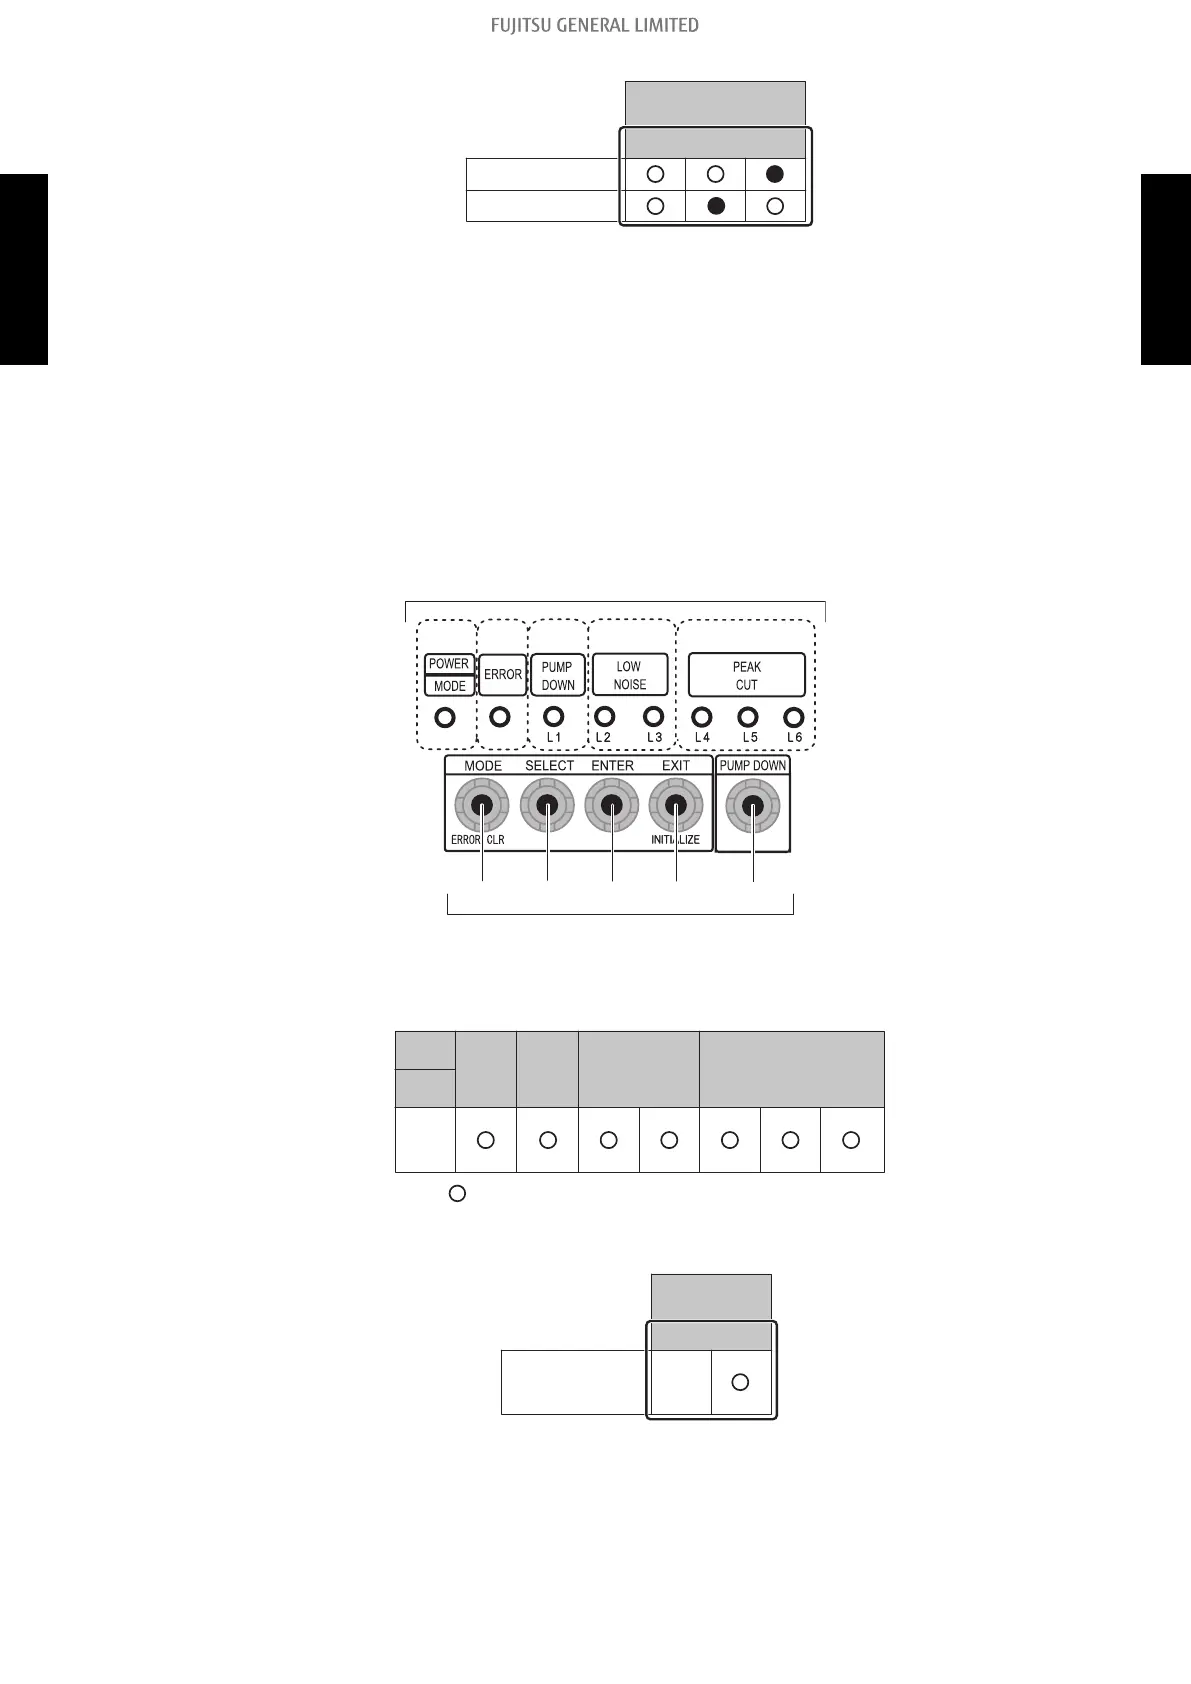
1. Press the MODE switch button (SW1) for 3 seconds or more to switch to “Local setting mode”.
2. After confirming the LED lamp of POWER/MODE blinks 9 times, press the ENTER switch but-
ton (SW3).
POWER
MODE
ERROR
(L1) (L2) (L3) (L4) (L5) (L6)
PUMP
DOWN
LOW NOISE PEAK CUT
Blinks
(9 times
)
3. Press the SELECT switch button (SW2), and adjust the LED lamp as shown below. Then the
LED lamp indicates the current setting.
(L2)
(L3)
LOW NOISE
Blink
PEAK CUT
MOD E
- 142 -
13-2. Local setting procedure 13. Function settings (For AOU42RGLX and AOU48RGLX)
OUTDOOR UNIT
AOU12-48R
OUTDOOR UNIT
AOU12-48R
 Loading...