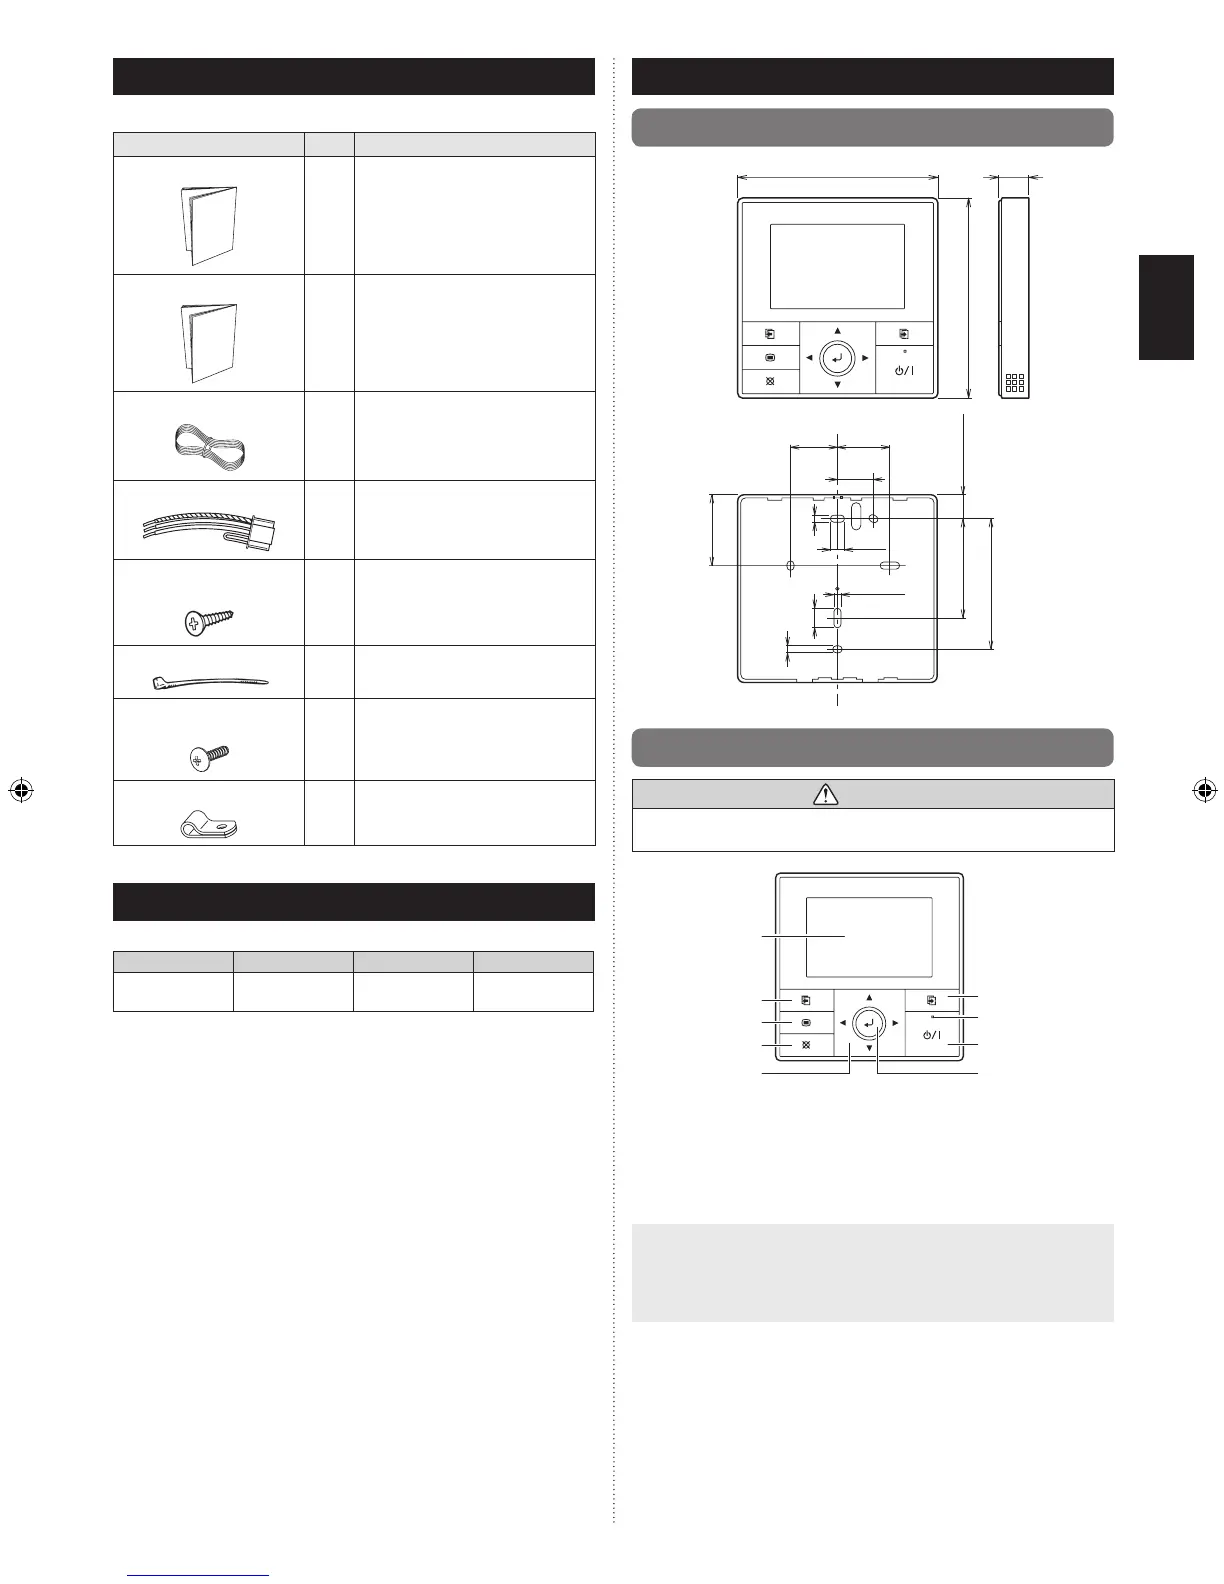
2. ACCESSORIES
The following installation parts are supplied. Use them as required.
Name and Shape
Q’ty
Application
Installation manual
1
This manual
Operating manual
1
Instruction book for operation
Remote controller cable
1
For connecting the remote controller
Connecting cable
1
For connecting the remote controller
cable to the wall mounted type and
the oor type indoor unit
Screw
(M4 × 16 mm)
2
For installing the remote controller
Cable tie
1
For remote controller and remote
controller cable binding
Screw
(M4 × 14 mm)
1
For installing the remote controller
cable to the indoor unit
Cable clamper
1
For installing the remote controller
cable to the indoor unit
3. ELECTRICAL REQUIREMENT
When connecting the remote controller, use cable specied as follows:
Conductor size Type Remarks
Remote controller
cable
0.33 mm
2
(22AWG)
Polar 3 core
Use sheathed
PVC cable
*We recommend that you purchase our service parts for the remote control-
ler cable. Contact service personnel to purchase this.
4. SELECTING AN INSTALLATION LOCATION
4.1. Dimensions
4-23/32 (120)
Unit: in. (mm)
4-23/32 (120)
1-25/32 (45.3)
2-16/32 (63.5)
19/32 (15.3)
3-9/32 (83.5)
6/32 (4.5)
6/32 (4.5)
16/32 (12.5)
7/32 (21.3)
1-6/32
(30)
11/32 (9)
1-10/32
(33.5)
6/32 (4.5)
29/32
(23)
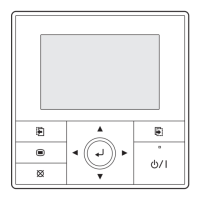
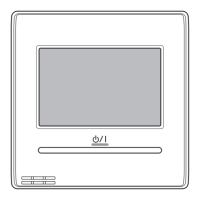
4.2. Name of parts
CAUTION
Press the button lightly with a nger. It may cause a failure if pressed with
excessive force.
(1)
(2)
(3)
(4)
(5)
(6)
(7)
(8)
(9)
(1) Display panel (with backlight) (6) Screen switch button (Right)
(2) Screen switch button (Left) (7) Power indicator
(3) Menu button (8) On/Off button
(4) Cancel button (9) Enter button
(5) Cursor button
-Note-
While the backlight is off by the automatic light off, the rst button opera-
tion does not work, and the backlight illuminates. (The On/Off button is
excluded.)
While the backlight is set to [Off], it is effective from the rst button opera-
tion.