20
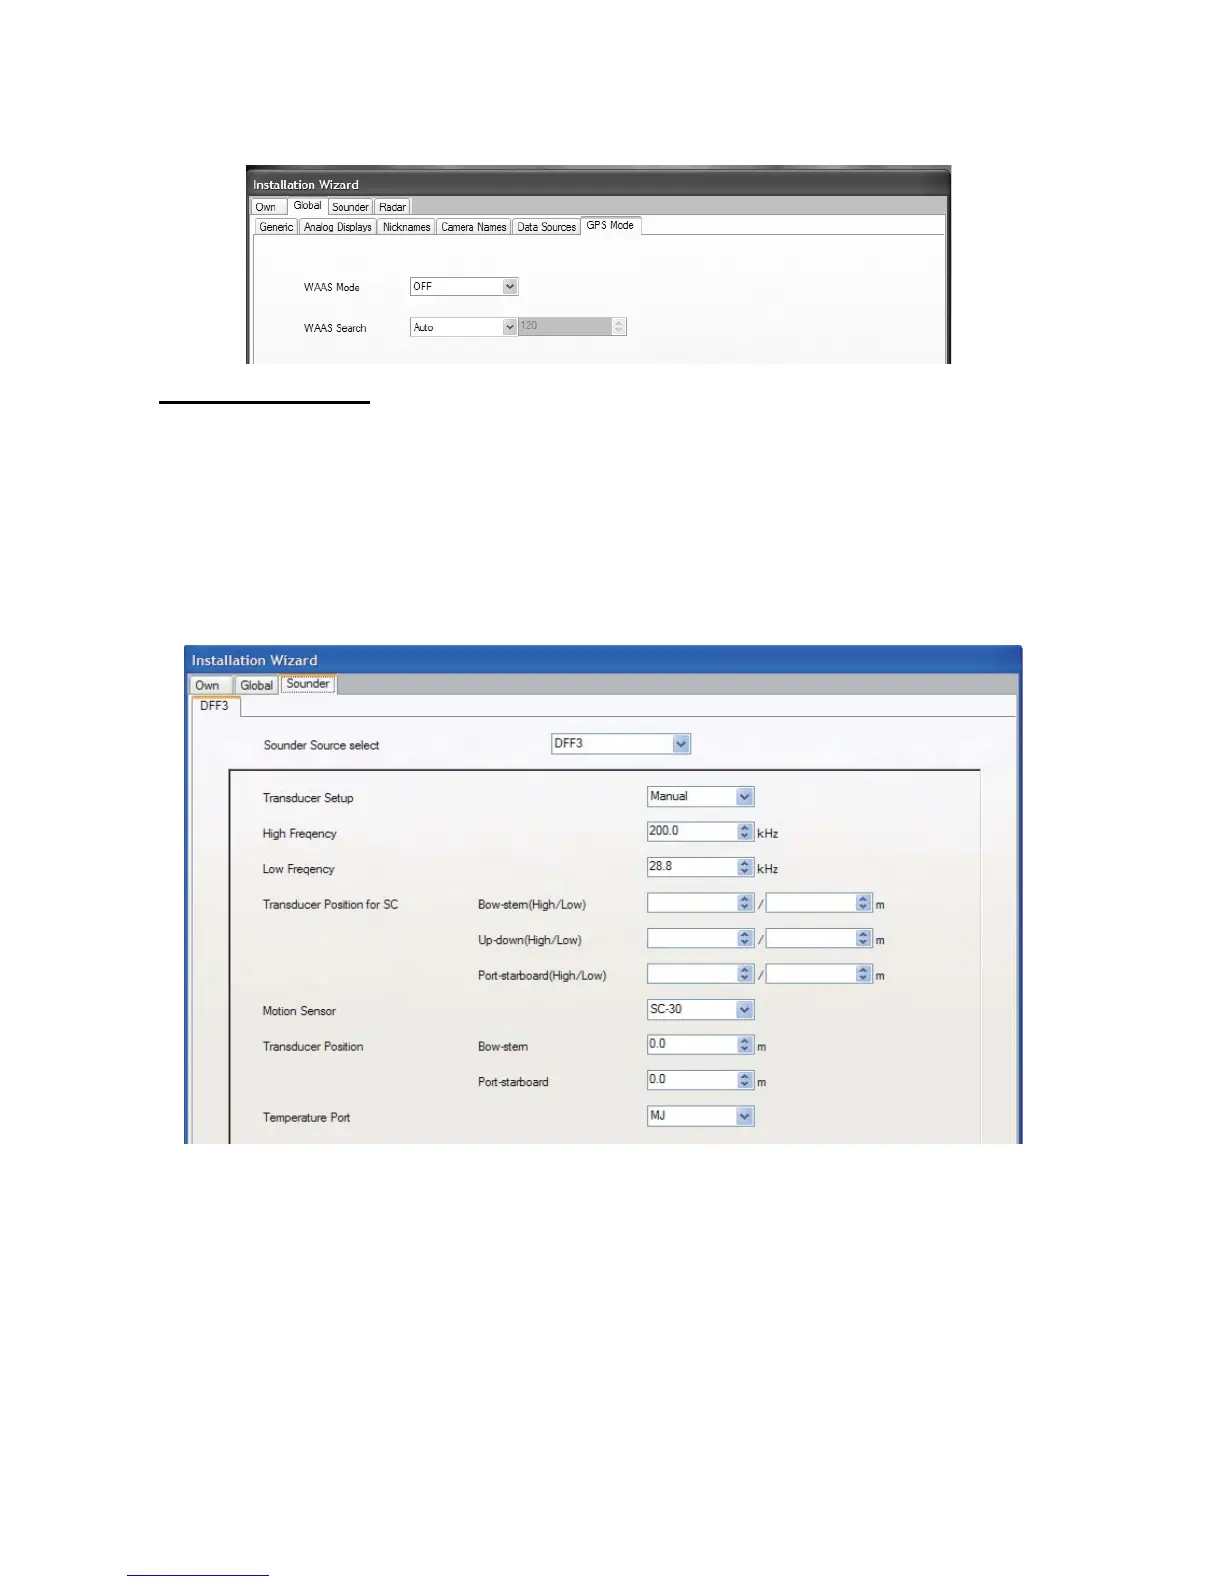
27.The GPS Mode tub appears when the GP-330B or WS-200 is connected. Set the WAAS
Mode and WAAS Search, and click the [Next] button. (See the list on page 21.)
Sounder, Radar tabs
When your MFD is connected to a sensor(s), i.e., network sounder (DFF, ETR or FCV-1150) and/
or radar sensor (DRS or FAR-2xx7), a dialog box appears with the name of the sensor shown in
a tab.
Sounder
28. Click the Sounder Source select dialog box, and choose the type of the network sounder.
(Setting for DFF series)
a) Click the Transducer Setup pull-down menu, and choose Model Number, TD-ID or Manual,
according to the transducer connected.
Model Number: Furuno’s transducer
TD-ID: Airmar’s transducer w/TD-ID
Manual: Transducers other than above
b) If you choose Model Number at step a), click the High Frequency and Low Frequency pull-
down menus, and choose the applicable model type. For TD-ID and Manual, set the high
and low frequencies.
c) For DFF1 or DFF1-UHD, click the Power pull-down menu, and choose output power of the
transducer.
DFF1: 1k (W) or 600W
DFF1-UHD: 1k (W)
 Loading...