V
FUTABA 9Z
THE UNOFFICIAL WORKSHOP MANUAL
WARNING: THE INFORMATION IN THIS MANUAL IS FOR INFORMATION PURPOSES ONLY AND MAY BE INCORRECT, CAUSE DAMAGE
TO YOUR RADIO OR INJURY TO YOURSELF AND OTHERS. IF YOU USE THIS MANUAL YOU DO SO SOLEY AT YOUR OWN RISK.
www.jamesandtracy.co.uk
Copyright 2012 jamesandtracy.co.uk
Page 68 of 84
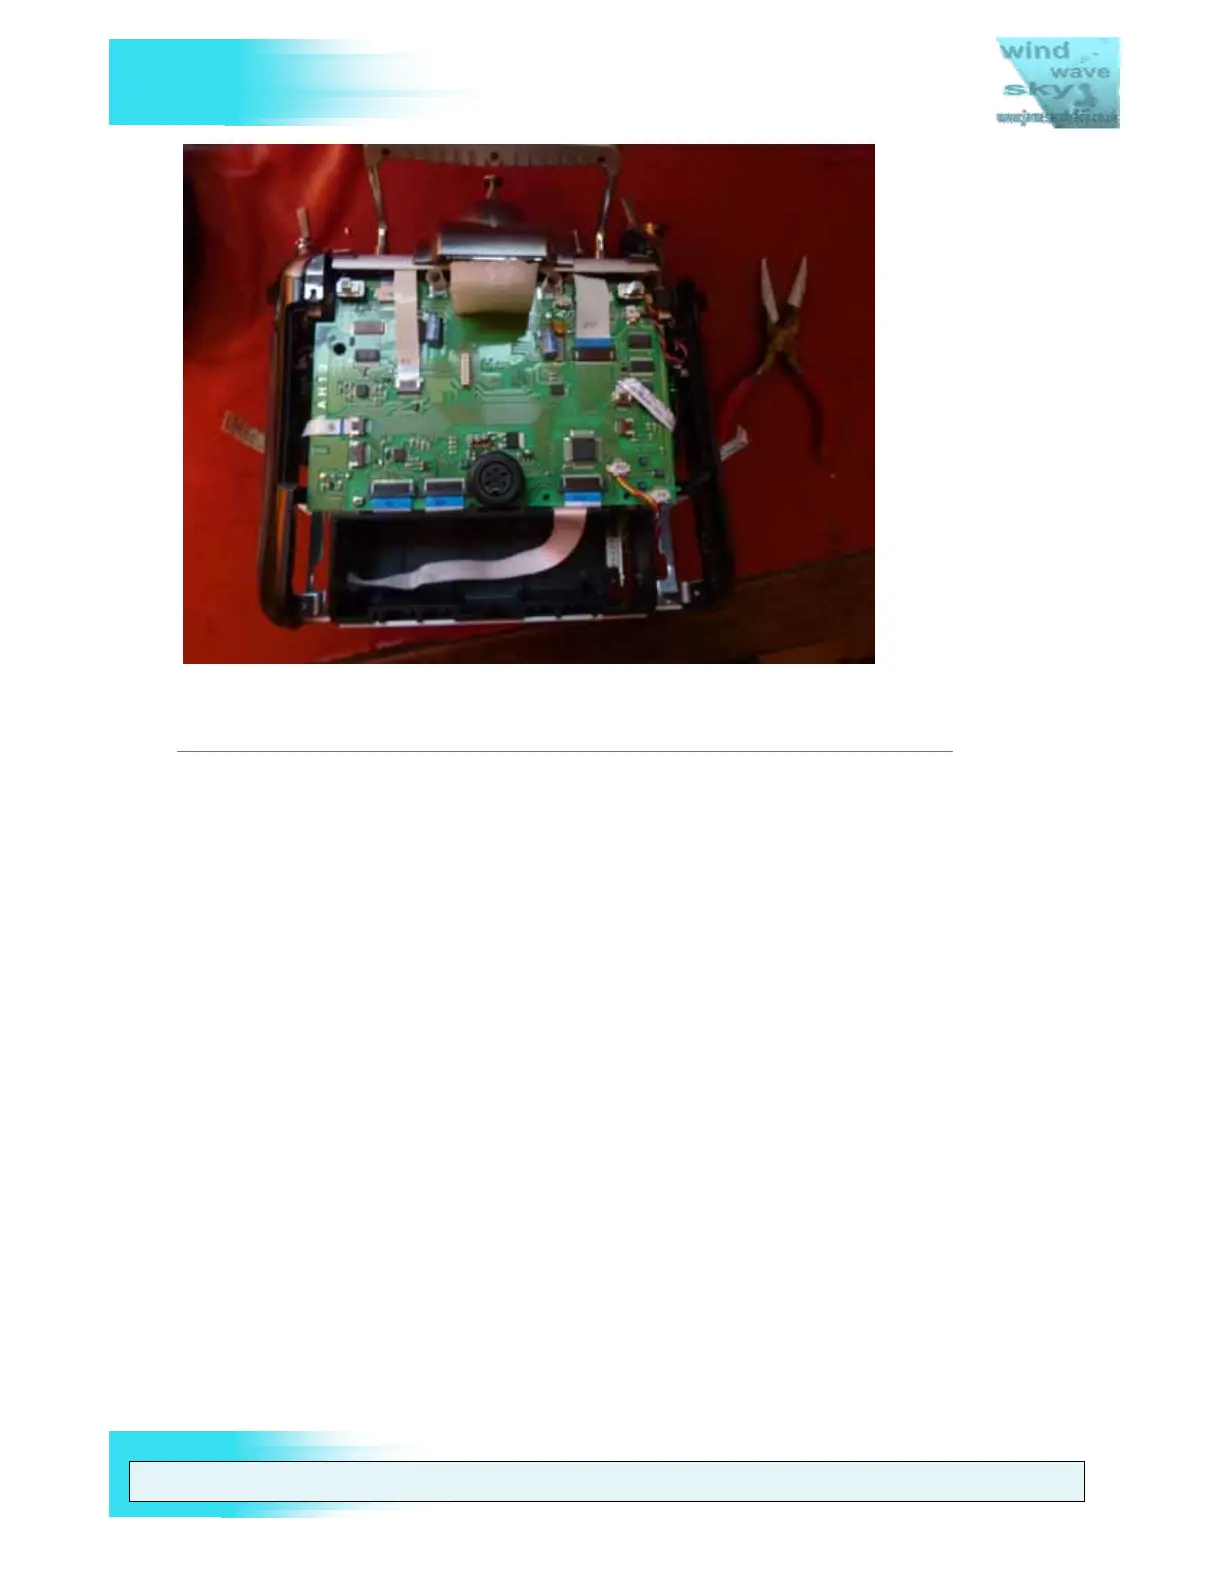
Figure 67 - Partial Step 3 Disassembly Option
Stage 4 Disassembly
1. Label all ribbon cables on the main PCB if you have not already done so. You
should know where and how to replace each and every one so take a photo with a
camera.
2. Pull out the two ribbon cables that prevent full access to the LCD Panel. Be careful
not to pinch or kink them and apply pressure as near to blue line on them (close to
the socket) as possible (see Figure 68). Remove using your fingers or a pair of
pliers protected with masking tape.