GAMATRONIC ELECTRONIC INDUSTRIES LTD.
iv P+ PREMIUM 60, Installation Guide,
1.4
8.
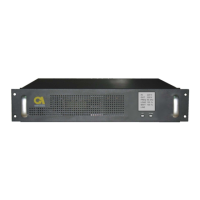
REMOTE MONITORING PANEL (OPTION) ........................................................................................... 54
9. RELATED PRODUCTS ..................................................................................................................... 56
9.1 G4 ....................................................................................................................................... 56
9.2 G-Eye ................................................................................................................................. 57
10. PREVENTIVE MAINTENANCE ........................................................................................................... 58
11. SERVICE AND REPAIRS .................................................................................................................. 58
12. POWER
+
PREMIUM 60 SPECIFICATIONS .......................................................................................... 59
LIST OF FIGURES
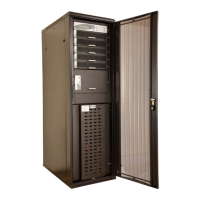
Figure 1: Major components of the Power+ Premium 60 UPS system ......................................... 4
Figure 2: Dimensions of the Premium 60 ........................................................................................ 5
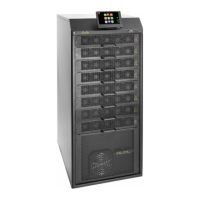
Figure 3: Battery cabinet ................................................................................................................... 5
Figure 4: Removing the side panels (part 1) ................................................................................... 6
Figure 5: Removing the side panels (part 2) ................................................................................... 6
Figure 6: Removing the bottom front panel .................................................................................... 7
Figure 7: The static switch circuit board ......................................................................................... 8
Figure 8: Left side screw holding static switch plate in place ...................................................... 9
Figure 9: Right-side screw holding static switch plate in place ................................................... 9
Figure 10: Push the plate in to expose 4 nuts and bolts .............................................................. 10
Figure 11: Removing the 4 bolts of the right front wheel ............................................................ 10
Figure 12: Two bolts are located under the metal panel .............................................................. 11
Figure 13: Remove the two rear wheels ........................................................................................ 11
Figure 14: Connection diagram (for completion by the customer) ............................................. 15
Figure 15: Ensure sufficient free space at front and rear of the UPS ......................................... 16
Figure 16: Wrong way to connect Power+ Premium 60 with a four-pole switch ...................... 19
Figure 17: Acceptable connection for grounded generator and 4-pole switch ......................... 20
Figure 18: Preferred generator (neutralized) and connection (3-pole) ....................................... 21
Figure 19: Main input and output terminals .................................................................................. 22
Figure 20: Connection diagram for standard 3-3 configuration .................................................. 23
Figure 21: Connection diagram for 3-3 config. w/ input isol. transformer ................................. 24
Figure 22: Internal wiring diagram of Gamatronic’s battery cabinet .......................................... 27
Figure 23: Closer view of dry contact terminals ........................................................................... 28
Figure 24: Close-up of dry contact terminals ................................................................................ 28
Figure 25: Pin usage in D9 alarm connector. ................................................................................ 29
Figure 26: Initial configuration wizard, "Start" screen ................................................................ 31
Figure 27: Initial config. wizard: password entry ......................................................................... 31
Figure 28: Initial config. wizard: set number of modules ............................................................ 32
Figure 29: Initial config. wizard: number of battery cabinets or battery compartments ......... 33
Figure 30: Initial config. wizard: set battery capacity .................................................................. 33
Figure 31: Initial config. wizard: set time zone ............................................................................ 34
Figure 32: Finish configuration wizard .......................................................................................... 34
Figure 33: The "alarms" icon indicates alarm conditions ............................................................ 35
Figure 34: IP address configuration ............................................................................................... 36
Figure 35: Push the module in gently but firmly ........................................................................... 39
Figure 36: Front panel of the UPS module .................................................................................... 40
Figure 37: Turning off a module ..................................................................................................... 41
Figure 38: "Status > Modules" screen ........................................................................................... 41
Figure 39: Verifying status of replacement module ...................................................................... 42
Figure 40: Status > Modules > Output ........................................................................................... 43
 Loading...