24
2 X 20V Li-ion 5-in-1 Cordless Garden Kit
AFTER SALES SUPPORT
e-mail: info.aldi@positecgroup.com
1300 889 028
MODEL No.: CBC36A • 10/2020 • 702316
(toll free)
AFTER SALES SUPPORT
(toll free)
2 X 20V Li-ion 5-in-1 Cordless Garden Kit
e-mail: info.aldi@positecgroup.com1300 889 028
MODEL No.: CBC36A • 10/2020 • 702316
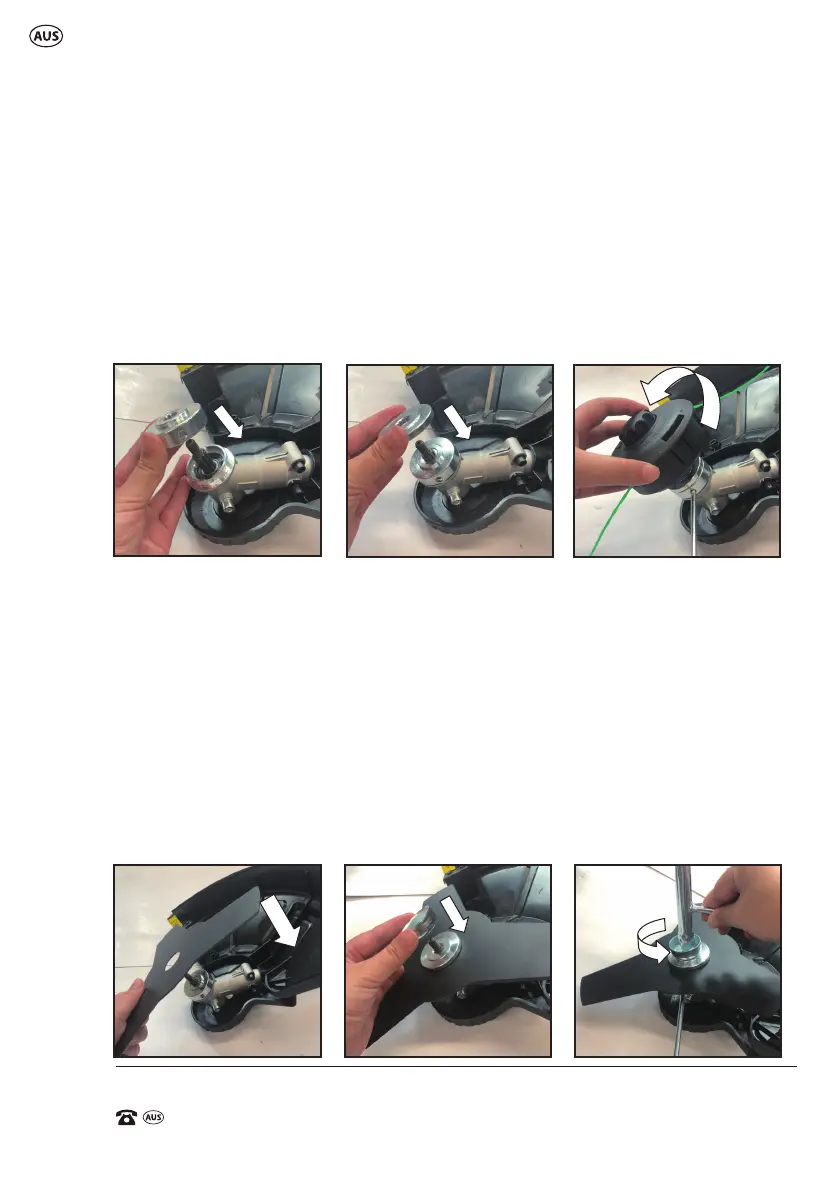
protector (10) lies over one of the two recesses on the sides of the spindle.
(Fig. E1)
2) Place the inner ange (12) with the recess over the protector (10). (Fig. E2)
3) Insert the spindle lock rod (42) through the hole on the side of the
protector (10) to x it in position securely. (Fig. E3)
4) Screw the line trimmer spool (9) onto the spindle by turning it anti-
clockwise. Hold the protector (10) in position with the spindle lock rod (42)
so that it does not rotate with the line trimmer spool (9). (Fig. E3)
You have successfully installed the line trimmer spool.
E1 E2
E3
Brush cutter assembly
1) Place the protector
(10)
over the spindle so that the hole on the side of the
protector
(10)
lies over one of the two recesses on the sides of the spindle.
(Fig. E1)
2) Place the brush cutter blade (18) over the protector (10) on the spindle. (Fig. F1)
3) Place the inner ange
(12)
with the recess on top of the brush cutter
blade (18).(Fig. F2)
4) Place the outer ange (19) with the opening upwards over the inner
ange (12) on the spindle. (Fig. F2)
5) Insert the blade nut (20) on top of the outer ange (19), onto the spindle
and tighten it by turning it anti-clockwise with the wrench (13mm) (41)
provided. (Fig. F3)
F1 F2
F3