Installation Procedures
Preparing the Radar Mounting Surface
Before you can mount the radar, you must choose a suitable mounting location (Mounting Considerations,
page2).
1 Secure the included mounting template to the surface at the mounting location, along the bow-stern axis, as
indicated on the template.
2 Drill the mounting holes using a 15mm (
19
/
32
in.) drill bit.
3 If you need to run the power and network cables through the mounting surface, select a location along
the center channel indicated on the template, drill a pass-through hole for the cables using a 32mm
(1
1
/
4
in.) drill bit, and route the cables through the surface (optional) (Wiring and Connection Considerations,
page5).
4 Remove the mounting template from the surface.
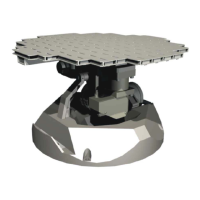
Mounting the Radar
Before you can mount the radar, you must select a mounting location (Mounting Considerations, page2) and
prepare the mounting surface (Preparing the Radar Mounting Surface, page3).
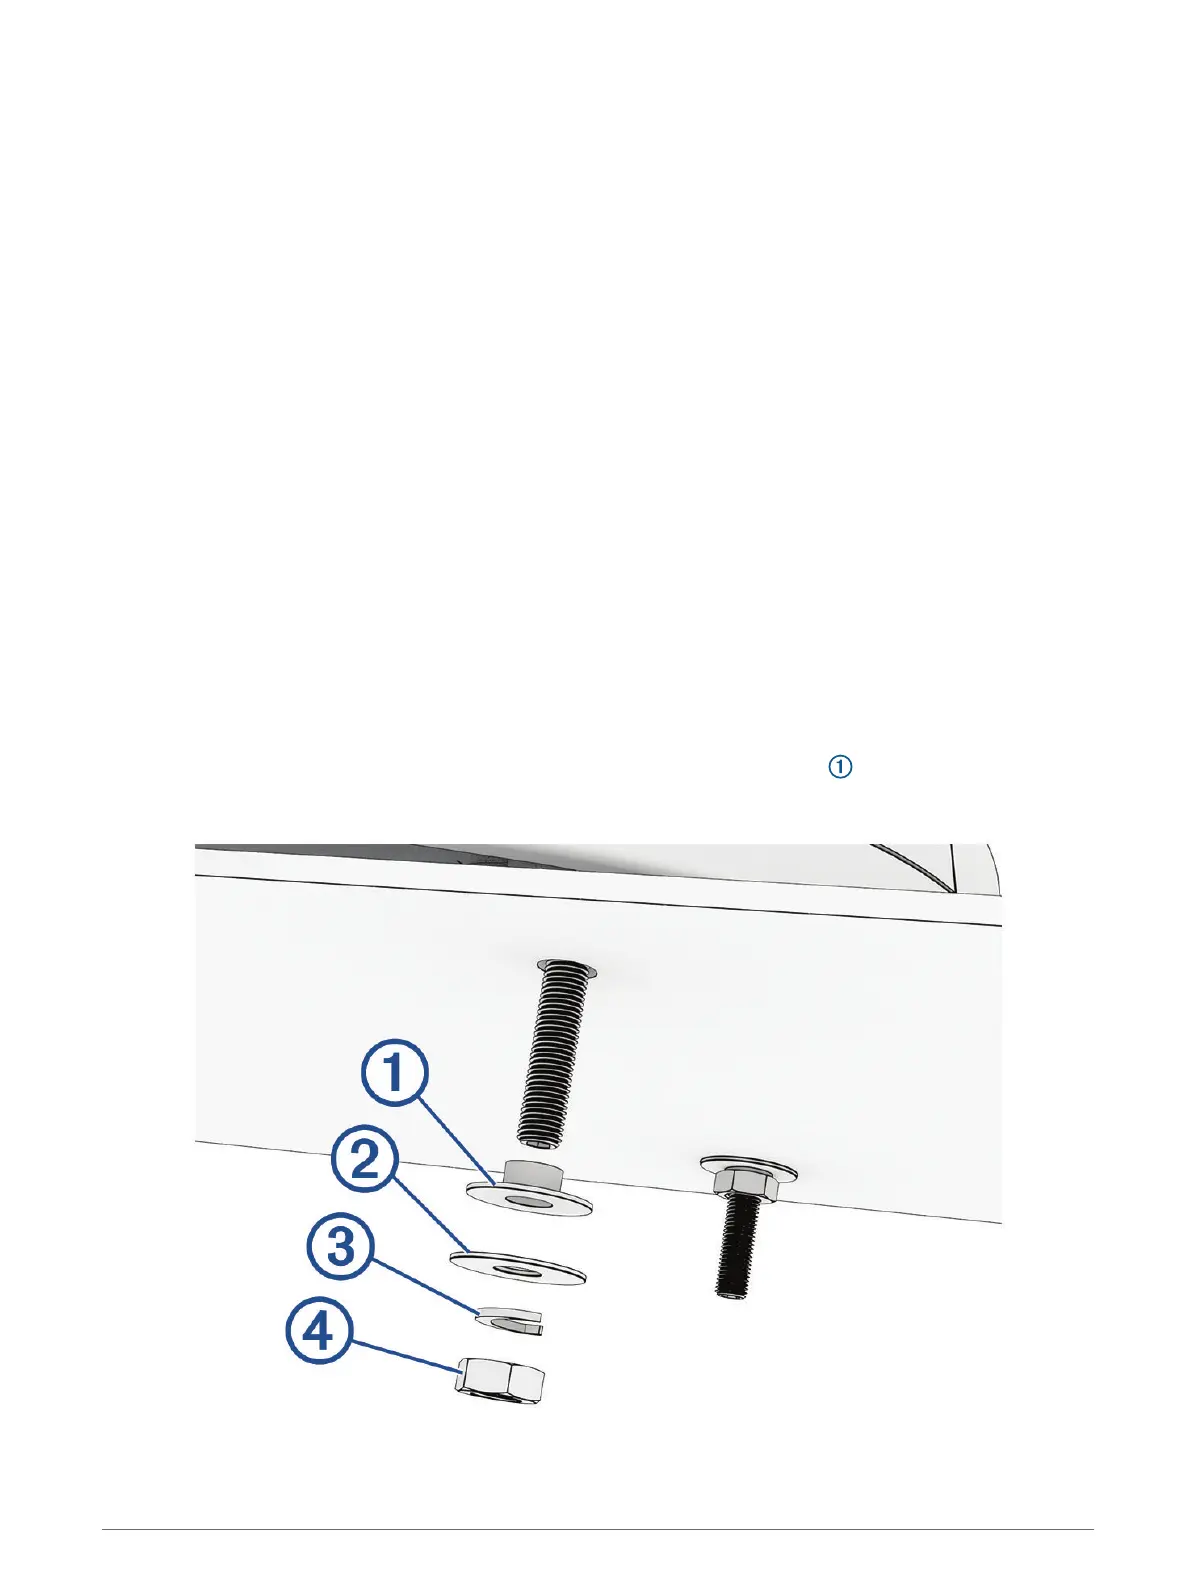
1 Place the radar onto the mounting surface, aligning the holes on the base of the radar with the holes you
drilled when preparing the mounting surface.
2 Apply the included primer (Petrolatum Primer) to half the length of each threaded rod.
3 Insert the primed end of each threaded rod through the mounting surface and into the radar base, and
tighten them using a 6mm hex wrench.
To avoid damaging the pedestal, you should stop tightening the threaded rods when they no longer turn
easily.
4 From under the mounting surface, place the included plastic shoulder washers over the threaded rods
and into the holes.
3
 Loading...