E-Stop Replacement
Parts needed:
1 E500187-07 Emergency stop switch (E-stop switch)
1 -------------- 6" zip tie
You will need:
• Channel locks
• Small screwdriver
• Wire cutters
• Rubber mallet
• Tape measure
1. Using a #2 Phillips screwdriver, remove the upper arm cover
(F14753-39) by removing the four black counter-sunk screws from
the front and back of the upper arm cover. On the back of the
cover, remove only the two screws which are located below the
red E-stop button.
2. Disconnect the wires going to the horn switch and the connector block. Remove the E-stop switch.
3. Remount the top cover back onto the neck.
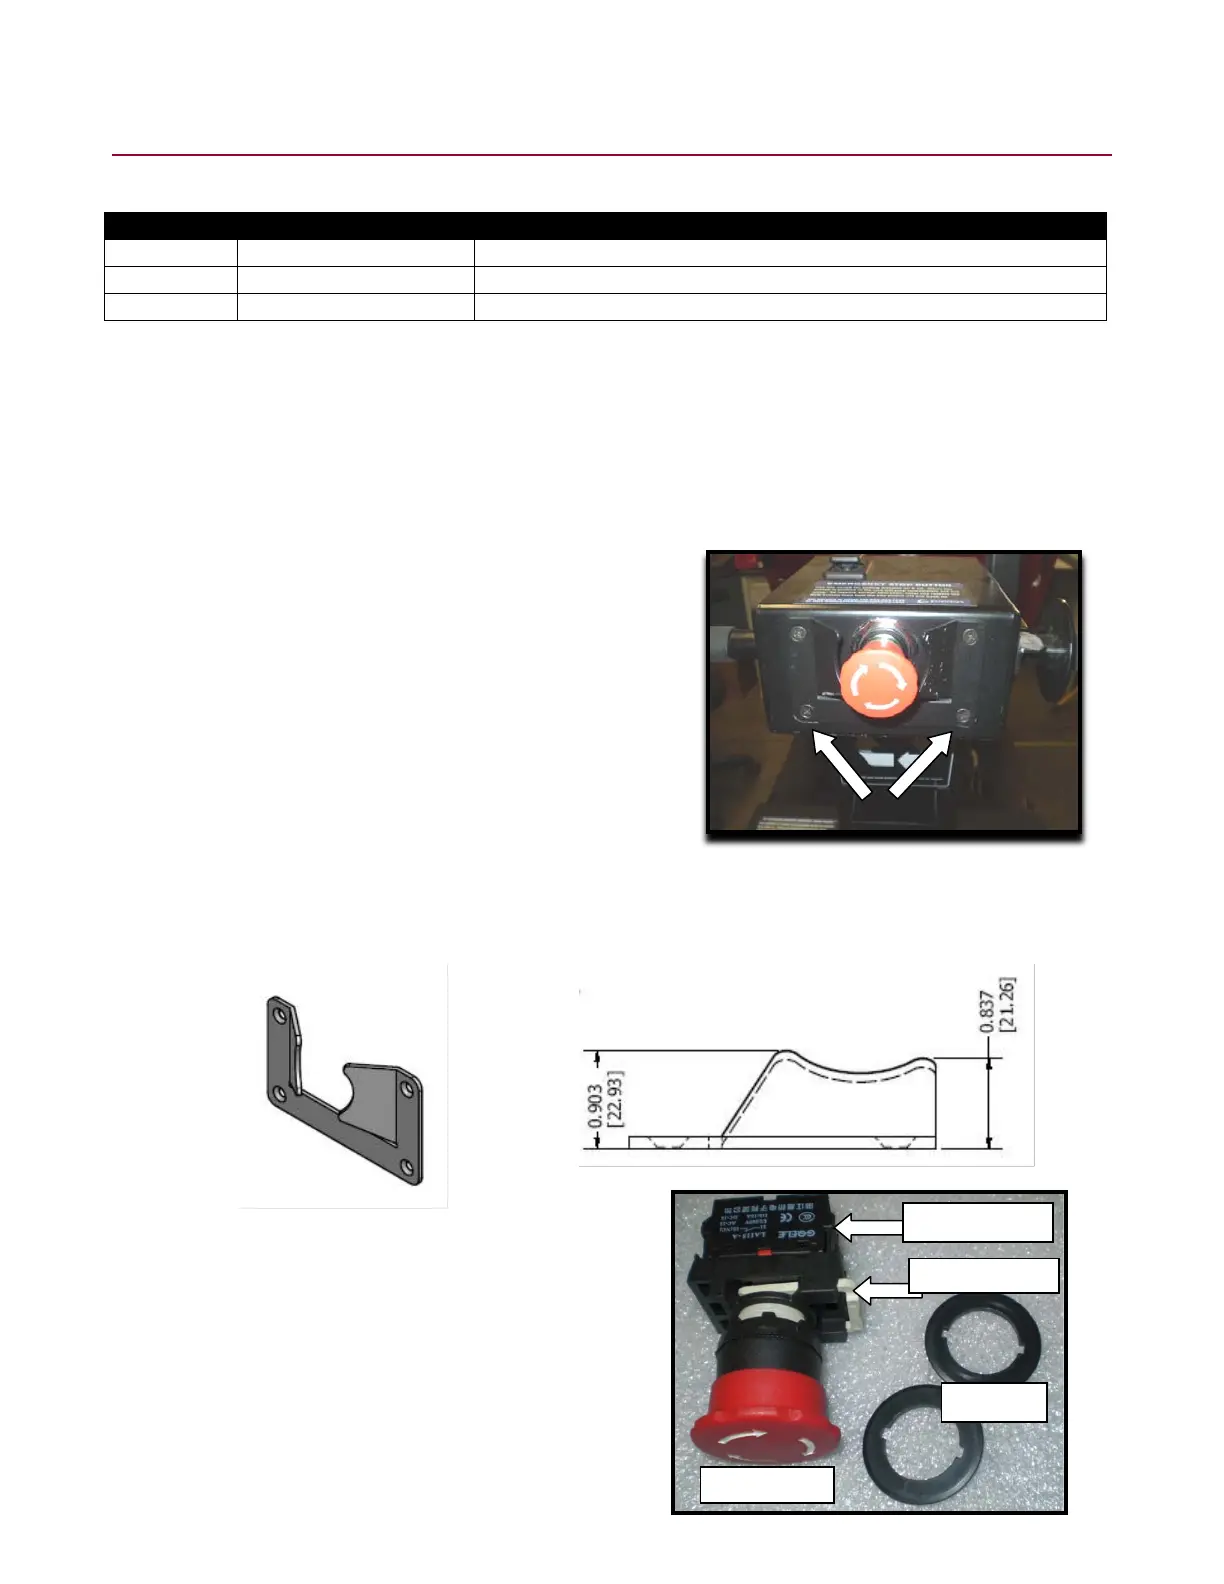
4. Take a rubber mallet and strike the two finger guards to bend them in. They should be bent in to a dimension of 0.837
[21.26] (top) and 0.903 [22.93] (bottom) from the top cover to the furthest point of the switch guard as shown below.
5. Unpack the E-stop assembly. The package comes with the red
E-stop switch, contact blocks, connector block, and two plastic
adapters (one side of the adapter has a flat surface and the
other side has a 1/32" boss).