- 40 -
MaxVIEW
MaxVIEWMaxVIEW
MaxVIEW™ 400
™ 400™ 400
™ 400 Video Management System.
Video Management System. Video Management System.
Video Management System.
PC Requirements.
PC Requirements.PC Requirements.
PC Requirements.
For optimal performance MaxVIEW 400 software requires the following minimum
requirements to operate on a computer:
C
CC
C
OMPONENT
OMPONENT OMPONENT
OMPONENT
M
MM
M
INIMUM
INIMUM INIMUM
INIMUM
R
RR
R
EQUIREMENTS
EQUIREMENTS EQUIREMENTS
EQUIREMENTS
Operating system
Operating systemOperating system
Operating system MS Windows XP\Vista \ Windows 7.
Processor
ProcessorProcessor
Processor Intel\AMD, Dual Core 2.2 GHz processor or better.
RAM
RAMRAM
RAM 4GB or higher
Free hard disk space
Free hard disk spaceFree hard disk space
Free hard disk space 250GB (recommended)
Monitor
MonitorMonitor
Monitor
SVGA 1280 x 768 x 32 bit true color
NOTE: A horizontal resolution of 1440 is required for
use of GPS mapping.
Video Adap
Video AdapVideo Adap
Video Adaptor
tortor
tor
3D accelerated graphics processor with 32 MB
dedicated video RAM
Connection
ConnectionConnection
Connection
USB 1.1, USB 2.0
100 Mbps Ethernet Network Card
TCP/IP Protocol
Description.
Description.Description.
Description.
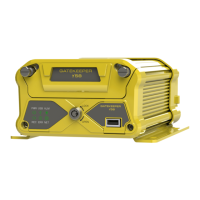
MaxVIEW 400 is designed to be used with the NiTRO 400 or NiTRO-X 400 series
of digital Video Recorders and is available as a free download from www.gatekeeper-
systems.com
or a printed version can be purchased as part of the Basic Kit (P/N: GSX-
NTR40X-DPBK-Basic Kit). It is recommended that MaxVIEW be run utilizing Calendar View,
as this will reduce the amount of time required to load the video ready for playback.
It is highly recommended that all work is saved and currently open programs are closed prior
to the installation of MaxVIEW 400. Please note that due to user account settings on Vista
and Windows 7, MaxVIEW 400 may not automatically install on these systems when the
setup program is run.
The example installation in the document will be based on a Windows XP Pro system. The
install package will be contained within a ZIP file.
- 29 -
Quick
QuickQuick
Quick Configuration
Configuration Configuration
Configuration
•
Once the bus ignition is triggered the unit should power up and begin recording within 1
minute.
•
The NiTRO
and NiTRO-X™ recorders need to be configured as per the specific settings
determined by the district. Use the remote control to navigate through the programming
options, aimed at the DVR.
Typical configuration requirements are as follows:
MOTOR
MOTORMOTOR
MOTOR
– License ID (program the Bus ID)
MOTOR
MOTOR MOTOR
MOTOR
–
Speed Check
-
SYSTEM
SYSTEMSYSTEM
SYSTEM
– Time Zone (change to reflect your current time zone)
SYSTEM
SYSTEMSYSTEM
SYSTEM
– Time Setup (verify the date/time is, correct)
RECORD
RECORD RECORD
RECORD
– Quality Settings, under REC MODE navigate down to any channels which
do not have cameras attached and change them from AUTO to OFF.
Once the unit has been tested, configured and the camera(s) aimed the unit can now be
properly shut down by turning the bus ignition off.
Menu System.
Menu System.Menu System.
Menu System.
Live.
Live.Live.
Live.
The live menu is divided into six configurable sections.
OSD
OSDOSD
OSD
Determines if camera information; date time, etc will be visible on the
screen and also on the recorded video file. Use the menu key to access the
drop down menu and then the Up or Down navigation keys to change the
value. Once the required option is highlighted, press the OK key.
Options: On / Off
Default Value:
Default Value: Default Value:
Default Value: OFF
OFFOFF
OFF
Background
BackgroundBackground
Background
Sets the background level of opacity for the menus. Use the menu key to
access the drop down menu and then the Up or Down navigation keys to
change the value. Once the required option is highlighted, press the OK key.
Options: Opaque; Semi-Transparent; Transparent.
Default Value:
Default Value:Default Value:
Default Value: Opaque
Opaque Opaque
Opaque