GASMAX/TX Operation & Maintenance Manual, Revision 1.0
Page 26
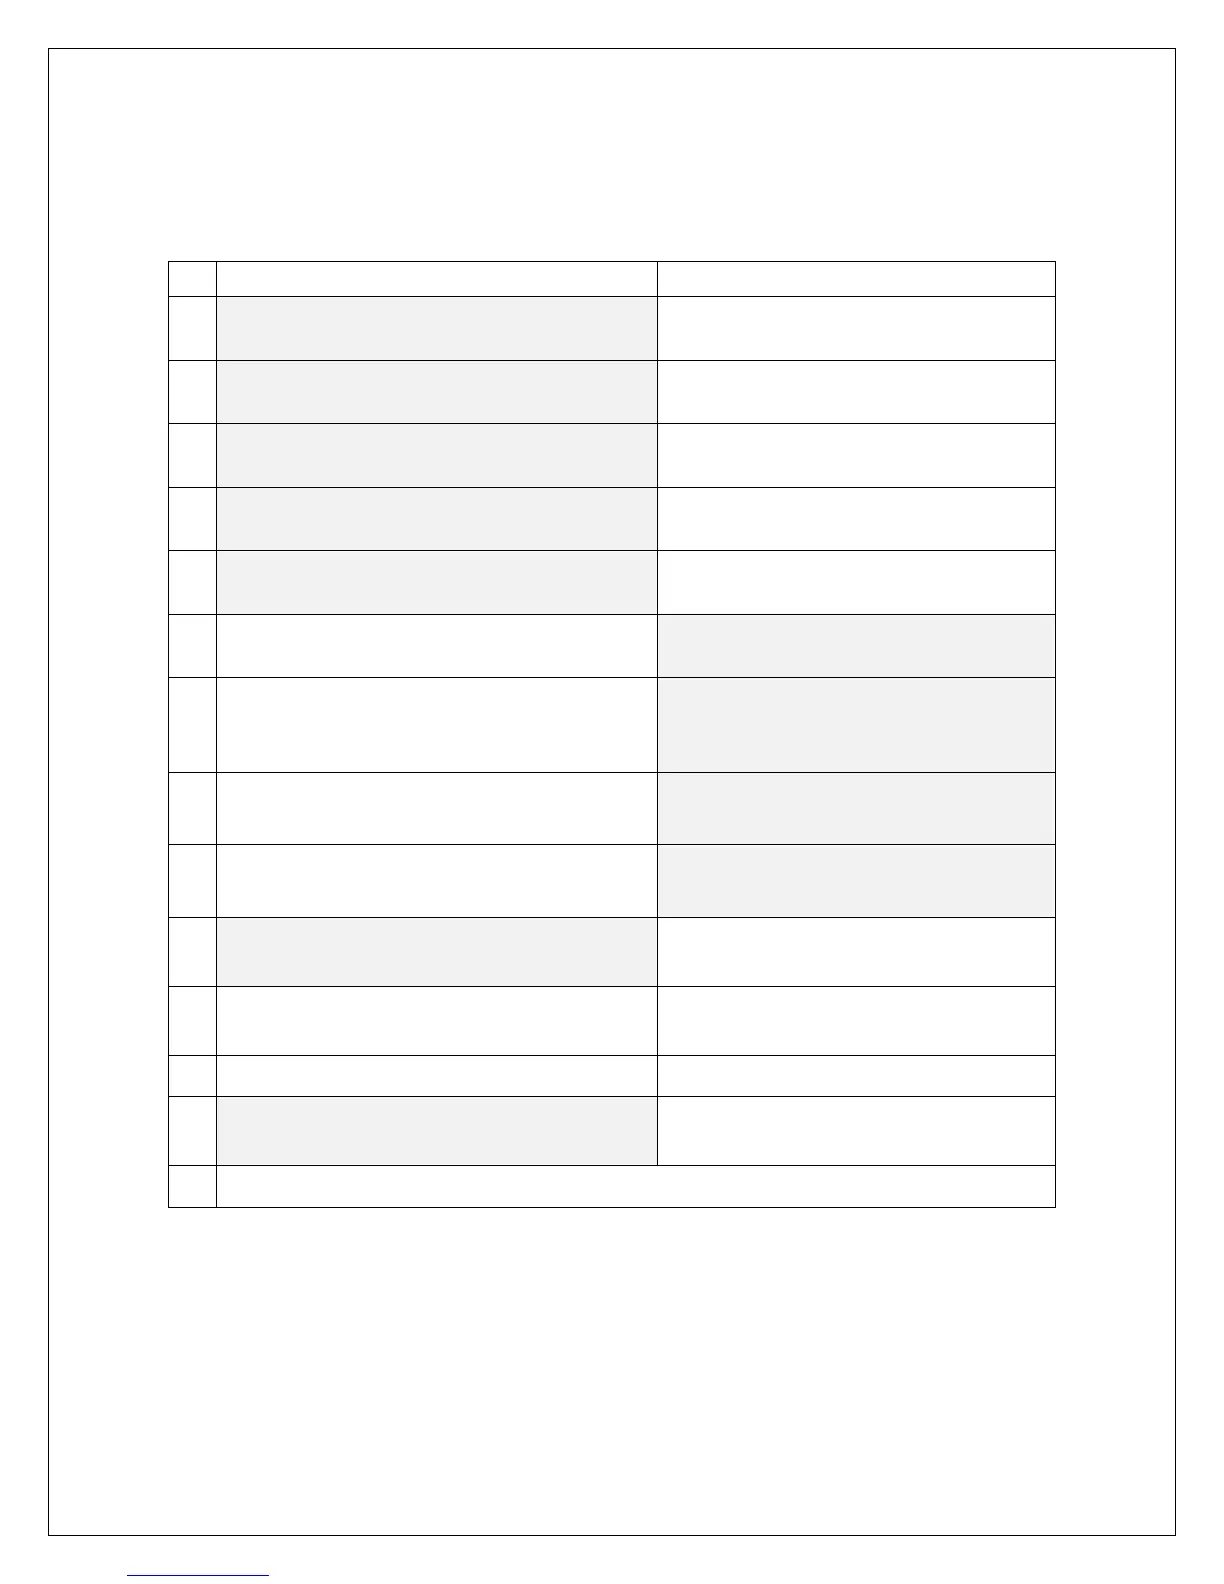
SETTING UP THE GASMAX/TX AND C2/TX WIRELESS SITE MANAGER
To successfully setup a wireless network, perform the following steps in order:
GASMAX/TX Gas Monitor C2/TX Wireless Site Manager
1
Apply AC or DC power to the C2/TX Wireless
System Manager
2
Select the desired network identifier
(“A” through “Z”)
3
If the C2/TX is the primary or only controller in the
network, select RF Mode = “Server”
4
If using 900 MHz radios, set the desired transmit
power output
5
Enable the desired number of wireless channels in
the C2/TX WSM
6
Turn on the GASMAX/TX by holding a magnetic wand
over UP/ON key for several seconds
7
Configure the network identifier (“A” thru “Z”) to match
that chosen for the C2/TX WSM or system controller.
Find in “Device Setup – RF Link”
8 Configure the RTU # (device ID) for a unique value
Find in “Device Setup – RF Link”
9 Program channel tag name (if desired)
Find in “Channel Setup”
10 Select C2/TX channel and set Remote Address
to match device ID on GASMAX/TX
11 Hold magnetic wand over UP key to force initial
transmission
Confirm reception of wireless transmission
and valid gas detector reading
xx Repeat for Each GASMAX/TX Repeat for each GASMAX/TX
12 Program relays and alarm conditions for
desired outputs
Perform end-to-end test using calibration or test gas
Figure 8-2; Step-by-Step Setup Checklist