GE HEALTHCARE
DIRECTION 5394152, Revision 5
LOGIQ™ P6/P6 PRO SERVICE MANUAL
Page 8-114 Section 8-4 - Software Installation
8-4-1 Installing Base Image Software (cont’d)
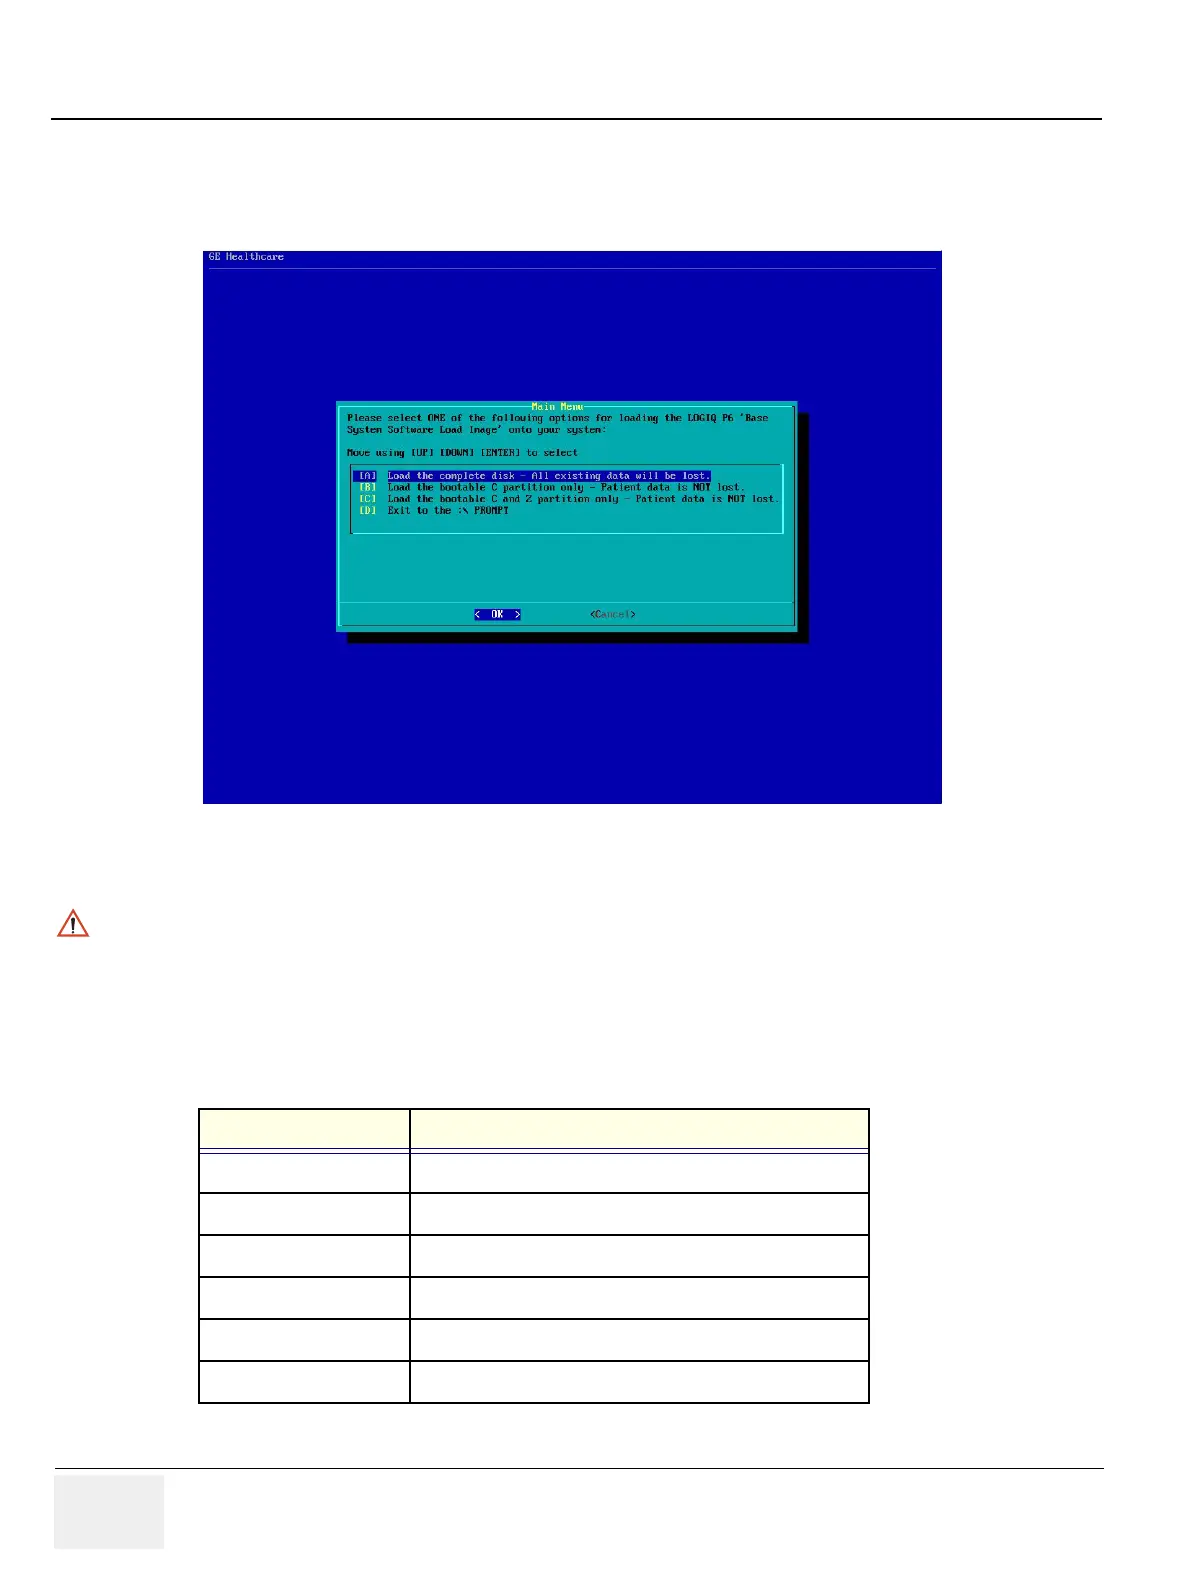
8.) Press Enter key and then the following screen will be shown. (If you want to abort installation
procedures, press CTRL+C.)
9.) Press A key to install the complete disk.
Figure 8-169 Base Image Software Installation Menu
NOTICE
Select A when installing the new HDD or upgrading from BT09. (HDD capacity should be minimum
120GB)
Select B when replacing C:\ partition only. It means all customer data are NOT deleted. The Ghost pro-
cedure is performed with data of the drivers D, E, F and Z left.”
Select C when replacing C:\ partition and Z:\ partition. It means all customer data are NOT deleted. The
Ghost procedure is performed with data of the drivers D, E and F left. Z:\ partition used for reloading
C:\ partition and Application software will be replaced.
Drive Partition Usage
(GRUB) grub data
C System Files and Application
D User Defined and Preset
E Patient Archive data
FSwap
Z C:\partition Repository for Reloading Function
Table 8-48 Drive Partition
 Loading...


