J
jennifer57Sep 23, 2025
What does 'SENSOR ERROR' mean on GE Masoneilan 12420 Transmitter?
- MmfullerSep 23, 2025
If the GE Transmitter displays 'SENSOR ERROR', it means the sensor and related components have failed. Replace the instrument.
What does 'SENSOR ERROR' mean on GE Masoneilan 12420 Transmitter?
If the GE Transmitter displays 'SENSOR ERROR', it means the sensor and related components have failed. Replace the instrument.
What to do if GE Masoneilan 12420 shows 'FLASH CHECKSUM ERROR'?
If your GE Transmitter shows a 'FLASH CHECKSUM ERROR', this indicates that the firmware checksum is invalid due to data corruption. To resolve this, remove power to the device for two minutes and restart it. If the failure persists, replace the device.
What causes 'VOLTAGE LOOP LOW' on GE Masoneilan 12420 Transmitter and how to fix it?
If the GE Transmitter displays 'VOLTAGE LOOP LOW', it indicates that the loop voltage or power supply voltage may have changed. Check the loop voltage and ensure it is above 10 VDC.
What causes 'VOLTAGE LOOP HIGH' on GE Masoneilan 12420 and how to resolve it?
If the GE Transmitter displays 'VOLTAGE LOOP HIGH', it indicates that the loop voltage or power supply voltage may have changed. Check the loop voltage and ensure it is below 40 VDC (or 30 VDC in intrinsically safe area).
What does 'NVM CHECKSUM SENSOR READ' mean on GE Masoneilan 12420?
If your GE Transmitter displays 'NVM CHECKSUM SENSOR READ', this indicates a permanent corruption of the content in non-volatile memory. Remove power to the device for two minutes and restart it. If the failure persists, replace the device.
What to do if GE Masoneilan 12420 has existing signal but nothing on LCD display?
If the GE Transmitter shows 'EXISTING SIGNAL BUT NOTHING ON LCD DISPLAY', the electronic module might be damaged and must be replaced at the factory.
Why output signal differs from value displayed on LCD of GE Masoneilan 12420?
If the GE Transmitter displays 'OUTPUT SIGNAL DIFFERS FROM VALUE DISPLAYED ON LCD', check the following: 1. Ensure the load resistance complies with Section 5.4.5 and the power supply applied to the main analog output signal is greater than 10 VDC. 2. Insert a reference milliamp meter in series with the 4-20 mA signal loop. 3. Recalibrate the internal milliamp meter via the ADVANCED SETUP menu. 4. Adjust [MA LOW:mA] until the reference milliamp meter indicates 4.000mA. 5. Adjust [MA HI:mA] until the reference milliamp meter indicates 20.000mA. 6. Use [SIG GENE] via the ADVANCED SETUP menu to generate various output signals and check the current signal versus the reference milliamp meter.
What causes linearity issues (output signal doesn't match liquid level) on GE Masoneilan 12420?
If the GE Transmitter displays 'OUTPUT SIGNAL DOES NOT MATCH WITH THE LIQUID LEVEL (LINEARITY ISSUE)', check the following: 1. Verify the calibration parameters, especially [MA LOW:mA], [MA HI:mA], [Z SHIFT:%] and [R SPAN:%]. 2. Check for potential faults in the VIEW ERROR menu and clear them with the [CLR ERR] function. 3. Ensure the torque arm is horizontal without the displacer. 4. Confirm the displacer isn't touching the chamber bottom or inner sides. 5. If possible, generate or simulate a mid-level and check the coupling, or perform a new coupling. Note: a new coupling requires a new zero and span calibration of the transmitter and the specific gravity meter. 6. If the problem persists, contact our After-Sales Department.
What does 'NVM MODULE WRITE' mean on GE Masoneilan 12420 Transmitter?
If the GE Transmitter displays 'NVM MODULE WRITE', it indicates a problem occurred when attempting to write to the non-volatile memory. Clear the condition using ValVue software or HART host. If the failure persists, replace the device.
What does 'VOLTAGE SHUNT DIAGNOSTIC LOW' mean on GE Masoneilan 12420 Transmitter?
If the GE Transmitter displays 'VOLTAGE SHUNT DIAGNOSTIC LOW', it means the internal voltage may have changed. Clear the condition using ValVue software or HART host. If the failure persists, replace the device.
Provides installation, operation, and maintenance instructions for the Masoneilan 12400 Series.
Details on using genuine GE Masoneilan spare parts for maintenance.
Information on GE's aftermarket support for valves and instruments.
Information on scheduled classes for customer service and instrumentation personnel.
Explains the 2-wire, loop-powered, digital displacement level transmitter/controller using buoyancy and torque tube principles.
Describes sensor analog signal conversion to digital and analog output signals.
Details ATEX/IECEx compliance for explosion proof and intrinsically safe installations.
Covers FM/FMc certifications for explosion proof and intrinsically safe installations.
General requirements for installation and maintenance under FM/FMc certifications.
Requirements for flameproof and dust ignition proof installations.
Requirements for intrinsically safe installation wiring and standards.
Explains the labeling for explosion proof and intrinsic safety approvals.
Guidelines and warnings for component replacement and repair procedures.
Wiring requirements for intrinsically safe installations as per ES-479.
Notes and clarifications for intrinsically safe installation procedures and requirements.
Details data indicated on the firm plate, including manufacturer and serial number.
Explains the numbering system for model, action, mounting, hazardous protection, and housing material.
Guidelines for storing and handling the instrument upon delivery.
Procedures and considerations for mounting the instrument on-site.
Instructions for external mounting of the displacer chamber model.
Instructions for mounting the instrument internally without a displacer chamber.
Guidance on using brackets for type 12404 displacer in motion.
Instructions for using a stilling well for type 12403 in turbulent liquid.
Information on standard left-handed and optional right-handed instrument case mounting.
Description of the electronic compartment, including cover, display, and pushbuttons.
Description of the mechanism compartment, including openings and factory assembly.
Mean Time Between Failure value for the 12400 Series instrument.
Description of the connection compartment, cover, and terminal board.
Details on terminal strip, ground terminal, and conduit connection.
Requirements for wiring and connections in hazardous area installations.
Table of allowable supply voltages for explosion proof and intrinsic safety.
Specifies the maximum power consumption of the instrument.
Information on output signal characteristics and maximum load resistance.
Overview of digital settings via pushbuttons, LCD, or HART communication.
Description of the LCD's display capabilities and usage for configuration.
Details the three pushbuttons and their functions for menu navigation.
Explains the three operating modes: NORMAL, SETUP, and FAILSAFE.
Details the communication paths and functions within the menus.
Describes operations and navigation within the NORMAL menu.
Outlines functions and navigation for the SETUP menu.
Explains how to define engineering units and level values.
Details settings for damping and smart filtering parameters.
Describes generating loop current for setting other instruments.
Explains automatic tuning of smart filtering parameters.
Details operations available when the instrument is in FAILSAFE mode.
Procedures for coupling the instrument to the torque tube, including simulation with weights or process liquid.
Steps to perform or check before calibration, defining operating mode and features.
Details operating rules and calibration principles for transmitters.
Explains calibration principles, specific gravity, and reduced span/zero shift functions.
Procedure for workshop calibration using weights for zero and span.
Procedure for calibrating the instrument on-site using process fluids.
Method for calibrating when level variations are not possible, using mechanical stops.
Procedure for setting mechanical stops (adjusting screws) for specific gravities.
Adjustment and calibration of the specific gravity meter function.
Overview of software temperature compensation for the torque tube.
Steps to enable and set torque tube temperature compensation via ValVue software.
How to set temperature compensation parameters using the ValVue suite software.
Describes the inputs and outputs for the controller function.
How to activate the controller function via push-buttons or ValVue software.
Setting parameters for controller function including setpoint, PID, and alarms.
Defines setpoint range, limits, and initial values.
Configuration options for controller action, derivative source, and dead zone.
Details PID parameters like P, I, D, Kd, and Beta.
Configuration of controller alarms based on absolute or deviation values.
Overview of the controller's PID operation, bargraphs, and status.
Lists relevant safety standards like IEC 61508 and IEC 61511.
Defines key terms related to functional safety, SIL, and failure rates.
Outlines probability of failure on demand and safety integrity levels.
Details assumptions and characteristics for safety functions.
Lists assumptions made for FMEDA and safety characteristic applicability.
Defines the primary safety function of the digital level transmitter.
Recommended proof test procedures to detect undetected dangerous faults.
Step-by-step instructions for removing the instrument case from the torque tube.
Procedures for installing the instrument case on different torque tube series.
Installation steps for 12200/300/400 series torque tubes.
Installation procedures for 12120/12800 series torque tubes.
Instructions for removing the case and torque tube sub-assembly.
Procedures for mounting the DLT case and torque tube sub-assembly.
Steps for reversing the instrument case mounting position.
Procedures and cautions for replacing electronic and mechanical components.
Checks for connection wires and polarities when no signal is present.
Action to take if a signal exists but the LCD is blank.
Troubleshooting steps for a static signal with varying level.
Checks and recalibration steps when output signal does not match LCD display.
Troubleshooting steps for issues with HART communication.
Steps to diagnose and resolve linearity issues with the output signal.
How to view and interpret diagnostic error messages.
Menu structure for transmitter models.
Menu structure for controller model.
Explanation of screens and navigation within the NORMAL menu.
Explanation of screens and navigation within the SETUP menu.
Entry point for the BASIC SETUP menu.
Detailed description of BASIC SETUP menu options (Part 1).
Detailed description of BASIC SETUP menu options (Part 2).
Graphical representation of the ADVANCED SETUP menu structure.
Detailed description of ADVANCED SETUP menu options (Part 1).
Detailed description of ADVANCED SETUP menu options (Part 2).
Graphical representation of the ENGINEERING UNIT menu structure.
Explanation of engineering unit settings.
Explanation of filtering settings.
Entry point for 4-20mA generation settings.
Entry point for automatic tuning settings.
Explanation of 4-20mA generation parameters.
Explanation of automatic tuning parameters.
Entry point for viewing instrument data.
Explanation of data fields available in the VIEW DATA menu.
Entry point for failsafe mode related menus.
Entry point for viewing error messages.
Explanation of screens and navigation within the FAILSAFE menu.
Explanation of screens and navigation within the VIEW ERROR menu.
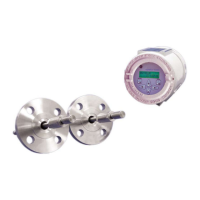
| Manufacturer | GE Masoneilan |
|---|---|
| Model | 12420 |
| Category | Transmitter |
| Type | Pressure Transmitter |
| Output | 4-20 mA |
| Process Connection | 1/2" NPT |
| Electrical Connection | 1/2" NPT |
| Material | 316 Stainless Steel |
| Operating Temperature | -40 to 185°F (-40 to 85°C) |