CHAPTER 6: SETPOINTS SETPOINTS MAIN MENU
350 FEEDER PROTECTION SYSTEM – INSTRUCTION MANUAL 6–3
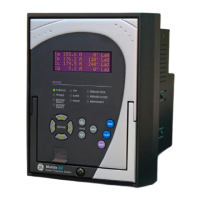
• Front panel, using the keypad and the display.
• Front USB port, or rear RS485, Ethernet 100 FX, Ethernet 10/100 BaseT (optional) port,
and a computer running the EnerVista SR3 Setup software supplied with the relay.
• Rear serial RS485, and a SCADA system running user-written software.
Any of these methods can be used to enter the same information. A computer, however,
makes entry much easier. Files can be stored and downloaded for fast, error free entry
when a computer is used. To facilitate this process, the GE EnerVista CD with the EnerVista
SR3 Setup software is supplied with the relay.
The relay leaves the factory with setpoints programmed to default values, and these
values are shown throughout the setpoint message illustrations. Some of these factory
default values can be left unchanged whenever they satisfy the application.
At a minimum, the S2 SYSTEM SETUP setpoints must be entered for the system to function
correctly. To safeguard against the installation of a relay into which setpoints have not
been entered, the Relay Not Ready self-test warning is displayed. In addition, the critical
failure relay will be de-energized. Once the relay has been programmed for the intended
application, the S1 RELAY SETUP/ INSTALLATION/ RELAY STATUS setpoint should be
changed from “Not Ready” (the default) to “Ready”.
Common setpoints
To make the application of this device as simple as possible, similar methods of operation
and similar types of setpoints are incorporated in various features. Rather than repeat
operation descriptions for this class of setpoint throughout the manual, a general
description is presented in this overview. Details that are specific to a particular feature are
included in the discussion of the feature. The form and nature of these setpoints is
described below.
• FUNCTION setpoint: The <ELEMENT_NAME> FUNCTION setpoint determines the
operational characteristic of each feature. The range for these setpoints is two or
more of: “Disabled”, “Enabled”, “Trip”, “Alarm”, “Latched Alarm”, and “Control”.
If <ELEMENT_NAME > FUNCTION: “Disabled”, the feature is not operational.
If <ELEMENT_NAME > FUNCTION: “Enabled”, the feature is operational.
If <ELEMENT_NAME > FUNCTION: “Trip”, then the feature is operational. When an
output is generated, the feature declares a Trip condition, and operates the Trip relay
(output relay 1), any other selected aux. output relays, and displays the appropriate
trip message.
If <ELEMENT_NAME> FUNCTION: “Alarm” or “Latched Alarm”, then the feature is
operational. When an output is generated, the feature declares an “Alarm” condition
which operates any selected aux.output relays and displays the appropriate alarm
message.
If <ELEMENT_NAME> FUNCTION: “Control” the feature is operational. When an output
is generated, the feature operates any selected output relays. The “Trip”, “Alarm”, and
“Control” function setpoint values are also used to select those operations that will be
stored in the Event Recorder.
• RELAYS (3–6) setpoint: The <ELEMENT_NAME> RELAYS (3-6) setpoint selects the
relays required to operate when the feature generates an output. The range is any
combination of the Auxiliary relays (Auxiliary Relays 3 to 6).
• PICKUP setpoint: The <ELEMENT_NAME> PICKUP setpoint selects the threshold
above which the measured parameter causes an output from the measuring element.
• DELAY setpoint: The <ELEMENT_NAME> DELAY setpoint selects a fixed time interval
to delay an input signal from appearing at the output. The time from a contact input
change of state or an AC parameter input level change to a contact closure of the 1
Trip relay, is the time selected as time delay in this setpoint plus approximately up to 2
power frequency periods.
Courtesy of NationalSwitchgear.com
 Loading...