,'##M#+'!+
) $%##,)$*))%!)
8C,"
AH4AG70DBCC>C741>CC><>52018=4C
5>A0B0=3;42CA82<>34;B
$))$"+#)#2>=C
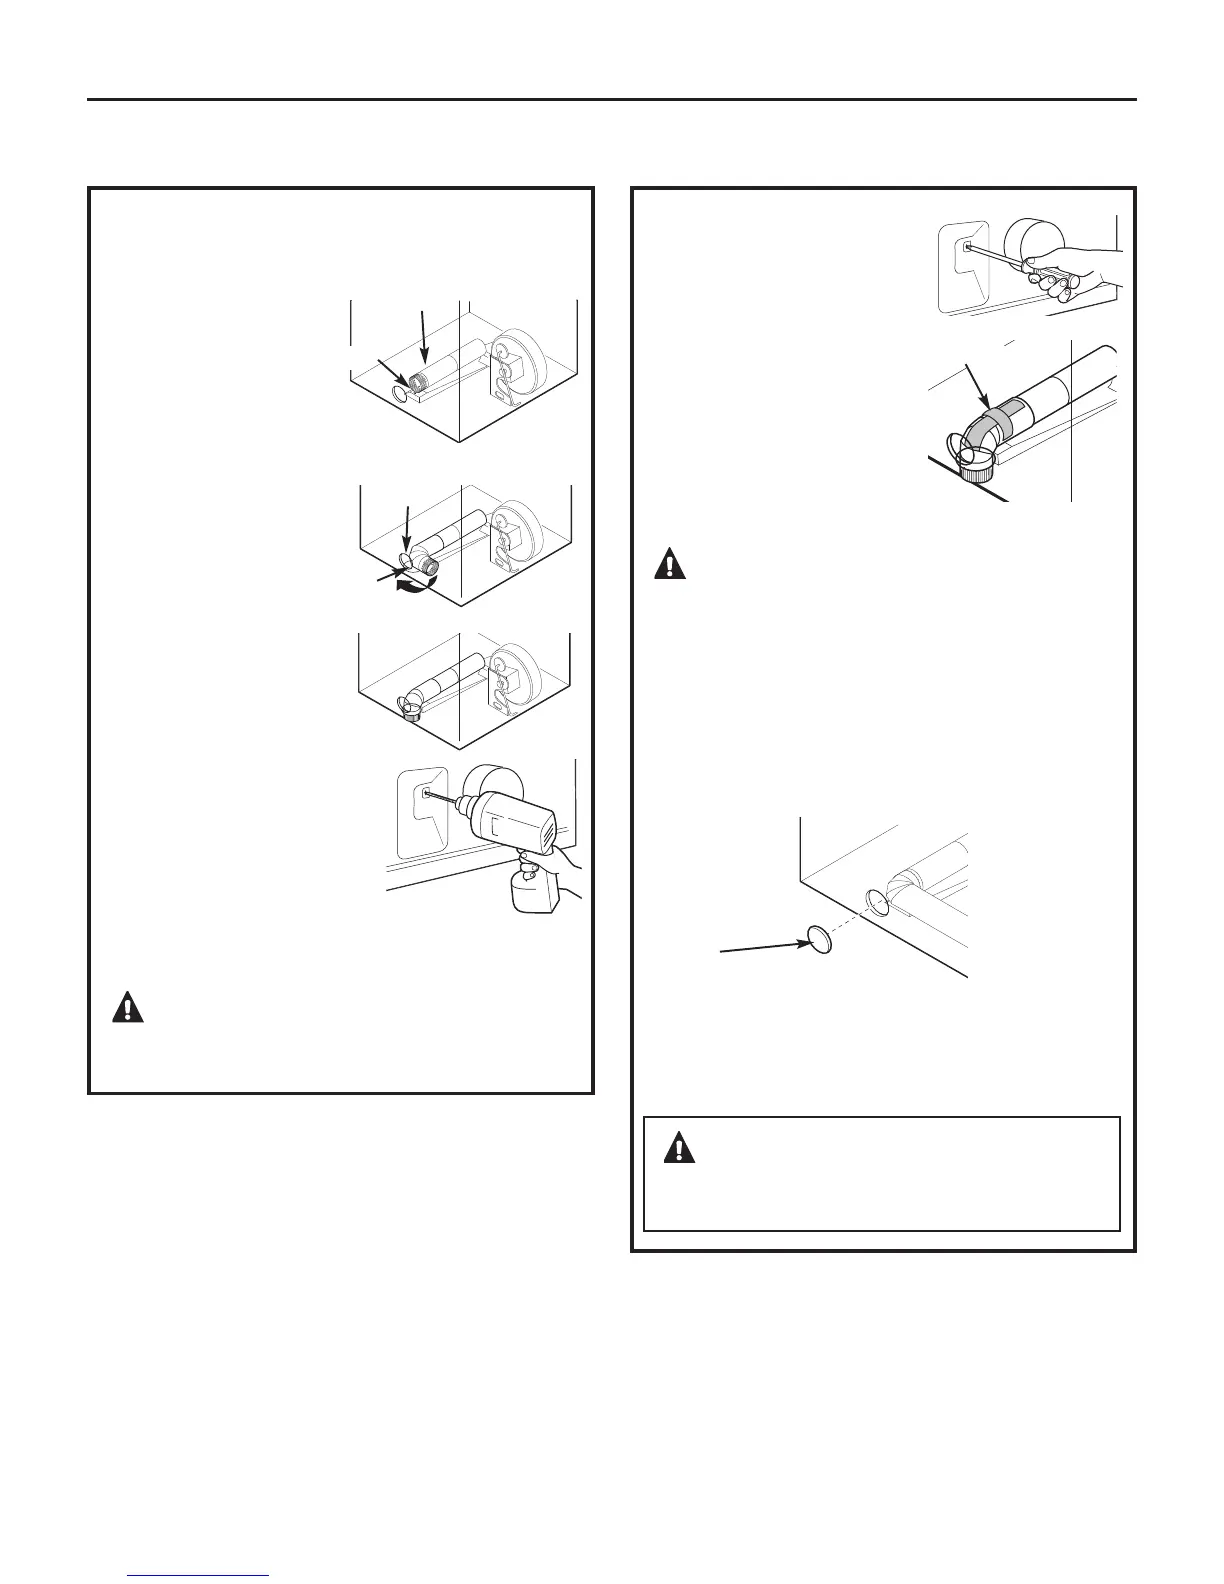
Connect standard metal elbows and ducts to
complete the exhaust system. Cover back opening
with a plate (Kit WE1M454) available from your
local service provider. Place dryer in final location.
#$+'%!))$''$#)
$))$"-*()
Plate
(Kit WE1M454)
=BC0;;0C8>==BCAD2C8>=B
##,*)
K Reconnect the cut
portion A of the
duct to the blower
housing.
K Tape the elbow
in a 90-degree
position to
prevent rotation.
K Insert the elbow
through the rear hole
and connect it to
portion A. Rotate
the elbow through
the bottom opening.
K While holding down
the pipe and elbow, using
your hand through the rear
opening, drill a 1/8″ hole
through the bottom tab
hole and the pipe as
shown in the illustration.
#$) Make sure the hole is drilled all the way
through the elbow and pipe.
*)$# 4BDA4=>CC>?D;;>A
30<064C744;42CA820;F8A4B8=B834C743AH4A
F74=8=B4AC8=6C743D2C
K While still holding down
the pipe and elbow from
the rear opening, screw
the pipes in place with
the previously saved screw.
K Apply duct tape
as shown on the joint
between the dryer internal
duct and the elbow.
#$) Make sure the tape
covers the screw hole in
portion A where it connects
to the elbow.
*)$# =C4A=0;3D2C9>8=CB<DBC
14B42DA43F8C7C0?4>C74AF8B4C74H<0H
B4?0A0C40=320DB40B054CH70I0A3
Duct tape
Rear hole
Bottom
opening
Bottom view
Portion “A”
Fixing hole