– 35 –
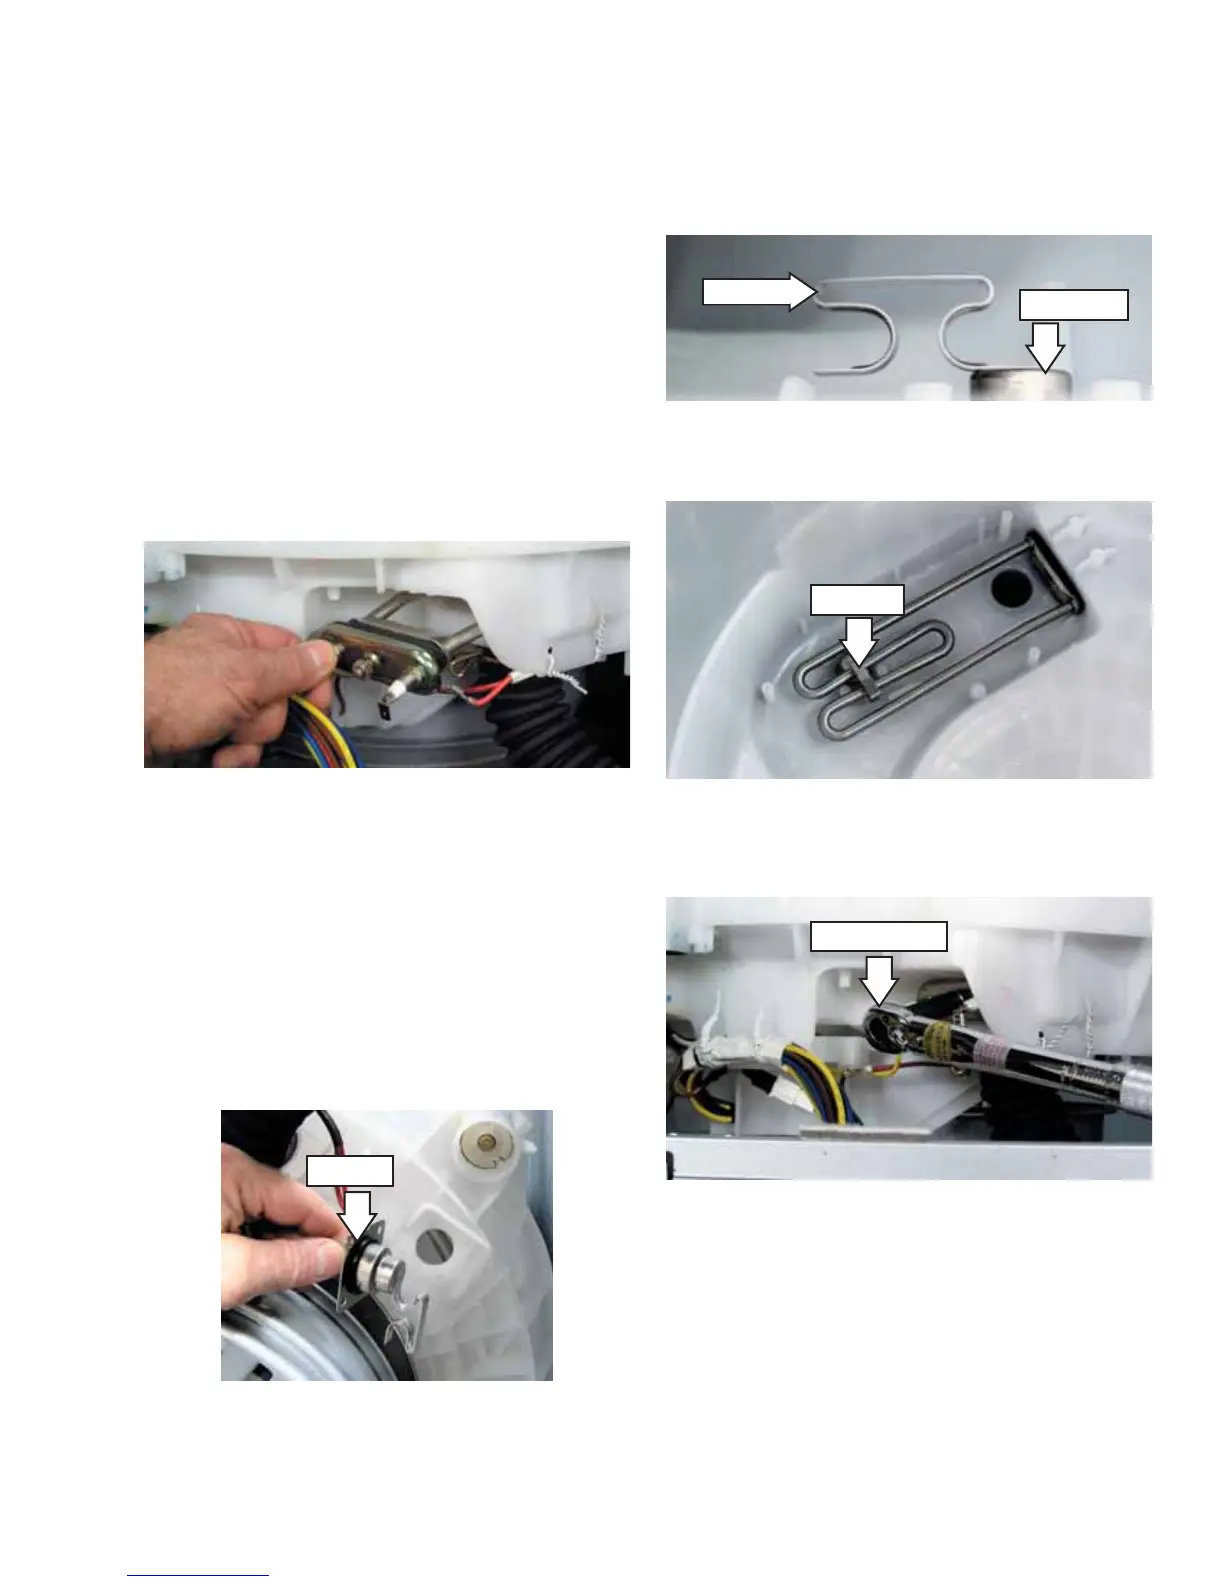
To install the heating element and hi-limit
thermostat:
1. Install the hi-limit thermostat.
Note: Be sure the O-ring is in place on the
thermostat prior to installing the thermostat.
Front View of Bracket Shown Inside Tub
Heating Element Shown Mounted Inside Tub with
Wash Basket Removed
3. Use a torque wrench to tighten the 10-mm hex
nut to 43.4 in. lbs of torque.
CAUTION: PROPER TORQUE MUST BE APPLIED TO
THE 10-MM HEX NUT TO ASSURE A PROPER SEAL.
UNDER TORQUING COULD CAUSE WATER LEAKAGE,
OVER TORQUING COULD CAUSE THE TUB TO CRACK.
4. Replace the heating element bracket using the
three 8-mm hex-head screws.
Bracket
Thermostat
Bracket
To remove the heating element and hi-limit
thermostat:
Note: The heating element must be removed before
removing the hi-limit thermostat.
1. Remove 2 wires from the terminal ends of the
heating element.
2 Remove the three 8-mm hex-head screws
holding the heating element bracket in place .
Remove the bracket.
3. Loosen the 10-mm hex-nut until the rubber
gasket is no longer compressed.
4. Grasp the heating element and pull it from the
tub.
Torque Wrench
O-Ring
5. Remove the 4 Phillips-head screws that hold the
hi-limit thermostat in place. Remove the hi-limit
thermostat.
2. Slide the element into the thermostat bracket
located inside the tub.
3. Seat the heating element in the tub opening.

 Loading...