3 / 48
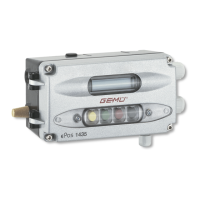
1435
e
Pos
Contents
1 General safety information 4
1.1 General information 4
1.2 Explanation of symbols and signs 4
1.3 Safety notes 4
1.4 Correct use 5
1.5 Information on use in damp conditions 5
1.6 Mounting position 5
1.7 Tools required for installation and assembly 5
2 Manufacturer's information 5
2.1 Transport 5
2.2 Delivery and performance 5
2.3 Storage 5
2.4 Function 5
2.5 Fail safe function 5
3 Diagrammatic view of the inputs and outputs 6
4 Mechanical mounting 7
4.1 Mounting to linear actuators 7
4.1.1 Preparation of the actuator 7
4.1.2 Assembling the travel sensor 7
4.1.3 Mounting the positioner 7
4.2 Mounting to quarter turn actuators 7
4.2.1 Preparation of the actuator 7
4.3 Remote mounting 8
5 Pneumatic connections 8
5.1 Replacing the fi lter strainers 8
6 Electrical connections 8
6.1 Version with terminals (standard) 8
6.2 Version with connector (optional) 9
6.3 Checking the mounted assembly 9
7 Operation 9
7.1 Operating and display elements 9
7.2 Operator interfaces 9
7.2.1 System mode "CLASSIC" (simple basic functions) 9
7.2.2 System mode "ADVANCED"
(extended diagnostic facilities) 9
7.2.3 Changing the operator interfaces 10
7.3 Menu levels 10
7.3.1 Working level (AUTO and MANUAL) 10
7.3.2 Confi guration level (CONFIG) 10
8 Commissioning 10
8.1 General information 10
8.2 Initial commissioning 10
8.2.1 Without factory setting
(when supplied without a valve) 10
8.2.2 With factory setting (positioner supplied mounted
to the valve) 12
9 System mode CLASSIC 13
9.1 Operating modes 13
9.1.1 Automatic operation (A:)AUTO) 13
9.1.2 Manual operation (B: MANUAL) 13
9.1.3 Confi guration (C: CONFIG) 13
9.1.3.1 Parameter setting - new positioners
(from software V2.0.0.0) 13
9.1.3.2 Parameter setting - old positioners
(up to software V1.3.1.8) 13
9.2 Parameter table 14
9.3 Explanation of parameters 15
10 System mode ADVANCED 18
10.1 Menu level 18
10.1.1 Automatic operation (AUTO) 18
10.1.2 Select operating mode (Mode) 18
10.1.3 Manual operation (MANUAL) 18
10.1.4 Confi guration (SETUP) 18
10.2 Confi guration menu (SETUP) 19
10.2.1 Menu structure 1. Service 19
10.2.2 Menu structure 2. SetBasics 19
10.2.3 Menu structure 3. SetFunction 20
10.2.4 Menu structure 4. SetCalibration 20
10.2.5 Menu structure 5. Communication 20
10.2.6 Menu structure - Complete overview 21
10.3 Parameter table 22
11 Explanation of parameters 24
11.1 Service 24
11.1.1 Scanning the input and output signals 24
11.1.2 Activating or deactivating the user access 25
11.1.3 Reading out, deleting and deactivating error
messages 26
11.1.4 Display serial number, software version and enter
TAG no. 26
11.2 2 SetBasics 27
11.2.1 Defi nition of set value input 27
11.2.2 Reset 27
11.2.3 Initialisation 27
11.2.4 Making the display settings 29
11.3 3 SetFunction 29
11.3.1 Setting the positioner parameters 29
11.3.2 Setting the dead zone 30
11.3.3 Setting alarm output functions and switch points 31
11.3.4 Setting error output functions 31
11.3.5 Setting position feedback function and limiting
values 32
11.3.6 Storing parameter sets 32
11.4 4 SetCalibration 33
11.4.1 Setting direction of actual value display 33
12 Error messages 35
13 Table for changes to the factory settings 36
14 Disposal 37
15 Returns 37
16 Information 37
17 Technical data 38
18 Order data 39
19 Fail safe function 45
List of terms 46