6
Step 1:
Open the web browser on your computer and check
if your connection is working. If your connection is
working, you can skip step 2 and 3.
Step 2:
(Instructions for Windows Vista / Windows 7; for
other operating systems please contact your service
provider)
• On your computer, go to “Start” at the bottom
left corner and click on “Control Panel”.
• The Control Panel window will appear. Click
on “View Network Status and Tasks” at the
“Network and Internet” category.
• The Network and Sharing Centre will appear:
• For Windows Vista: Click on “Manage
network connections” at the top left hand
corner.
• For Windows 7: Click on “Change adapter
settings” at the top left hand corner.
• Right click on the correct “Local Area
Connection” by identifying the correct network
card and click “Properties”.
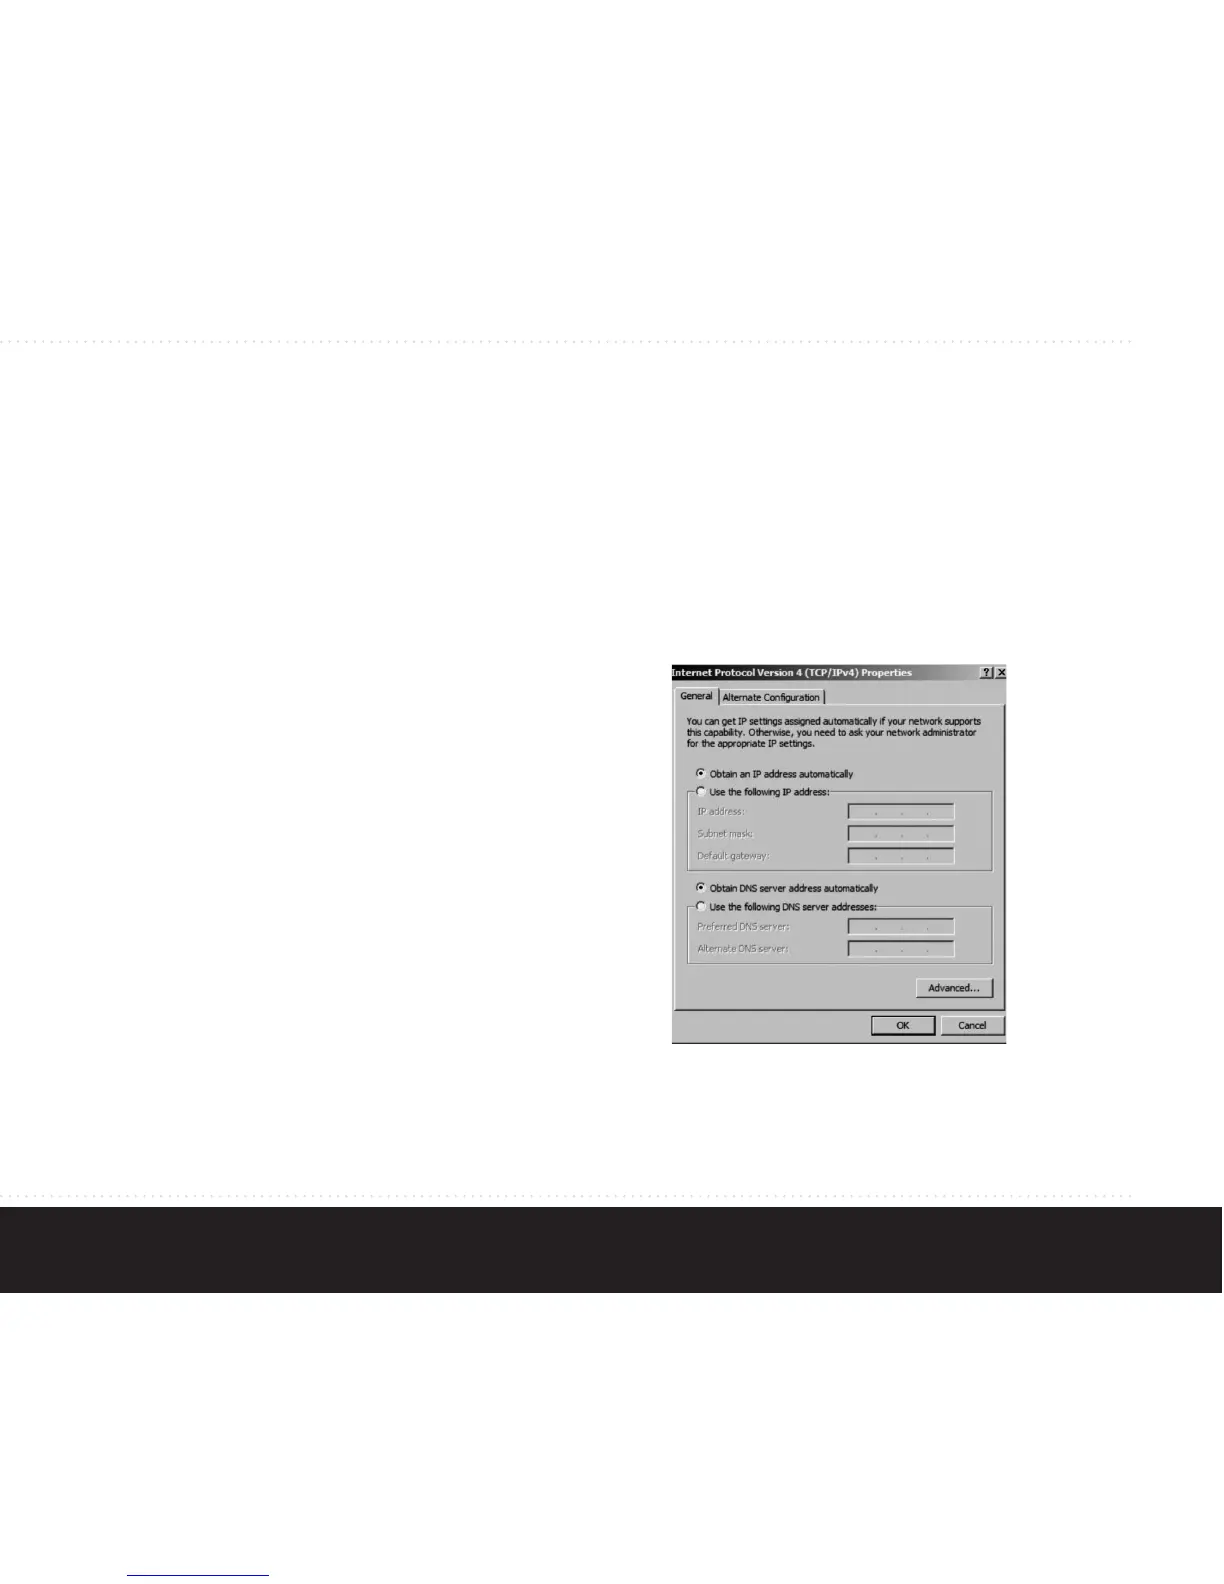
• Select “Internet Protocol Version 4 (TCP/IPv4)”.
Click on “Properties”
• Select “Obtain an IP address automatically”,
and “Obtain DNS server address automatically”.
Save the settings by clicking “OK”, and close the
window by clicking “OK” or “Close”.
Step 3:
Open your web browser and check if your connection
is working. If your connection is not working, please
refer to the troubleshooting section.
3. network setup