3. Wiring (cont').
• Securely fasten wires to wall as you go.
-Use insulated staples (included).
[30]
-Staples should be snug only.
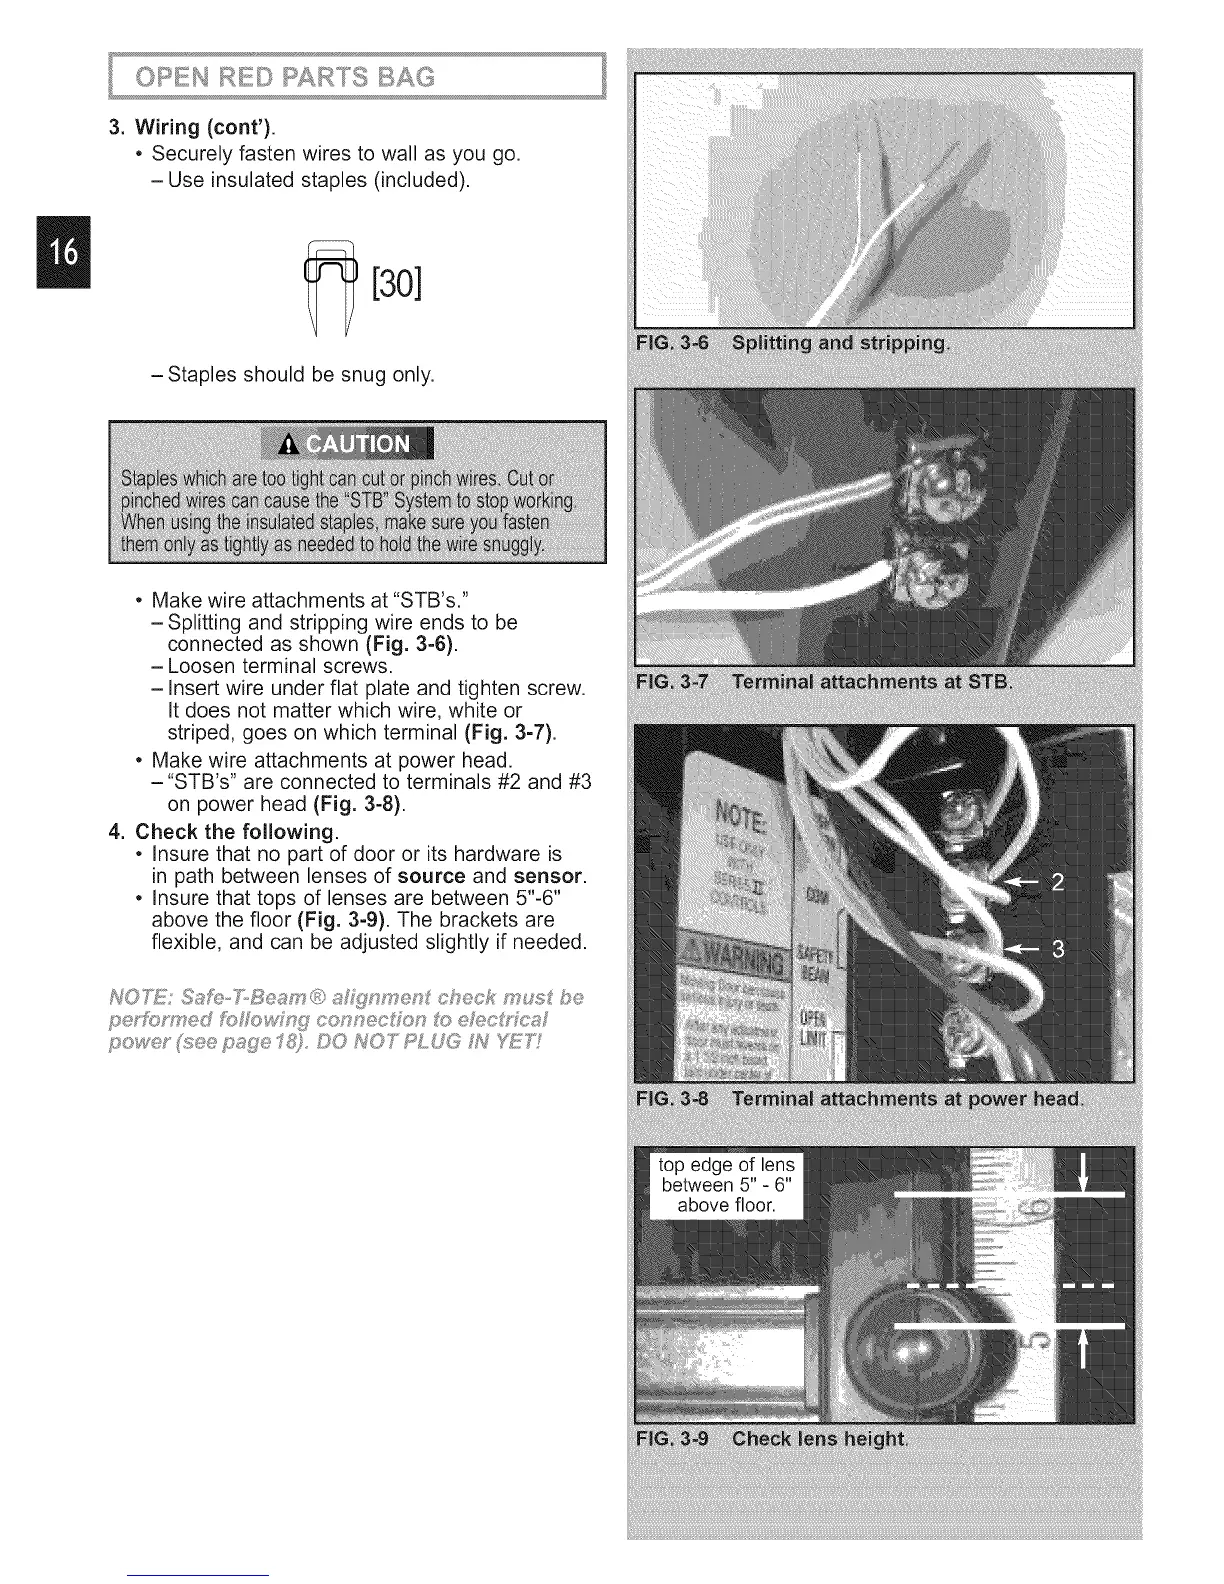
• Make wire attachments at "STB's."
-Splitting and stripping wire ends to be
connected as shown (Fig. 3-6).
-Loosen terminal screws.
-Insert wire under flat plate and tighten screw.
It does not matter which wire, white or
striped, goes on which terminal (Fig. 3-7).
• Make wire attachments at power head.
-"STB's" are connected to terminals #2 and #3
on power head (Fig. 3-8).
4. Check the following.
• Insure that no part of door or its hardware is
in path between lenses of source and sensor.
• Insure that tops of lenses are between 5"-6"
above the floor (Fig. 3-9). The brackets are
flexible, and can be adjusted slightly if needed.
pedo_ry ed [_Joyu:_ng connecd®n _ e_:_c#fcs
powe_ °(_,;eep_._ge"I_;},O0 hIOT PLUG t_d';_7S
 Loading...