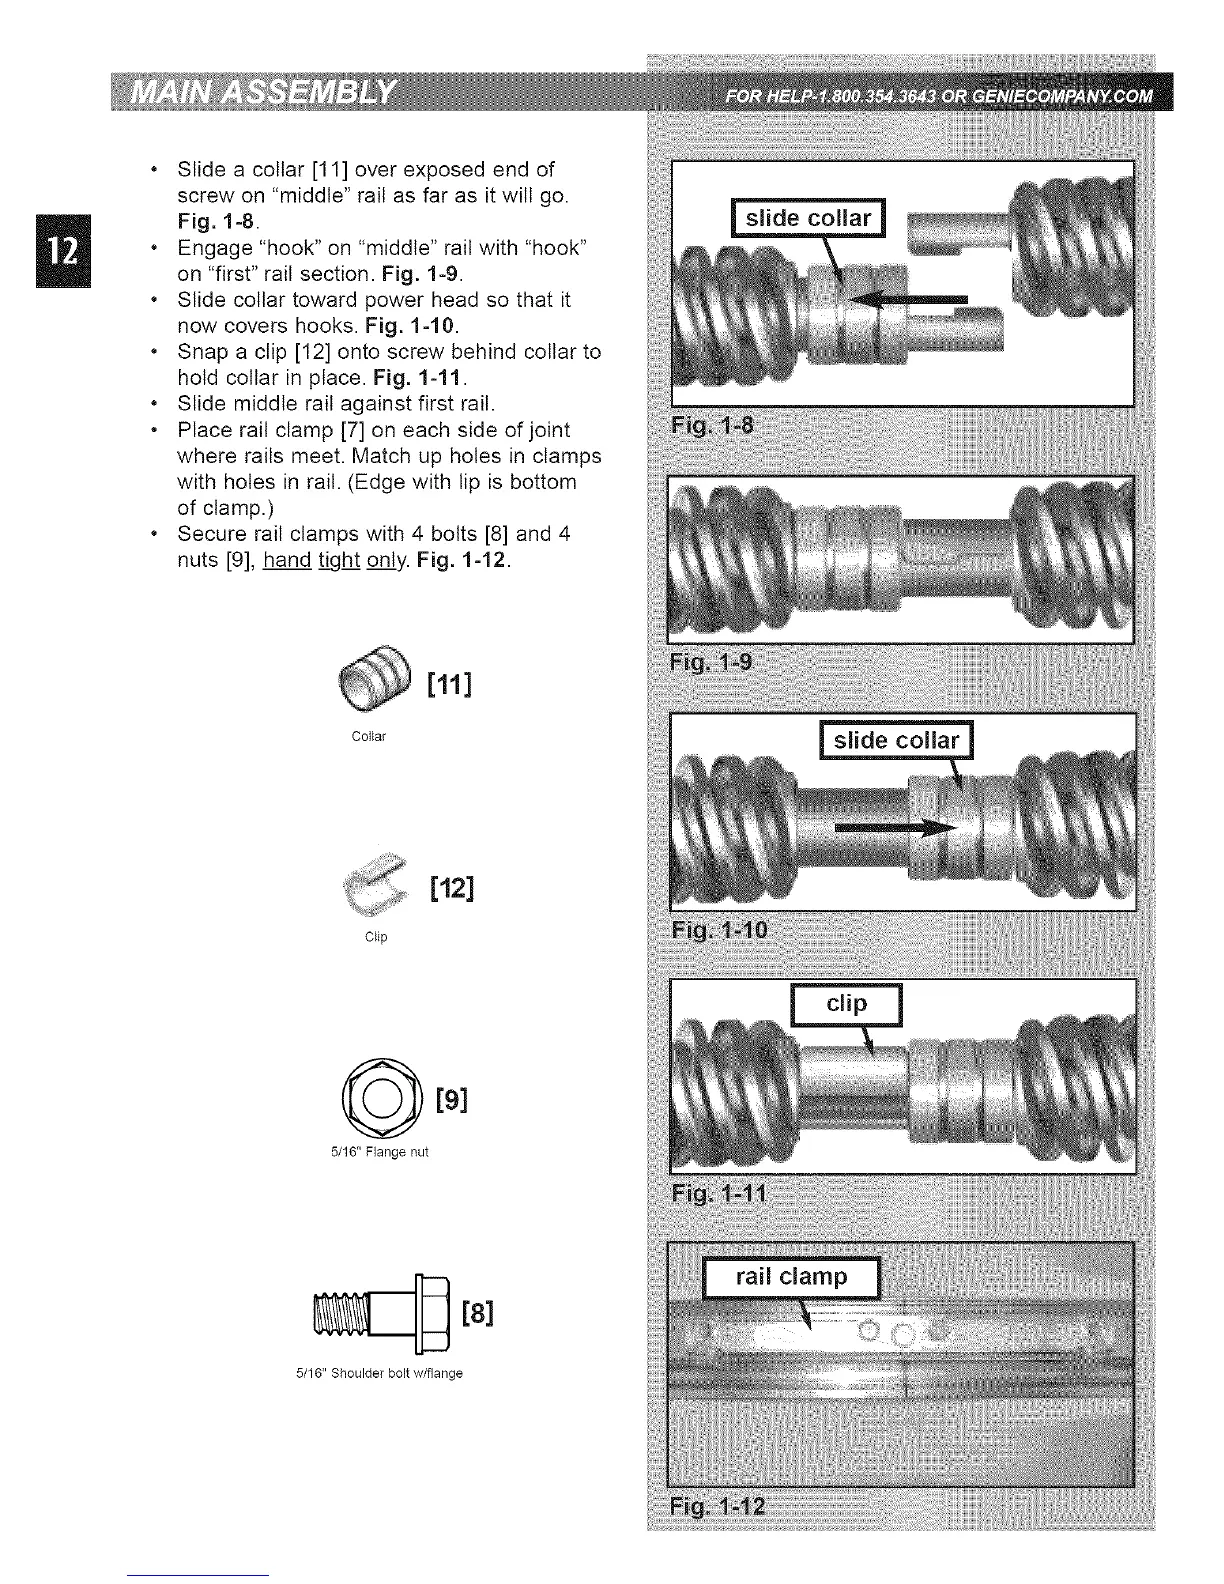
• Slide a collar [11] over exposed end of
screw on "middle" rail as far as it wilt go.
Fig. 1-8.
• Engage "hook" on "middle" rail with "hook"
on "first" rail section. Fig. 1-9.
• Slide collar toward power head so that it
now covers hooks. Fig. 1-10.
• Snap a clip [12] onto screw behind collar to
hold collar in place. Fig. 1-11.
• Slide middle rail against first rail.
• Place rail clamp [7] on each side of joint
where rails meet. Match up holes in clamps
with holes in rail. (Edge with lip is bottom
of clamp.)
• Secure rail clamps with 4 bolts [8] and 4
nuts [9], hand tight only. Fig. 1-12.
[12]
Clip
5/16" Flange nut
[8]
5/16" Shoulder bolt w/flange




 To Next Page