
G
george47Aug 3, 2025
What to do if my Gerber Technology Printer says 'Paper low'?
- AAngel RobinsonAug 3, 2025
If your Gerber Technology Printer indicates 'Paper low', it means the paper quantity is low. Refill the paper to resolve this issue.
What to do if my Gerber Technology Printer says 'Paper low'?
If your Gerber Technology Printer indicates 'Paper low', it means the paper quantity is low. Refill the paper to resolve this issue.
What to do if my Gerber Technology Printer displays 'Edge exceeds printing range'?
If the Gerber Technology Printer displays 'Edge exceeds printing range', it means that either the plot paper is too narrow or the marker file is too wide. To fix this: 1. Change the plotter paper to the proper size. 2. Modify the marker file. 3. Restart the plotter after completing steps 1 or 2.
Why does my Gerber Technology Printer say 'Invalid X ink jet cartridge'?
The 'Invalid X ink jet cartridge' error on your Gerber Technology Printer can occur because there is no ink jet cartridge in the ink jet cartridge holder, or the ink jet cartridge is out of ink or damaged. Replace the ink jet cartridge to solve the problem.
Displays safety warnings and symbols on the plotter.
Explains the meaning of warning and caution symbols used in the manual.
Emphasizes following safety instructions for operation.
Advises against performing maintenance without another person present.
Instructions for safe handling of electrical circuits and power supplies in potentially hazardous environments.
Warnings about moving machinery and potential health hazards associated with ink exposure.
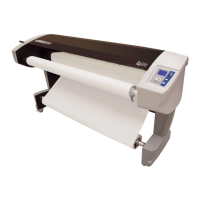
Identifies and describes the main physical components of the GERBERplotter XLp Series.
Describes the function of the plotter's control panel buttons and screen.
Lists and identifies the components found inside the plotter's shipping crate.
Details the items included in the component box.
Instructions for attaching side columns and crossbeam.
Steps for securing the head unit and connecting the feed motor cable.
Instructions for connecting the plotter to the computer via USB cable.
How to adjust rubber stops for front cover alignment.
How to select the correct voltage (110V or 220V) for the plotter.
Locating and retrieving the power cord from the crate.
Steps to connect the power cord and turn on the plotter.
Detailed steps for inserting the feed roll bar and securing the paper roll with mandrels.
Instructions on how to feed paper through the nip bar and pinch rollers.
Explains how to route the paper for floor output or take-up bar.
Finalizing paper installation and setting the nip bar lever.
Procedures for installing HP45 inkjet cartridges into the plotter.
Step-by-step guide to install the WinPlot software from the CD.
Instructions for installing the XLp Interface software from its CD.
How to configure the plotter settings within the Gerber Device Configuration utility.
Steps to configure the plotter for network (TCP/IP) communication.
Shows the initial screen for system settings configuration.
Details on setting up IP communication through the System Setting window.
Steps to select network adapter and perform LAN scan.
Steps to connect and confirm network settings.
Instructions for restarting the plotter and XLp Interface after configuration.
Locating and accessing the XLp Interface icon on the taskbar.
Configuring line width, Y plot origin, and ink usage settings.
Configuring ink counter reset values.
Configuring paper roll length and preferences.
Configuring units, alarms, and cartridge tests.
Selecting between USB or IP communication.
Accessing various calibration settings for the plotter.
Procedure to calibrate the X gap for accurate plotting.
Calibrating cartridge overlap for print alignment.
Calibrating separation alignment between cartridges.
Calibrating the forward/reverse alignment of the plotter.
Performing box tests to determine plotter printing tolerance.
Step-by-step instructions for completing a test plot using WinPlot.
Navigating and using the WinPlot window for plotting.
Browsing and selecting plot files within the WinPlot application.
Clicking "Plot" in WinPlot to start the printing process.
Lists common supplies and their part numbers for ordering.
Provides solutions for common error messages and operational issues.
| Resolution | Up to 600 dpi |
|---|---|
| Model | XLp Series |
| Media Width | Up to 72 inches |
| Interface | Ethernet |
| Speed | Up to 30 inches per second |
| Power Requirements | 50/60 Hz |