18
In these cases the Blind rivet nut gun should be
adjustedtoaforcesuitablefortherespective
blind rivet nut size (e.g.M6). This ensures that
all blind rivet nuts of certain dimensions (e.g.
M6) but with differing nut lengths are always
set precisely as intended into materials of vary-
ing thicknesses.
Toadjustthesettingforce,followthesequence
of operations below:
1. Press down completely green release
button 6.
2.Adjustthesettingstroketomaximum
stroke of 10 mm (until all lines on the scale
become visible).
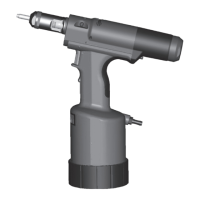
3. Unscrew set screw 9 (image 2) until the
frontedgeofthesetscrew9projects
approx. 10 mm from the device face.
4. Winding down the blind rivet nut to be set
(See item 4.1)
Insert the blind rivet nut into the material to
be riveted. For materials of varying thick-
nesses it is advisable to select maximum
material thickness.
5. Trigger a setting sequence by pressing the
activation button. If the nut becomes
deformed during this process use a
hexagon screw driver SW4 to drive in
the set screw by c. 1 to 2 rotations.
(Youcanusethesameblindrivetnutfor
severaladjustmentprocessesuntilthe
desired deformation takes place!)
Turning in setscrew 9 increases the setting force of the rivet tool; unscrewing
decreases the setting force!
Findingthebestsettingforcerequiresdelicateadjustmentsbyturninginsetscrew9,repeatingthe
entire setting process (winding down – setting process) time and again until a perfect deformation
of the blind rivet nut has been achieved.
5. Sequence of operations
• Positionblindrivetnutwithouttiltingon
threaded mandrel 3.
• ThenusetheBlindrivetnutguntopressthe
threaded mandrel towards the blind rivet
tool. This action will automatically start the
winding down process. (Do not press activa-
tion button!)
5.1 How to wind down a nut
• Keepatightholdoftheblindrivetnut
throughout the winding down process until
the blind rivet nut rests on nose piece 2.
The winding down process finishes auto-
matically.
• Insertthewoundonblindrivetnutallthe
way into the drilled hole of the work piece.
• Startthesettingprocessbypressingthe
activation button.
Hold down activation button!
• Theremovalprocesswillstartautomati-
cally once either the set setting stroke or
5.2 How to set the blind rivet nut
the set setting force have been reached (See
also item 4!). The removal process will conti-
nue as long as the activation button is being
held down. Do not release activation button be-
fore the threaded mandrel has been completely
removed from the set nut.
41303013_Gesipa_FireFox2_160413.indd 18 16.04.2013 13:39:32
 Loading...