49
# Action to be carried out RGB LED status
7
OPTIONAL
During the charging process, the selector can be used to
increase or reduce the charging power.
The vehicle itself will then decide which power level to absorb
Fixed blue
8
To end the charging session, disconnect the recharging cable
on the vehicle side
From fixed blue or flashing blue
to flashing green
9
Take the plug out of the socket-outlet on the charging station
side
From flashing green to fixed green
10 If the station detects no errors, it will return to standby Fixed green
NOTE= To end the charging session, stop it first on the vehicle (the method will change de-
pending on the vehicle model; we suggest you refer to the manual of your vehicle
to find the right method). The cable can now be removed from the vehicle, terminating the charging operation.
The station will now allow you to remove the plug.
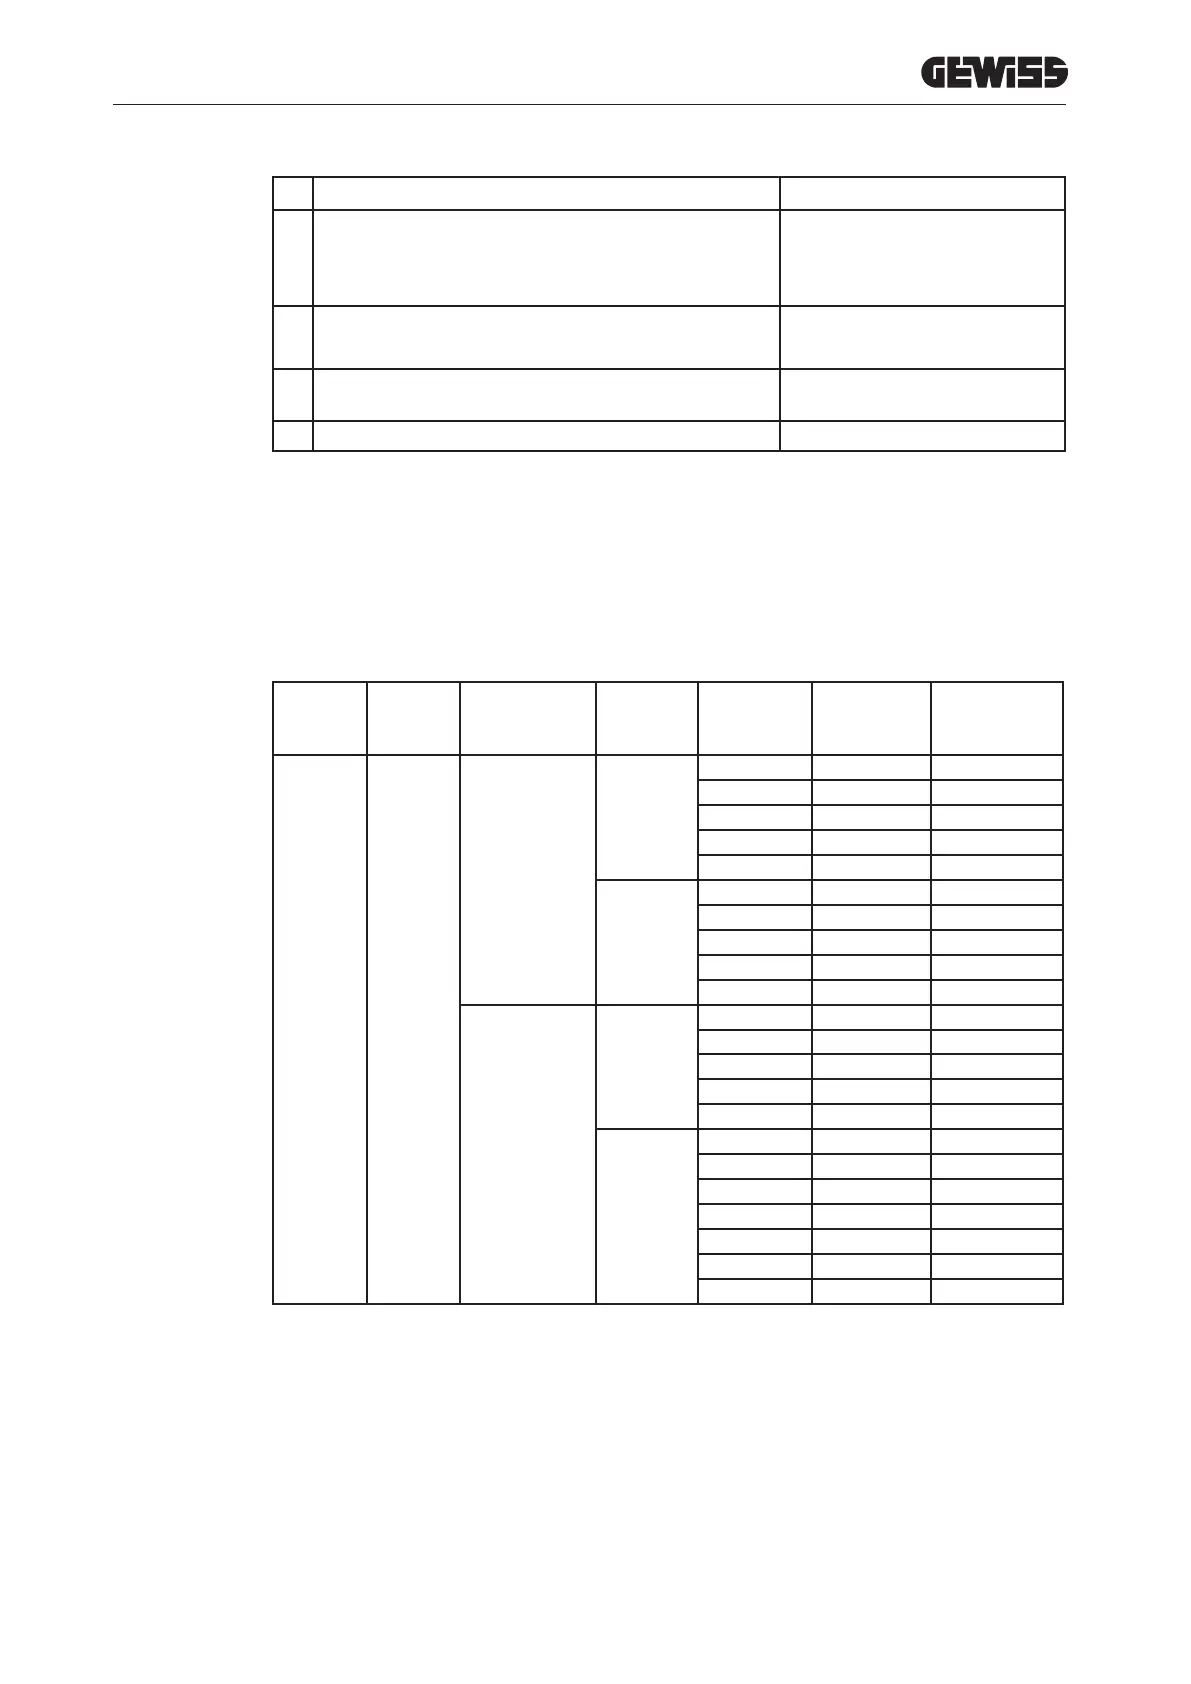
The following table shows the charging power values used by the station on the basis of the position of the selector
and the nominal power value of the station (to alter the NOMINAL POWER value, refer to chapter 13).
TYPE VERSION POWER SUPPLY
FACTORY
VALUE
NOMINAL
value that
can be set
Selector
position 1
VALUE 60%
Selector
position 2
VALUE 30%
FREE
CABLE OR
SOCK-
ET-OUT-
LET
SINGLE-PHASE
20
20 12 6
16 10 6
14 8 6
12 7 6
10 7 6
32
32 19 10
25 15 7
20 12 6
16 10 6
14 8 6
THREE-PHASE
16
16 10 6
14 8 6
12 7 6
10 6 6
8 6 6
32
32 19 10
25 15 7
20 12 6
16 10 6
14 8 6
12 7 6
10 7 6
10.2. PARKING
The station activates the charging session once a valid RFID card has been swiped.
 Loading...