43
PUSHTOOPEN
©Ghost Controls
®
2020
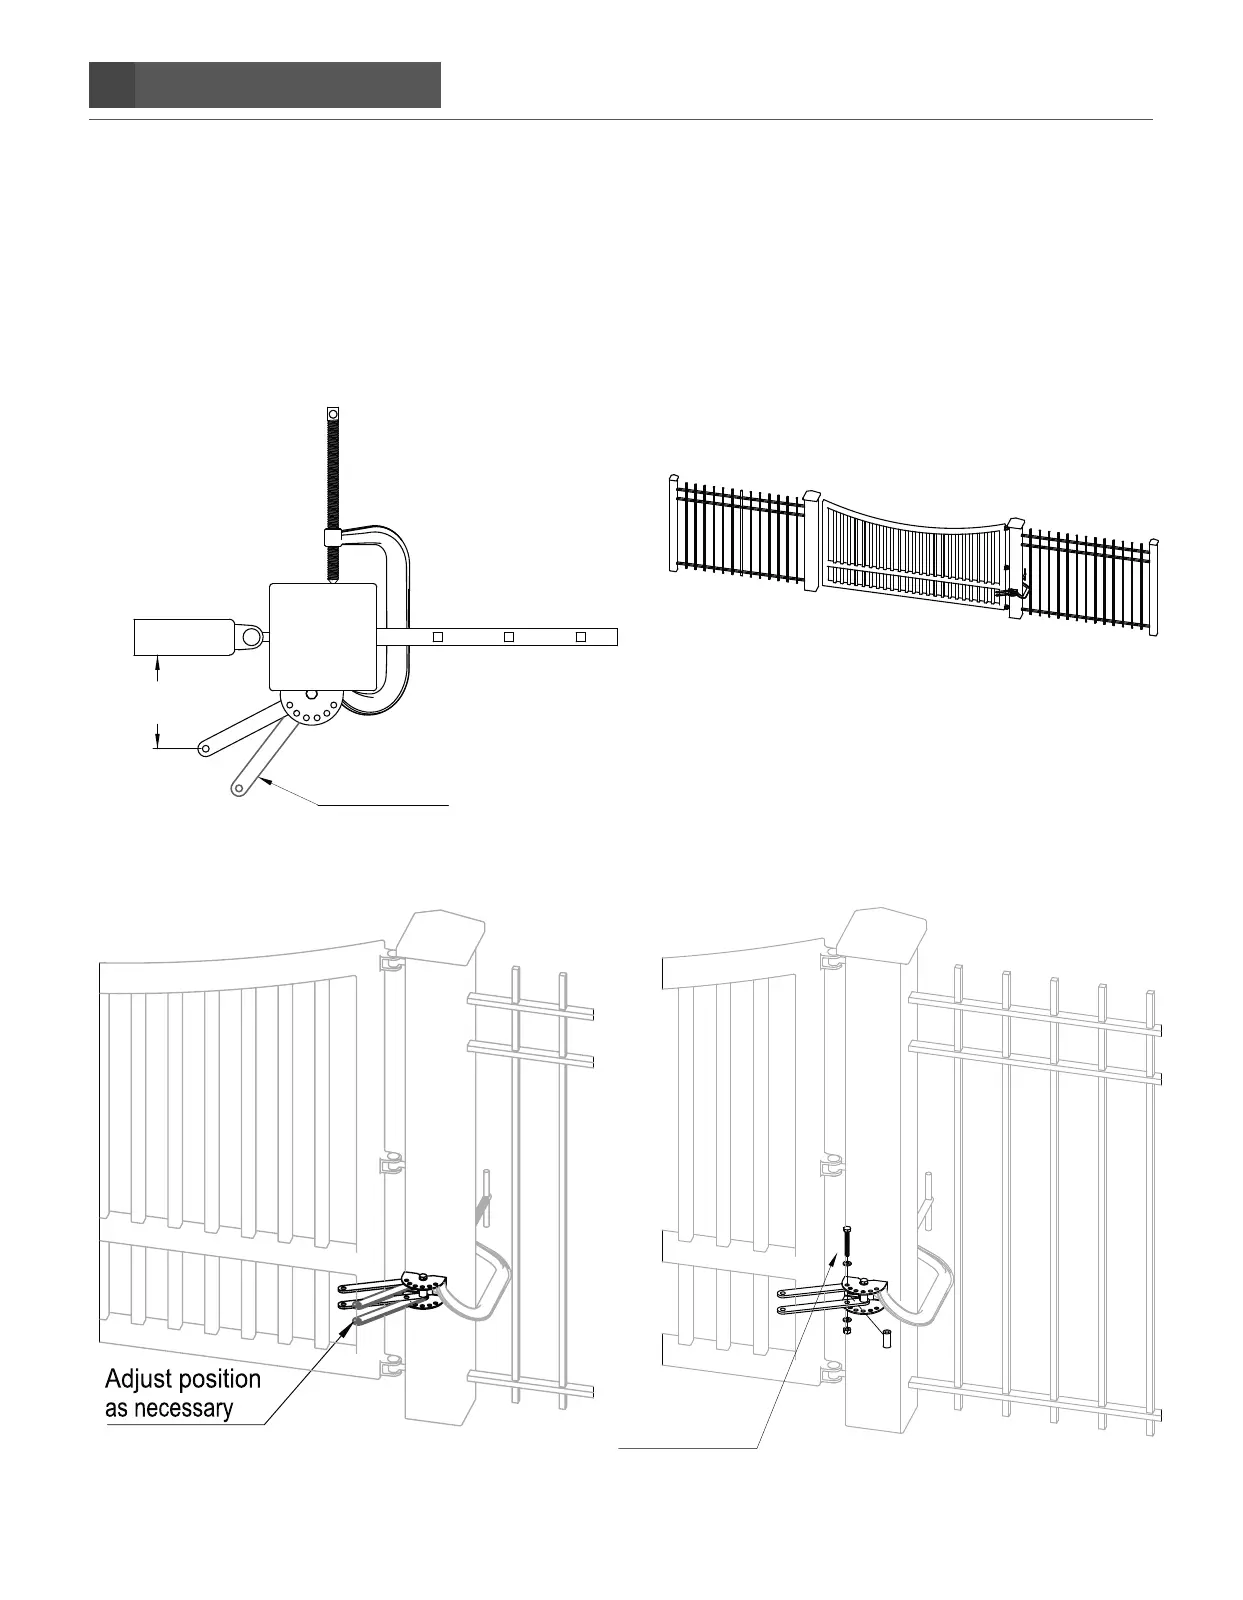
STEP 4. Verifying minimum of 4˝ gate clearance and finishing rear post mount bracket assembly.
If the clearance is less than 4˝, you will need to adjust the pivot brackets so that you have at least 4˝ of clearance, other-
wise, you will not have minimal mechanical advantage needed to move the gate.
Once the clearances are correct, place the secondary bolt into the post mount and push-to-open brackets, as shown below.
Insert the M10x1.5x75mm bolt and M10 washer through the post bracket hole, then first push-to-open bracket, pivot spacer,
second push-to-open bracket, and exit out bottom hole of post bracket as shown below. Fasten a M10 washer and M10
locknut on the end of the bolt. Finish by tightening both bolts on post bracket.
>4.0
Adjust position
as necessary
Add Secondary Bolt