55
PUSHTOOPEN
PROGRAMMING THE OPEN LIMIT: PUSHTOOPEN
The OPEN limit is when the operator is extended and the gate is in the closed position.
IMPORTANT
ONLY THE OPERATOR ARMS’ EXTENDED LIMIT IS ADJUSTABLE AND CAN BE SET WITH THE CONTROL
BOARD. THE ARMS’ RETRACTED POSITION IS FIXED AND IS NOT ELECTRONICALLY ADJUSTABLE.
THE CLOSED POSITION IS SET BY HARDWARE MOUNTING ONLY. Please refer to the hardware installation to
make sure the retracted position is properly set/installed.
Installation Type Retracted Position Extended Position
Push-To-Open Gate at the fully CLOSED position (not
electronically adjustable)
Gate at the OPEN position (electroni-
cally adjustable)
TURN THE CONTROL BOX ON
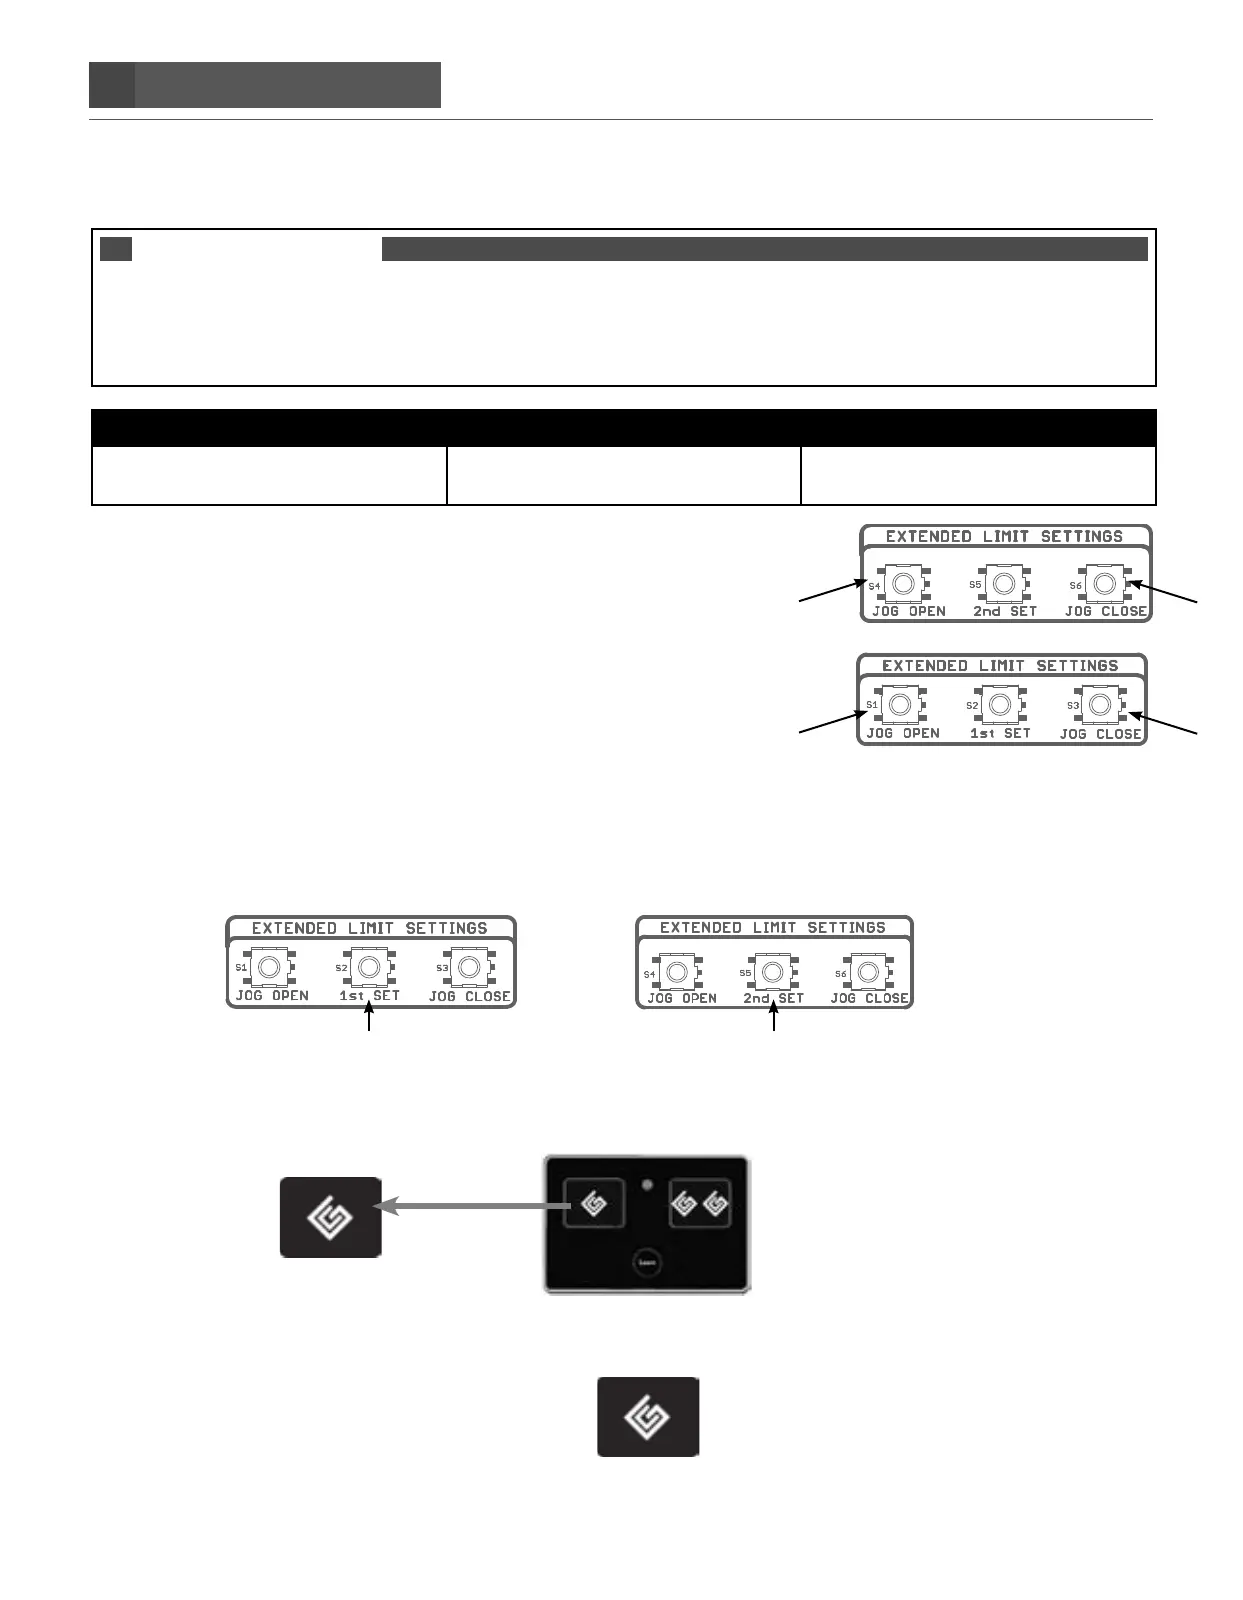
STEP 18. Setting the open limit.
A. Locate the 2nd SET limit settings on the control board and press and
hold the JOG CLOSE button for the second gate until the gate
reaches the desired closed position. The gate can move only if
pressure is maintained. Releasing the JOG button will stop the
gate immediately. Once the 2nd set is in the desired closed position
then repeat for
the 1st gate with the 1st SET limit settings JOG CLOSE button.
B. Both JOG OPEN or JOG CLOSE buttons are needed to ‘fine’ tune your desired OPEN position.
STEP 19. Press and hold the 1st set limit button on the control panel until it beeps, then release.
Then Press and hold the 2nd set limit button until it beeps, then release
STEP 20. Press the transmitter button to activate the gates and let the gate close fully you should
hear a single beep.
When the gate reaches its CLOSED position, the control board will sound a single beep, confirming the CLOSED
limit has been set.
A. Confirm the newly programmed OPEN limit by pressing the remote transmitter button to activate the gate and confirm
the closed position has been set correctly. This limit is stored and remembered even when all of the power sources are
removed.
B. Repeat STEPS 16-18 if needed to change your desired OPEN position.
C. Test your system with the remote transmitter to make sure it opens and closes without errors.
2ND SET LIMIT SETTINGS
1ST SET LIMIT SETTINGS