20
Nasal cannula
Warning: Shock,conk patient shall be monitored directed by medical stuff or
professional paramedics.
4.5 Time Powering on Function
(Refer to 4.2.4 Time powering on setup)
After having set up the time for powering on,you can power off, and when the
clock arrives to the time set,the device will power on automatically and save. After
the set duration operation,the device will power off automatically.
4.6 USB Data Uploading
Long press key to power on and access the main interface, plug one port of
the USB data line into USB connection as Figure 4-6-1, the other into PC’s “USB”
port as Figure 4-6-2, the connection method between the device and PC is shown
as Figure 4-6-3. then the PC begins to read SD card.
In my computer,double-click the new disk symbol newly occurring to search for
the record data,copy the data from SD card, and save it in any disk of my comput-
er,and open the saved le via PC software to analyse patient’s sleep information.
(“Power on” ---- “Plug in USB data line” ---- “Open my computer” ------- “Search
for the device disk symbol” ----- “Copy the .bin le to PC hard disk to avoid data
missing”).
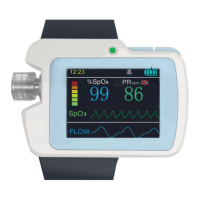
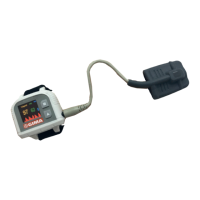
Figure 4-6-1 Connection between sleep Figure 4-6-2 Connection between
apnea screen meter and USB data line PC and USB data line
ENGLISH