Installation 5
0020239562_02 EASICOM 3 Installation and maintenance instructions 11
4.10.2 Installing the side section
▶ Refit the components in the reverse order.
5 Installation
Danger!
Risk of scalding and/or damage due to
incorrect installation leading to escaping
water.
Mechanical stresses in the connection pipes
may lead to leaks.
▶ Ensure that there is no mechanical stress
when installing the connection pipes.
Caution.
Risk of material damage caused by
residues in the pipelines.
Welding remnants, sealing residues, dirt or
other residues in the pipelines may damage
the product.
▶ Flush the heating installation thoroughly
before installing the product.
5.1 Checking the gas meter
▶ Make sure that the existing gas meter is capable of
passing the rate of gas supply required.
5.2 Gas and water connections
Caution.
Risk of damage caused by incorrect gas
connection installation.
Excess test pressure or operating pressure
may cause damage to the gas valve.
▶ Check the leak-tightness of the gas valve
using a maximum pressure of 11 kPa
(110 mbar).
Caution.
Risk of material damage caused by corro-
sion
Due to non-diffusion-tight plastic pipes in the
heating installation, air gets into the heating
water. Air in the heating water causes corro-
sion in the heat generator circuit and in the
product.
▶ If you use non-diffusion-tight plastic pipes
in the heating installation, ensure that no
air gets into the heat generator circuit.
Caution.
Risk of material damage due to heat trans-
fer during soldering.
▶ Only solder connectors if the connectors
are not yet screwed to the service valves.
Note
Apply heat insulation to the water pipes to the
boiler outlet and to the installation.
Preliminary work
1. Check that the system volume and the volumetric capa-
city of the expansion vessel are compatible.
▽ If the volume of the expansion vessel is insufficient
for the installation.
▶ Install an additional expansion vessel in the
heating return, as close to the product as pos-
sible.
▶ Install a non-return valve at the product's outlet
(heating flow).
2. Ensure that the installation has the following compon-
ents:
– A cold water stopcock for the unit
– A gas stopcock for the unit
– A filling and draining device in the heating installa-
tion
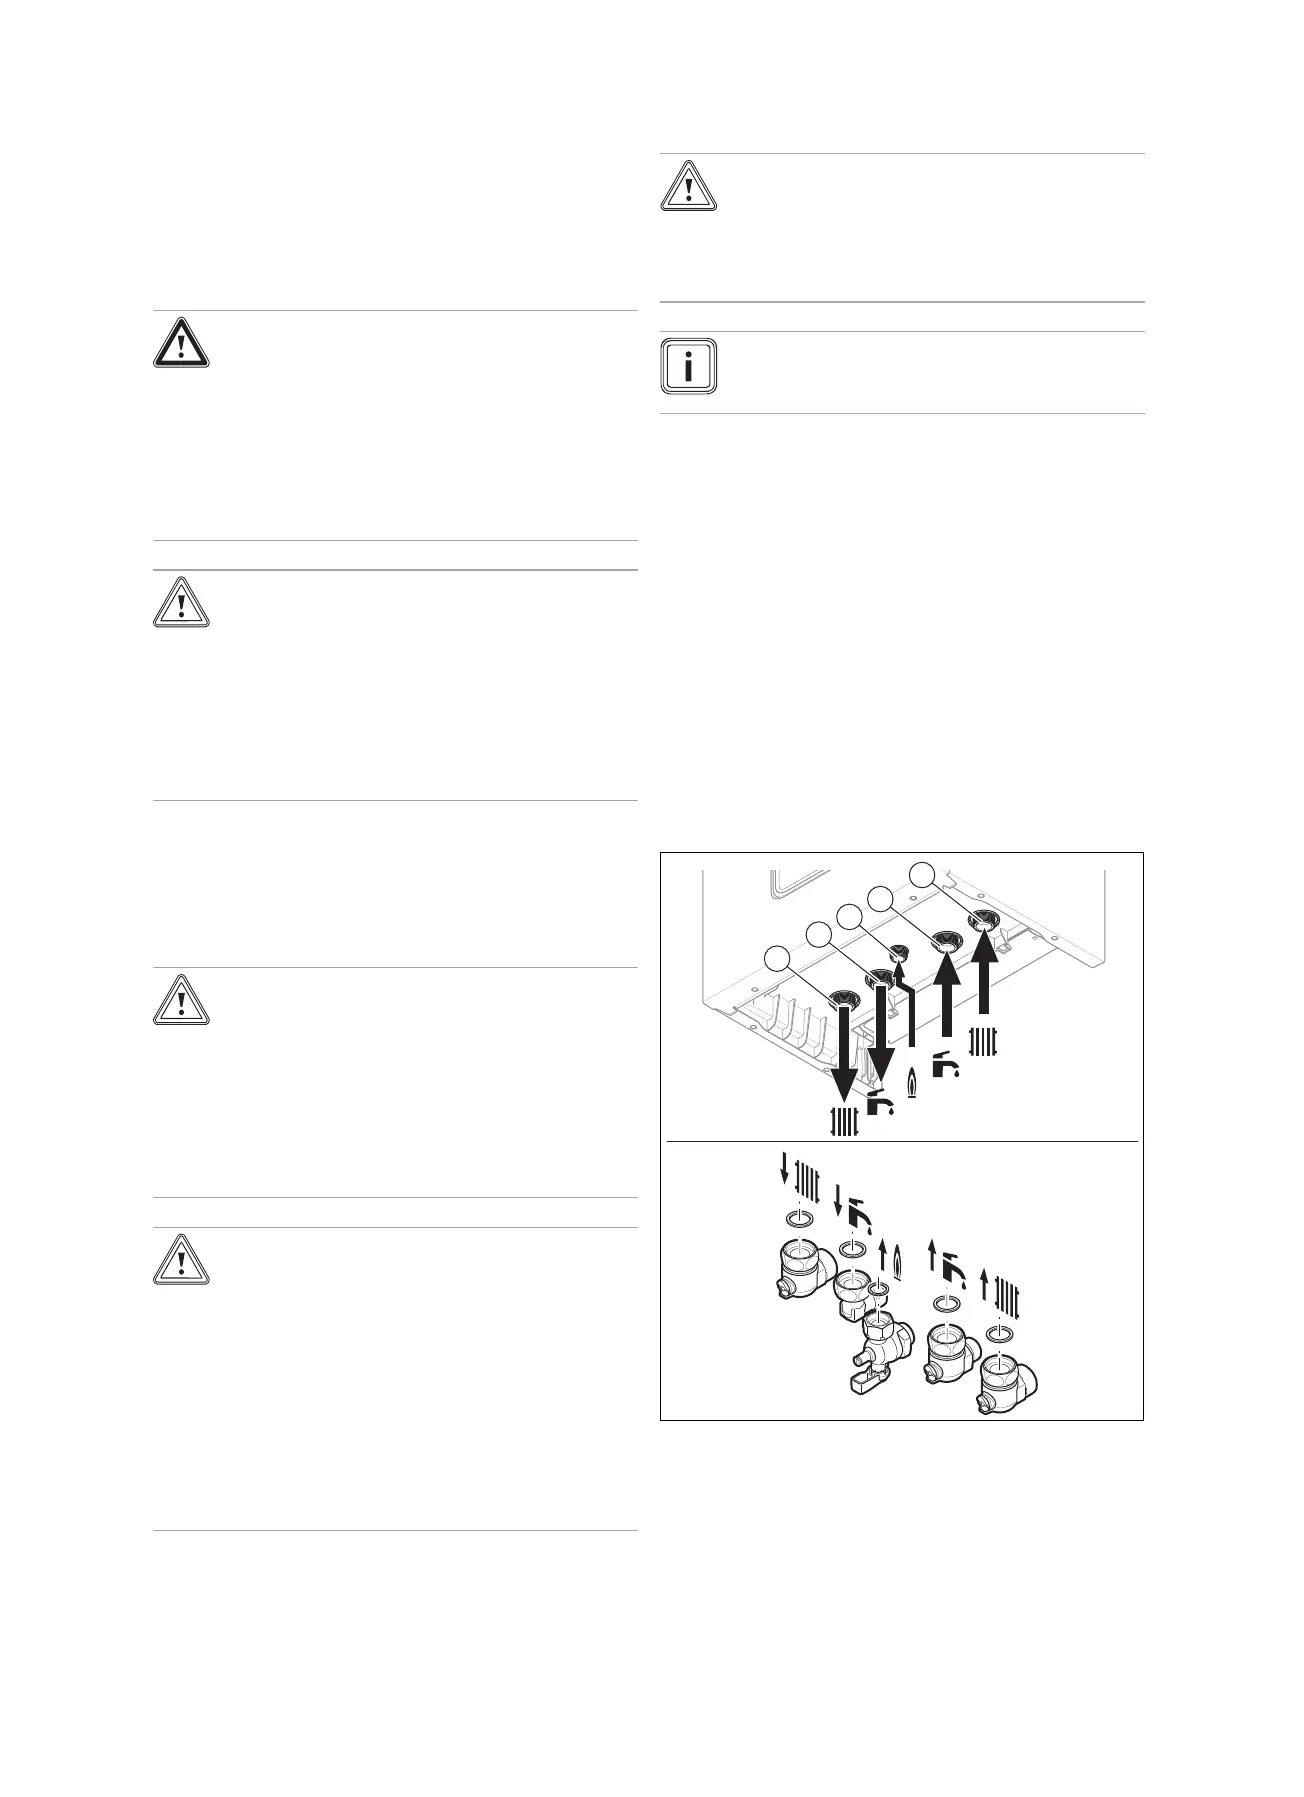
1 Heating flow connec-
tion, G3/4
2 Hot water connection,
G3/4
3 Gas connection, G1/2
4 Connection for the cold
water supply line, G3/4
5 Heating return connec-
tion, G3/4
1. Connect the water and gas connections in accordance
with the applicable standards.

 Loading...


