Inspection and maintenance 11
0020239562_02 EASICOM 3 Installation and maintenance instructions 23
5. Compare the measured value with the corresponding
value in the table.
Checking the CO₂ content
Great Britain
front casing on / front casing off
Natural gas
G20
9.2 ±1 %
◁ The value is OK.
▽ The value is not OK; you cannot start up the
product.
▶ Set the CO₂ content. (→ Page 23)
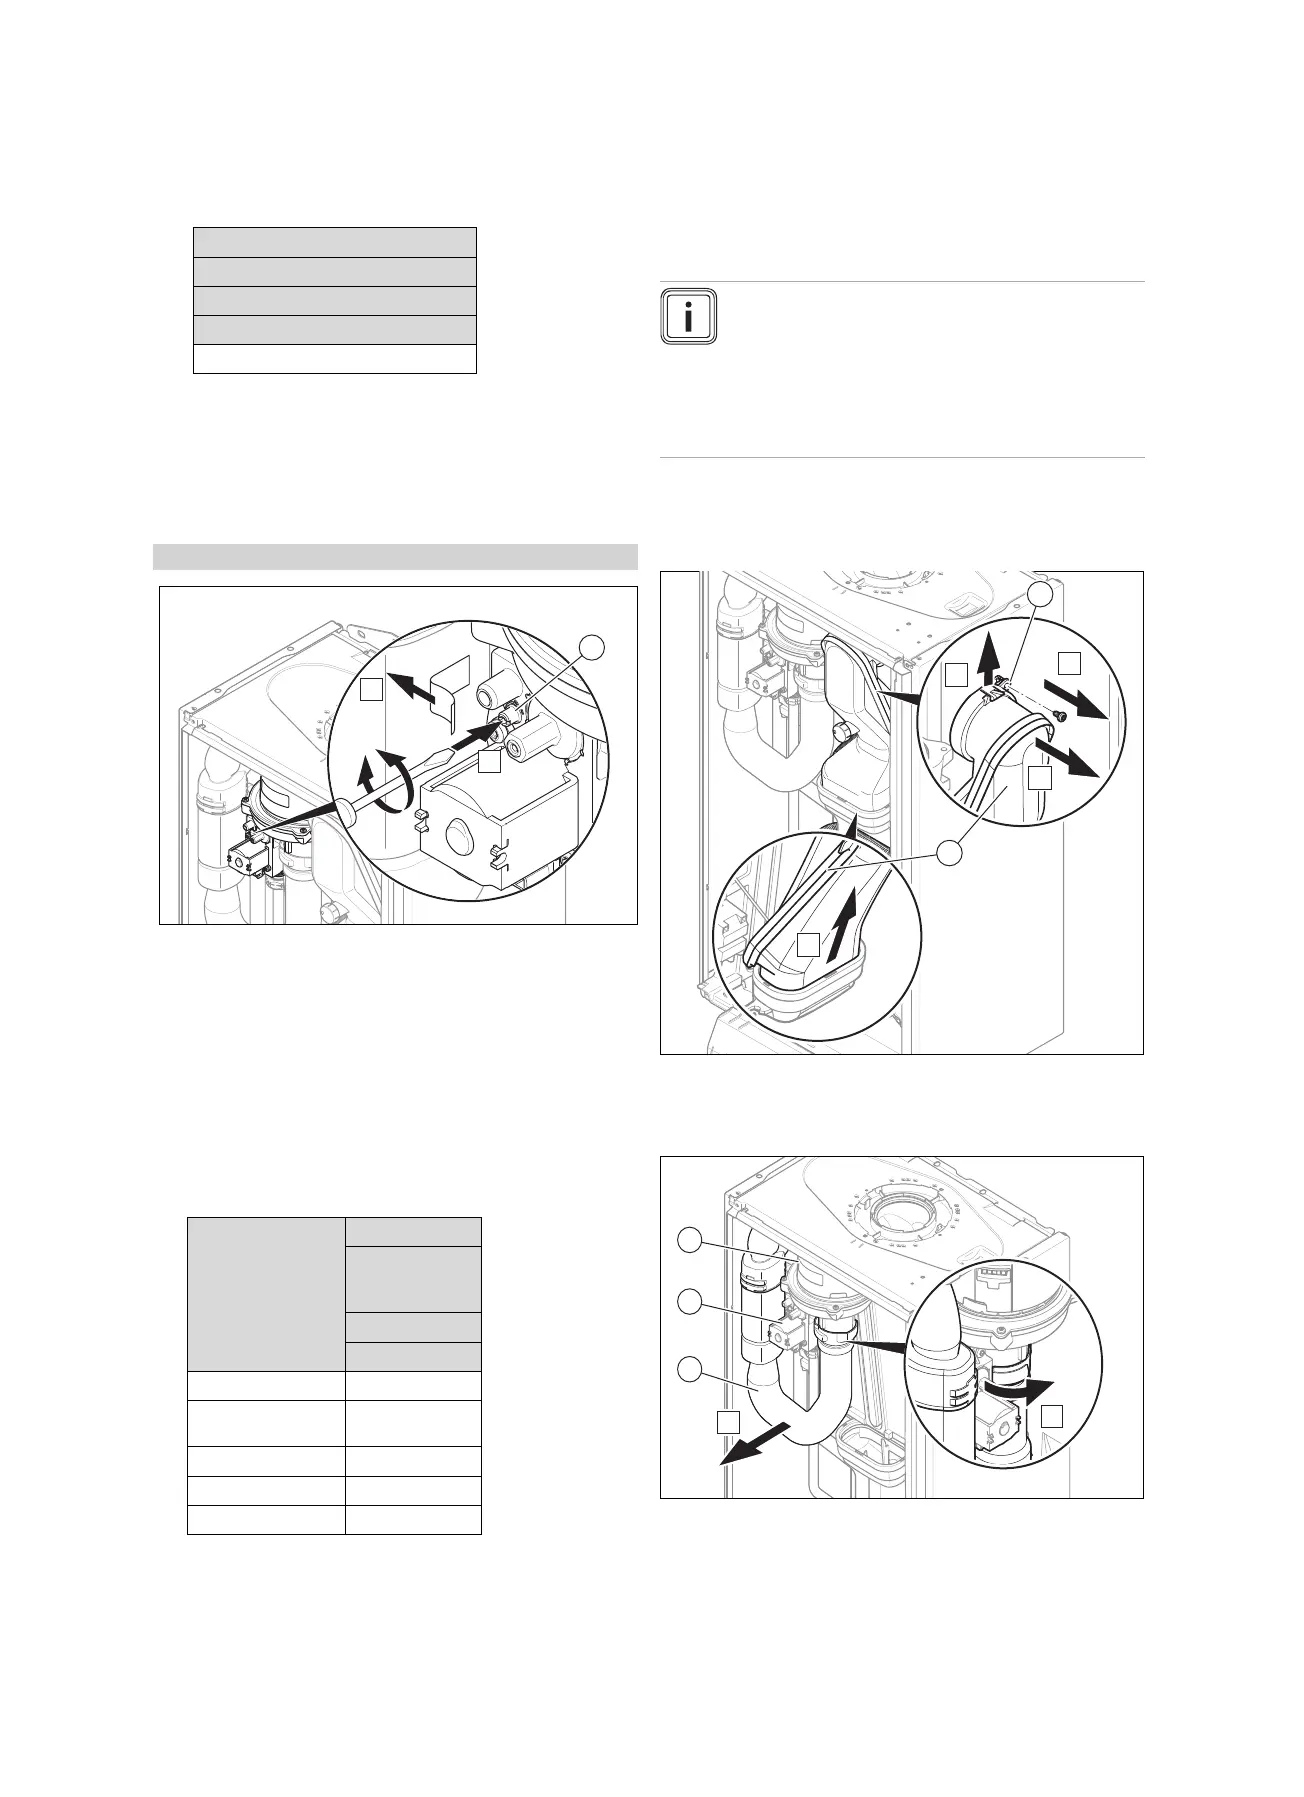
11.5 Setting the CO₂ content
Conditions: The CO₂ content must be adjusted
▶ Remove the sticker.
▶ Turn the screw (1) to set the CO₂ content (value with
front casing removed).
◁ To increase the CO₂ content: Turn anti-clockwise
◁ To decrease the CO₂ content: Turn clockwise
▶ Only carry out the adjustment in increments of 1/8 turn
and wait approximately 1 minute after each adjustment
until the value has stabilised.
▶ Compare the measured value with the corresponding
value in the table.
Setting the CO₂ value
Great Britain
front casing on
/ front casing
off
Natural gas
G20
CO₂ at full load
9.2 ±0.2 %
Set for Wobbe
index W₀
14.09 kW⋅h/m³
O₂ at full load
4.5 ±1.8 vol. %
CO at full load
≤ 250 ppm
CO/CO₂
≤ 0.0027
▽ If the setting is not in the specified adjustment range,
you must not start up the product.
▶ Inform Customer Service.
▶ Check whether the air-quality requirements with regard
to carbon monoxide are fulfilled.
▶ Fit the front panel.
11.6 Removing the gas-air mixture unit
Note
The gas-air mixture unit consists of three main
components:
– fan
– Gas valve,
– Burner cover
1. Switch off the product via the main switch.
2. Close the gas isolator cock.
3. Remove the front casing. (→ Page 10)
4. Remove the screw (1).
5. Push the clip upwards.
6. Remove the flue gas pipe (2).
7. Remove the air intake pipe (3).
8. Remove the plugs from the gas valve (4) and from the
fan (5).
 Loading...


