Troubleshooting 12
0020239562_02 EASICOM 3 Installation and maintenance instructions 27
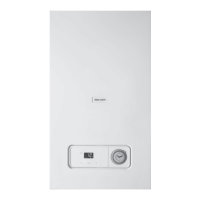
4. Remove the air intake pipe (2).
5. Remove the plug from the gas valve assembly (3) and
from the fan (4).
6. Unscrew the gas connection pipe's connection (1) from
the gas valve assembly.
7. Undo the two screws (5).
8. Remove the gas valve assembly (3).
9. Remove the seal (6) if it is still in place on the fan (7).
10. Install the new gas valve assembly in reverse order.
11. Check the CO₂ content. (→ Page 22)
12. Set the CO₂ content. (→ Page 23)
12.6.4 Replacing the heat exchanger
1. Remove the front casing. (→ Page 10)
2. Remove the gas-air mixture unit. (→ Page 23)
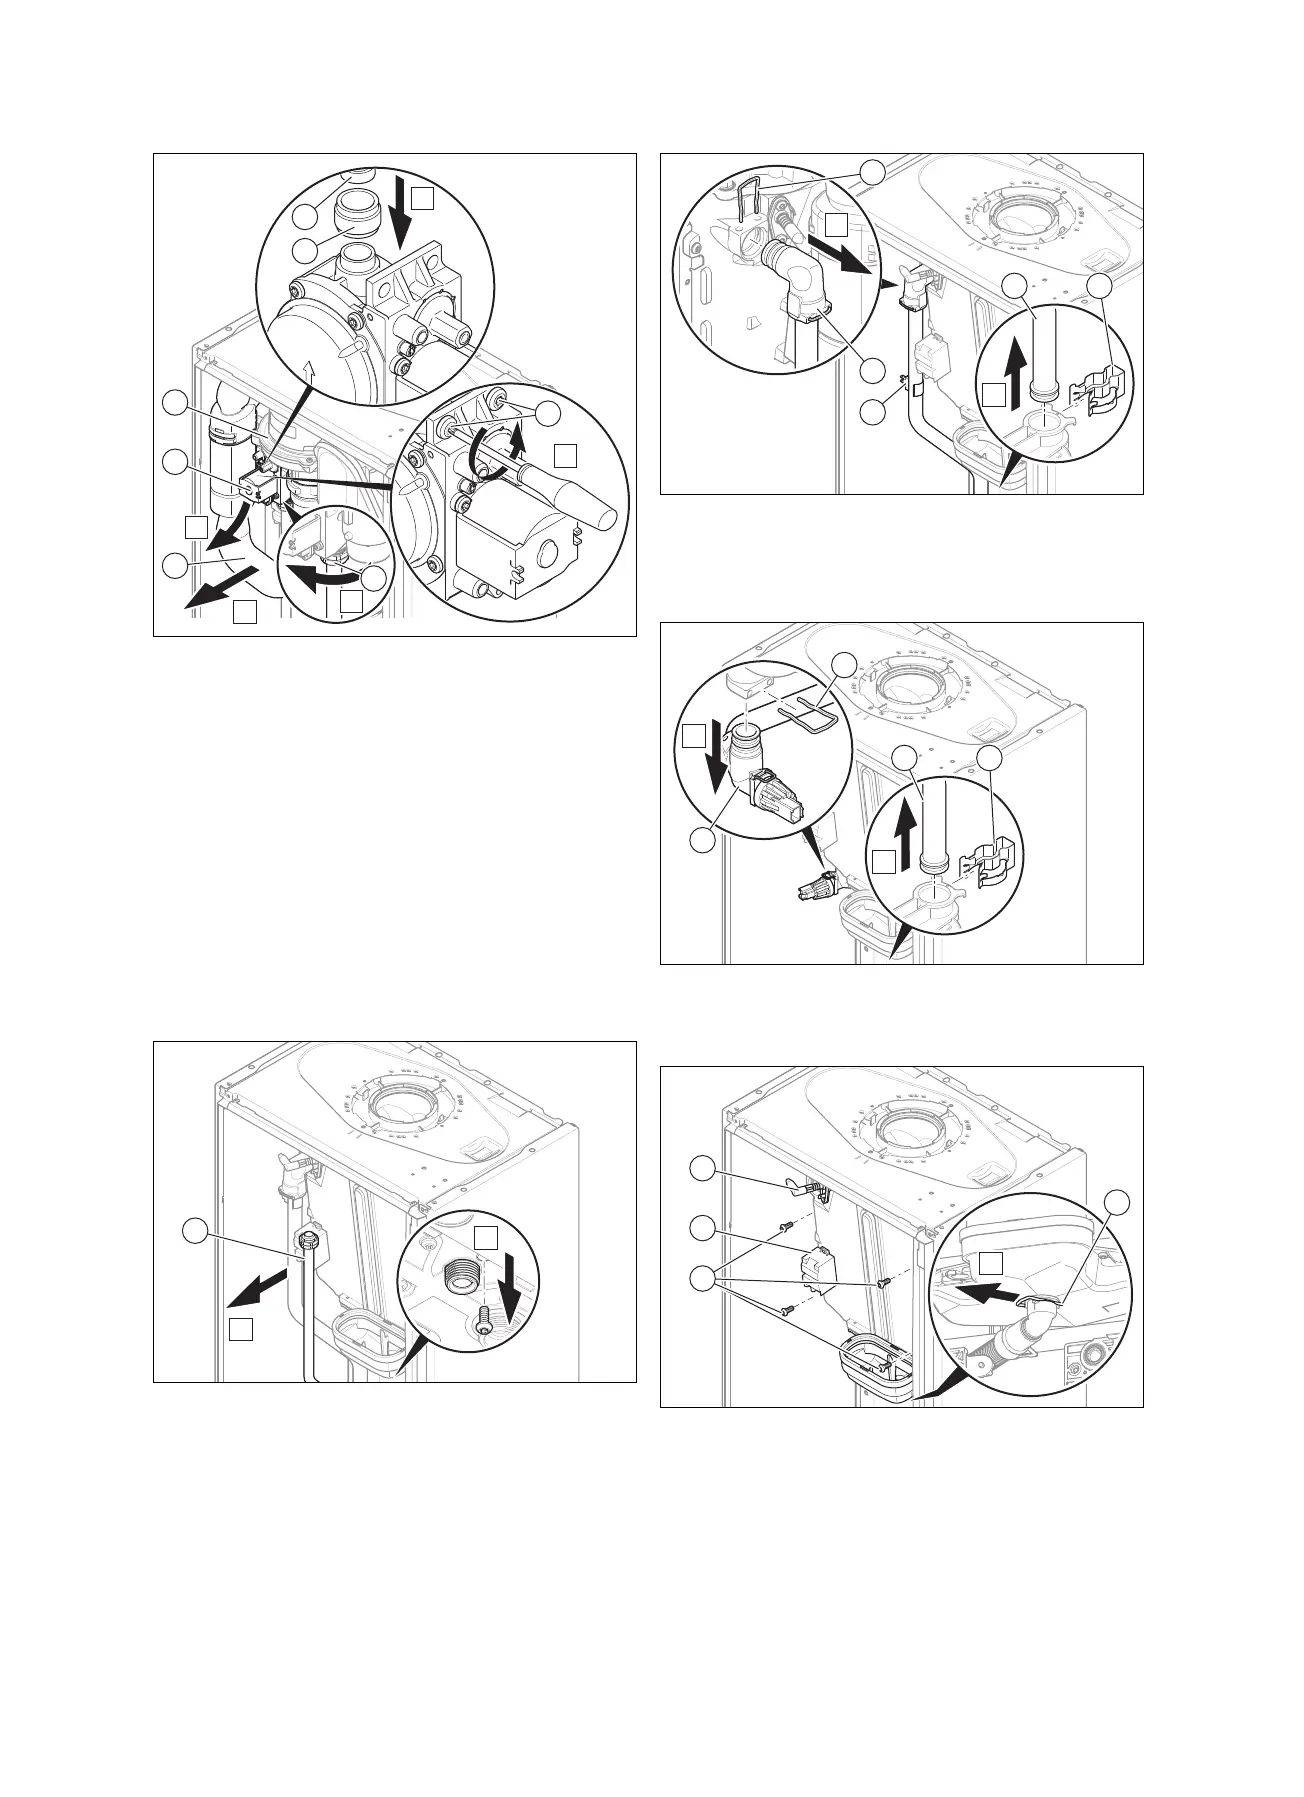
3. Remove the gas pipe (1).
4. Remove the temperature sensor (3).
5. Remove the upper clip (1).
6. Remove the lower clip (4).
7. Remove the supply pipe (5).
8. Remove the upper clip (1).
9. Remove the lower clip (3).
10. Remove the return pipe (2).
11. Remove the clip underneath the condensate tray (1).
12. Undo the four screws (2).
 Loading...


