24
SETTING THE METER
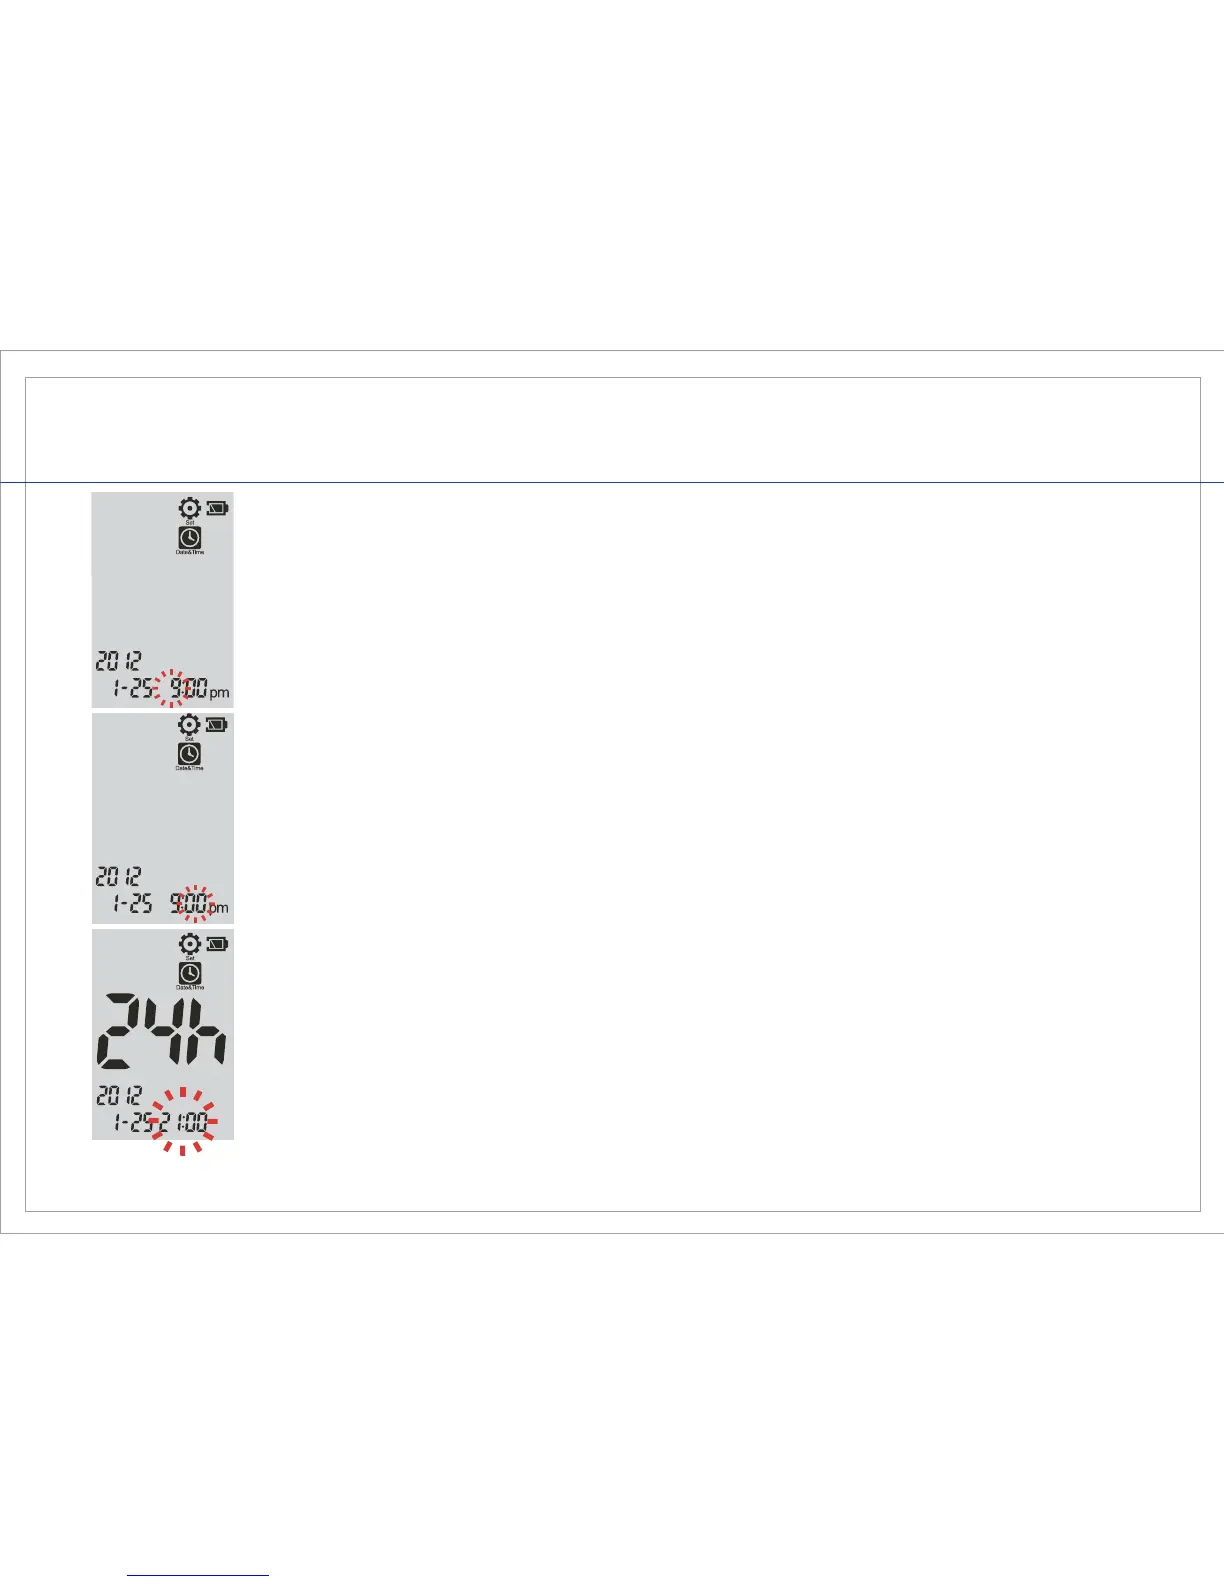
STEP 7
Setting the Hour: The “Hour” will be ashing. Use the left or right button to adjust
the Hour. Once the desired hour has been selected, quickly press and release
both left and right buttons together to conrm your entry and advance to the
“Minutes” setting. When setting the hour, be sure to propertly select AM or PM.
STEP 8
Setting the Minutes: The “Minutes” will be ashing. Use the left or right button
to adjust the Minutes. Once the desired minutes have been selected, quickly
press and release both left and right buttons together to conrm your entry and
advance to the “Clock” setting.
STEP 9
The Gmate® Voice System allows you to choose your clock setting to either the
12 hour (i.e. 9:00pm) or 24 hour (i.e. 21:00) format. Setting the Clock: The “12h
or 24h” will be ashing. Use the left or right button to adjust the clock to your
preferred setting. Once the desired clock setting has been selected, quickly
press and release both left and right buttons together to conrm your entry.
STEP 10
You have now completed the Date & Time settings. To exit the Date & Time
setting at any time, press both the left and right buttons together for 2 seconds.