12
User Manual V1.6-2022-01-05 02 Installation Instructions
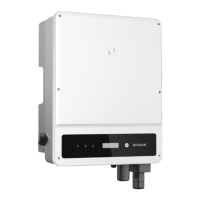
Step 3
WARNING!
WARNING!
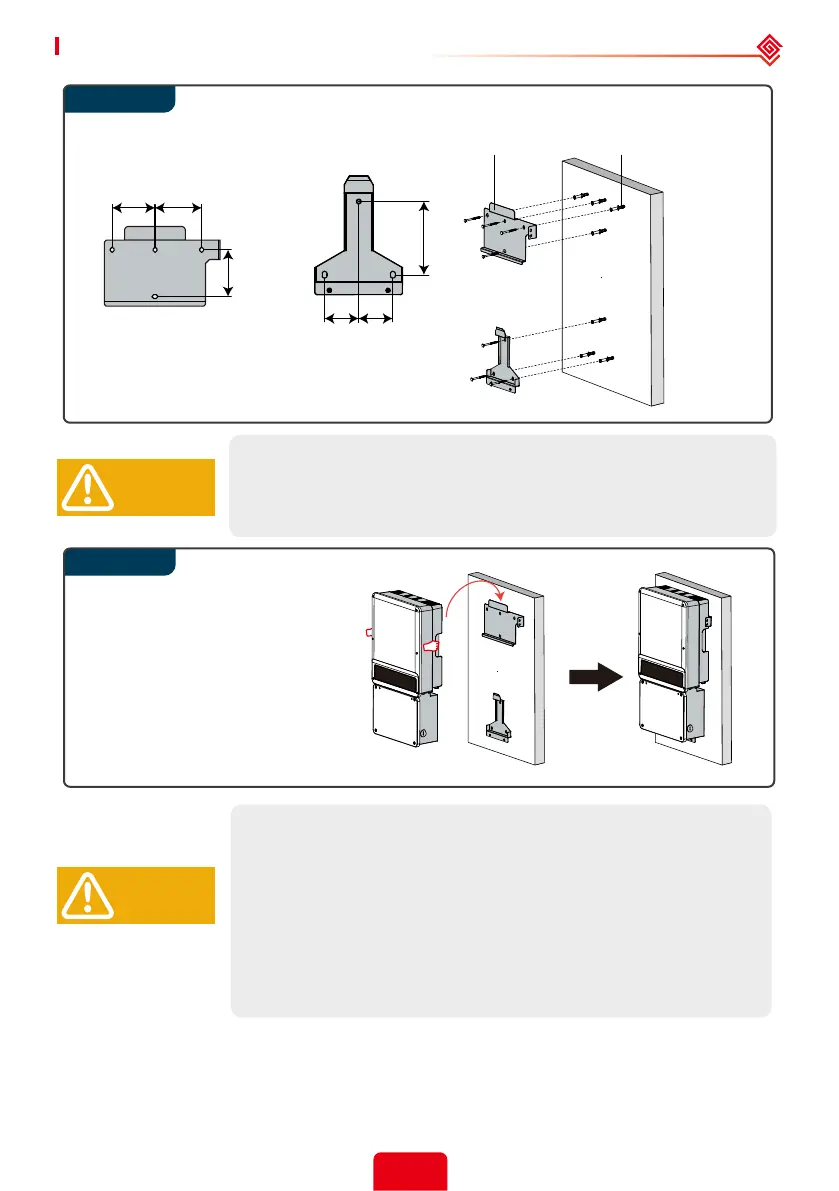
Use expansion bolts in accessory box to x the wall-mounted bracket
onto the wall tightly.
Bearing capacity of the wall must be higher than 100kg(220.46lb),
otherwise it may not be able to prevent the inverter from dropping.
La capacité de roulement du mur doit être supérieure à 100 kg(220.46lb),
sinon elle pourrait ne pas être en mesure d’empêcher l’onduleur de
tomber.
Carry the inverter by holding the
heatsink on two sides and place
the inverter on the wall-mounted
bracket. The inverter is heavy, do
not carry it by one person.
Do not use force beyond the heatsink sides to avoid damage to the
inverter.
Avoid holding and lifting the wiring box, keep balance of the inverter
during moving.
N’utilisez pas la force au-delà des côtés du radiateur pour éviter les
dommages causés à l’onduleur.
Évitez de tenir et de soulever l’unité de connexion, de maintenir l’équilibre
de l’onduleur pendant le déplacement.
Step 2
110mm 120mm
120mm
Wall -mounted bracket Expansion bolts
(4.33 in.)
(4.72 in.)
(4.72 in.)
70mm 70mm
150mm
(5.91 in.)
(2.76 in.)
(2.76 in.)