Press the "Enter" / "ESC" to enter / exit the each level menu, use the "Up" / "Down" to select the
item and change the parameters, and long press the "Enter" (greater than 3s) to set the
parameters.
Hour
Day
Month
Year
Error Log
First Level menu Second Level menu Third Level menu
Enter
ESC
Enter
ESC
LVRT
Shadow
PF Value
P [Active]
Set ON/OFF
Set ON/OFF
Set Power Factor
Set Active Power
P [Reactive] Set Reactive Power
Password Set New Password
CustomSet
ARC Clear
ARC Check
AFD Func
Language
Date & Time
Communication
Safety
Select Language
Set Date & Time
Select Address
Select Safety
Grid
Enable/Disable Grid
Second Level Menu Third Level Menu
Grid Type
FTY. Reset
Factory Reset
Select Time
Select Time
Select Time
Select Time
Set ON/OFF
Clear ARC Error
ARC Check
Enable/Disable
Select Grid Type
Select Factory Type
Factory Mode
Home
Running Info
Device Info
History Info
First Level Menu
Adv.Settings
Configuration
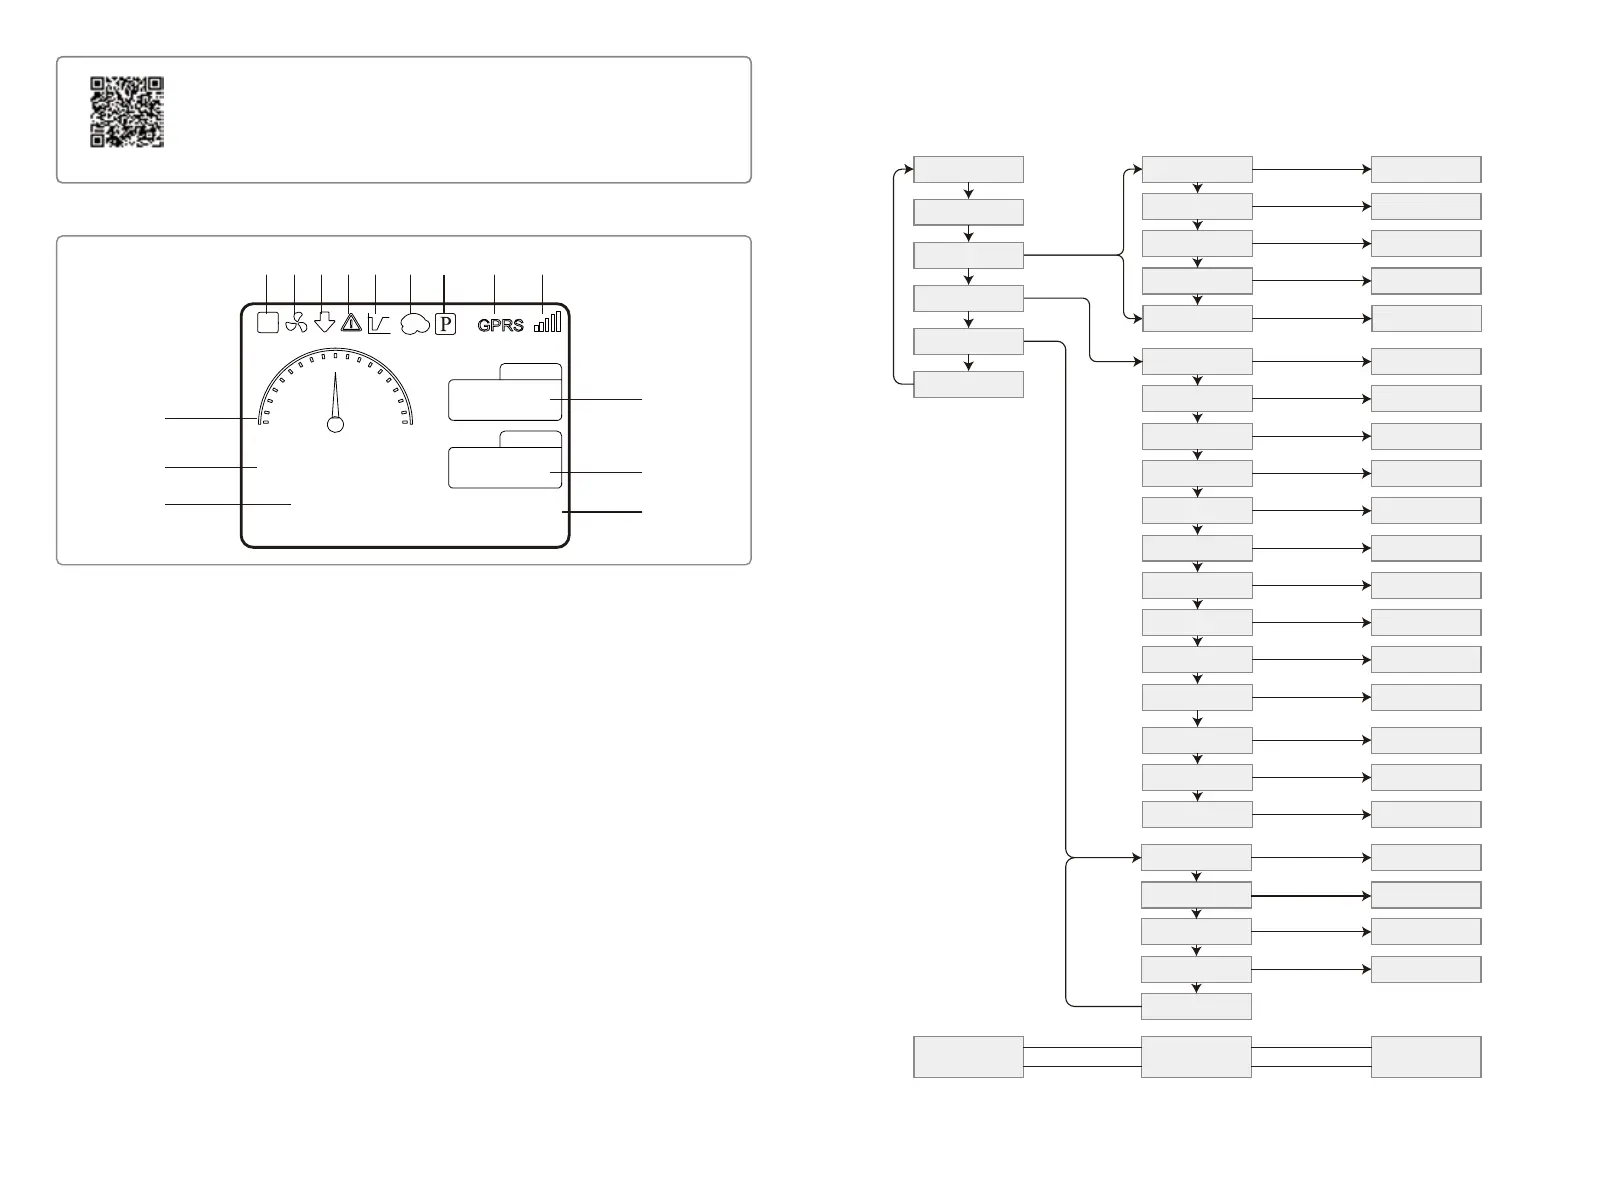
5.2 User Interface Introduction
① Safey code: The number represents the safety serial number
② Fan icon: The fan icon indicates that the fan is on
③ Power Derating: The output power of the inverter is deretaing
④ Alarm icon: The alarm icon indicates that the system LVRT function is on
⑤ LVRT icon: The LVRT icon indicates that the system LVRT function is on
⑥ Shadow scan: The Shadow icon indicates that the Shadow scan function is on
⑦ PID icon: The PID icon indicates the existence of the PID module
⑧ Communication icon: The way of communication, There are three GPRS, WiFi and RS485
⑨ Communication information icon: GPRS and WiFi show the signal strength, RS485 shows the
communication address.
⑩ E-Day icon: Daily generation
⑪ E-Total: Total generation
⑫ Time and date
⑬ Real-time power icon
⑭ Real-time power
⑮ System status information
5.3.1 Overview Of Menu Architecture
The display menu has a total of three levels. Use the "Up" "Down" "Enter" "ESC" button to
operate the menu. The enter button has two operating ways: long press (greater than 3s) and
short press the button. In summary, it has 5 buttons in total to operate the menu.
NOTE:
Download SolarGo App from Google Play Store or Apple App Store to
complete the system operation if the inverter has no LCD. You can
also scan the QR code to download it.
SolarGo APP
① ② ③ ④ ⑤ ⑥ ⑦ ⑧ ⑨
⑩
⑪
⑫
⑬
⑭
⑮
80.00KW
Waiting
999KWh
999KWh
2019-10-28 11:37:20
E-DAY
11
E-TOTAL
21 22
 Loading...